 N O T I C E
MSPbots WIKI is moving to a new home at support.mspbots.ai![]() to give you the best experience in browsing our Knowledge Base resources and addressing your concerns. Click here
to give you the best experience in browsing our Knowledge Base resources and addressing your concerns. Click here![]() for more info!
for more info!
N O T I C E
MSPbots WIKI is moving to a new home at support.mspbots.ai![]() to give you the best experience in browsing our Knowledge Base resources and addressing your concerns. Click here
to give you the best experience in browsing our Knowledge Base resources and addressing your concerns. Click here![]() for more info!
for more info!
Connecting HaloPSA to MSPbots lets you leverage automation and Business Intelligence (BI) solutions to manage every aspect of your MSP business. The integration is done by assigning the appropriate user permissions in HaloPSA, entering the integration settings in the MSPbots app, and configuring webhooks. This article provides the prerequisites and step-by-step guide to establishing a HaloPSA connection with MSPbots.
What's on this page:
1. Prerequisites for connecting HaloPSA to MSPbots
You need the following to establish a successful HaloPSA integration with MSPbots:
- Correct permissions set in HaloPSA:
- Identify the user who will run the API and have access to the MSPbots app. Use the Agent to log in as field.

- Assign the appropriate permissions to the identified user. For example, granting the read:tickets permission will give MSPbots read-only access to all data to which the user has access.

- Ensure the user is part of a department or team that has the corresponding permissions to access the relevant data.

- Identify the user who will run the API and have access to the MSPbots app. Use the Agent to log in as field.
Refer to the HaloPSA Guides for the instructions on setting up these permissions.
- Required information for configuring the integration in MSPbots:
Auth URL
Resource URL
Tenant
Client ID
Client Secret
Refer to the HaloPSA Guides for the instructions on setting up the API permission.
2. How to set up the HaloPSA and MSPbots integration
2.1. 1. Complete the prerequisites for the integration.
2.2. 2. Submit the required information in the MSPbots app.
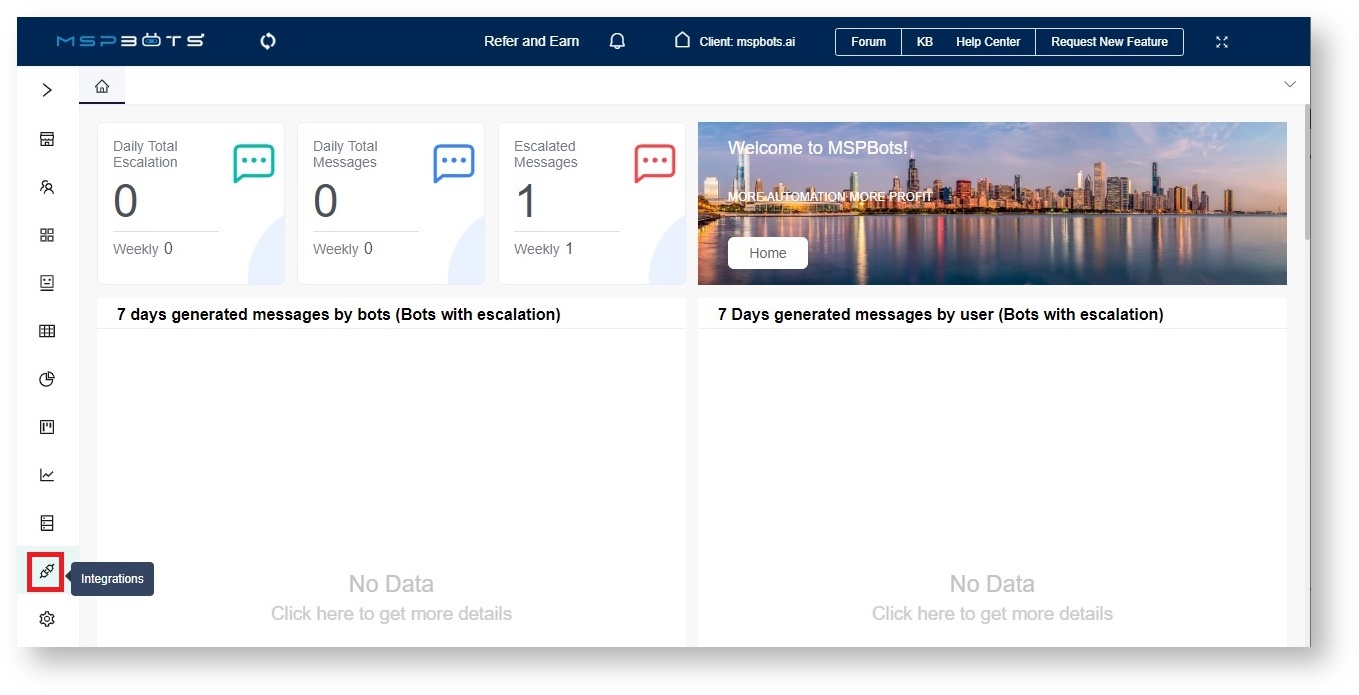
- Log in to the MSPbots app and navigate to Integrations on the menu.
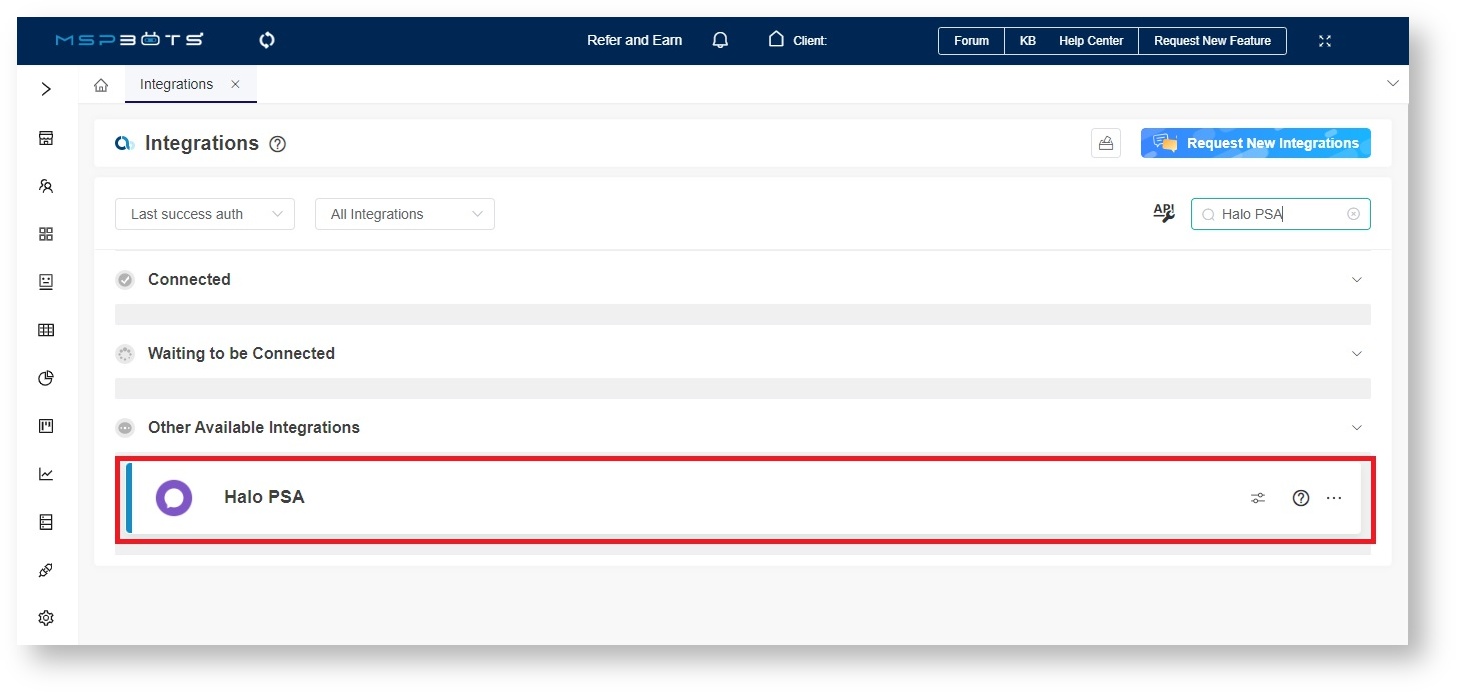
Search for Halo PSA and click it to open the connection settings.
When the HaloPSA configuration settings appear, fill in all of the following required fields:
Auth URL
Resource URL
Tenant
Client ID
Client Secret
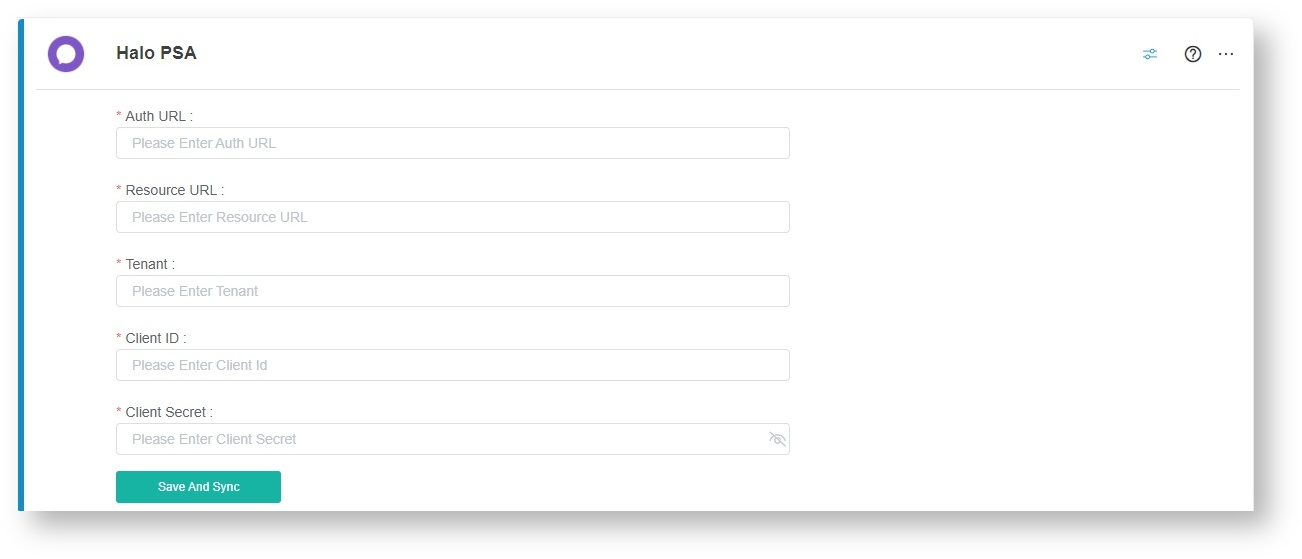
- Click Save And Sync when done.
- You will know that HaloPSA's connection is successful when the webhook callback URL field appears on the configuration box. Copy the the value of webhook callback URL to your desktop.

- Log in to the MSPbots app and navigate to Integrations on the menu.
2.3. 3. Configure the HaloPSA webhook
A webhook is required for HaloPSA dashboards to function properly. Configure the HaloPSA webhook according to the steps below.
It is important to configure the webhook correctly. If not properly set, an incorrect webhook may affect the normal data synchronization adversely and trigger HaloPSA's request limit rate of 450 requests within 5 minutes. A correct webhook configuration request ensures that the system will not initiate duplicate synchronizations, thereby reducing the possibility of triggering the rate limit.
- Once the field for webhook callback URL is visible, log in to the HaloPSA app.
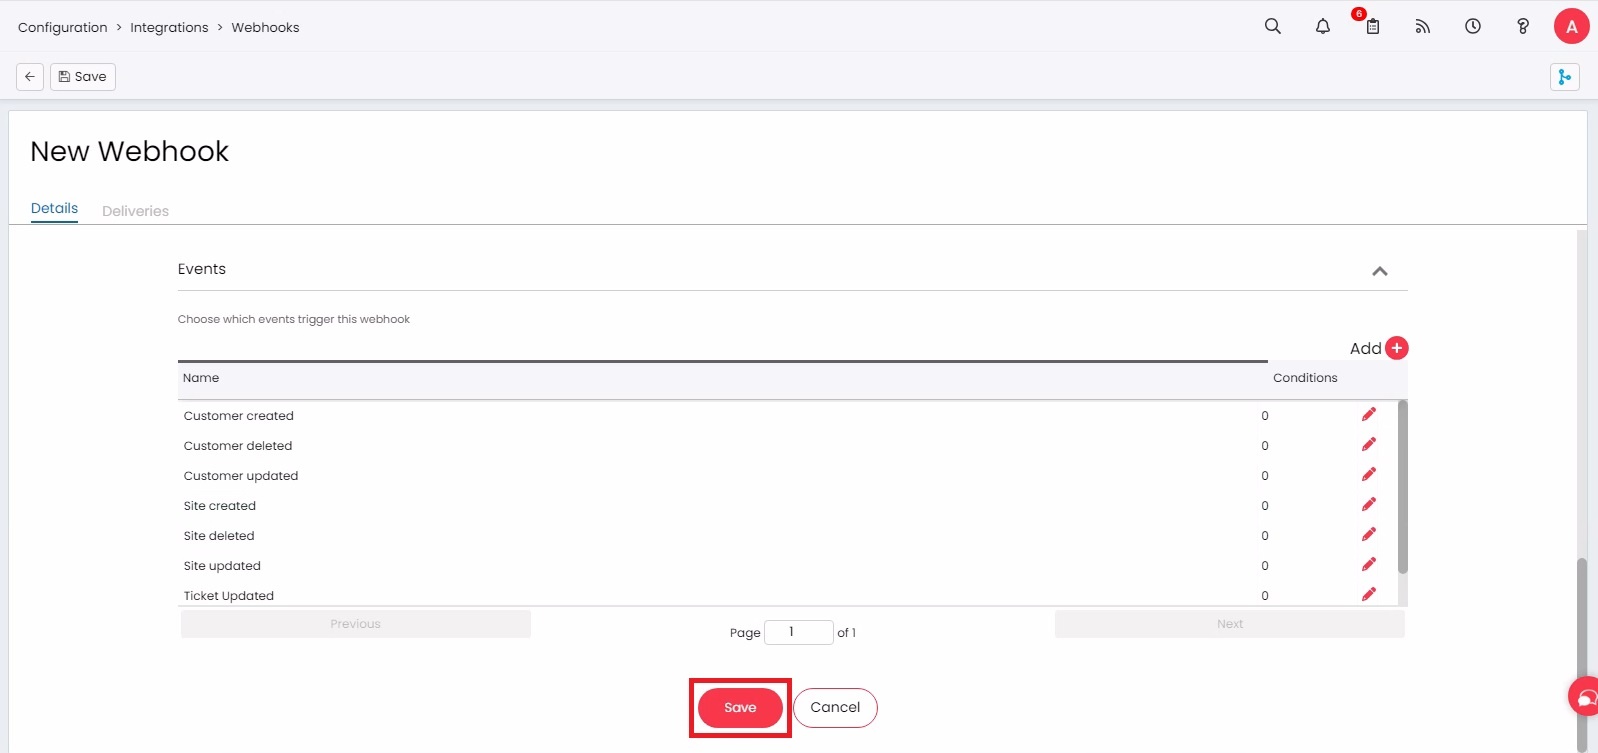
Navigate to Configuration > Integrations > Webhooks.

Click New to open the New Webhook screen.

Fill in the fields for Webhook Name and Payload URL. You can leave the other fields with their default values.
Webhook Name - Enter a unique webhook name.

Payload URL - Enter the webhook callback URL from Step 2.e.
Next, click the Add button to add a new event.

On the New Event screen, select Ticket Changed from the Event dropdown menu.

Click Save on the New Event screen.

- Repeat Steps 3.e, 3.f and 3.g until all the following events are added.
- Ticket Changed
- New Ticket Logged
- Site created
- Site updated
- Site deleted
- User created
- User updated
- User deleted
- Invoice created
- Invoice updated
- Invoice deleted
Then click Save on the New Webhook screen to keep the configuration.
3. What are the Webhook statuses and messages for the HaloPSA integration?
The Webhook statuses for your HaloPSA interaction can show any of the following:
| Status | Message | Description |
|---|---|---|
| Webhook Successful |
| This means that all the data was received successfully. |
| Webhook received no data for some events |
| This means that Webhook did not receive some data because of one of the following reasons:
|
| Webhook received no data |
| This means the webhook did not receive data because of the same reasons explained in the previous status message. Resolve this using the same recommendations for the previous message. |
| Webhook received no data within 4 days |
| This means that MSPbots has not received data from the webhook for the past 4 days. Ensure that all webhook events are properly configured according to the section Configure the HaloPSA webhook. |


4. Related Topics
Overview
Content Tools
N O T I C E
MSPbots WIKI is moving to a new home at support.mspbots.ai![]() to give you the best experience in browsing our Knowledge Base resources and addressing your concerns. Click here
to give you the best experience in browsing our Knowledge Base resources and addressing your concerns. Click here![]() for more info!
for more info!
2 Comments
Anonymous
Where are the permissions details that we should set in Halo?
Daniel Wang
Just read-only permission for dashboarding purposes right now.