 N O T I C E
MSPbots WIKI is moving to a new home at support.mspbots.ai![]() to give you the best experience in browsing our Knowledge Base resources and addressing your concerns. Click here
to give you the best experience in browsing our Knowledge Base resources and addressing your concerns. Click here![]() for more info!
for more info!
 N O T I C E
MSPbots WIKI is moving to a new home at support.mspbots.ai![]() to give you the best experience in browsing our Knowledge Base resources and addressing your concerns. Click here
to give you the best experience in browsing our Knowledge Base resources and addressing your concerns. Click here![]() for more info!
for more info!
Setting the priority rules for NextTicket is different for every MSP and depends on how a business wants to prioritize tickets. It is also not a one-shot procedure wherein the tickets fall into place in one go. Instead, you have to tweak the settings until you get the list that follows your required prioritization. This page shows an example of how to do this.
Important: This information applies to NextTicket for ConnectWise Manage only.
User case requirement: Configure NextTicket to give the highest priority to the following:
- Tickets assigned to users
- Unassigned tickets
Do the following procedure to set up the priority rules:
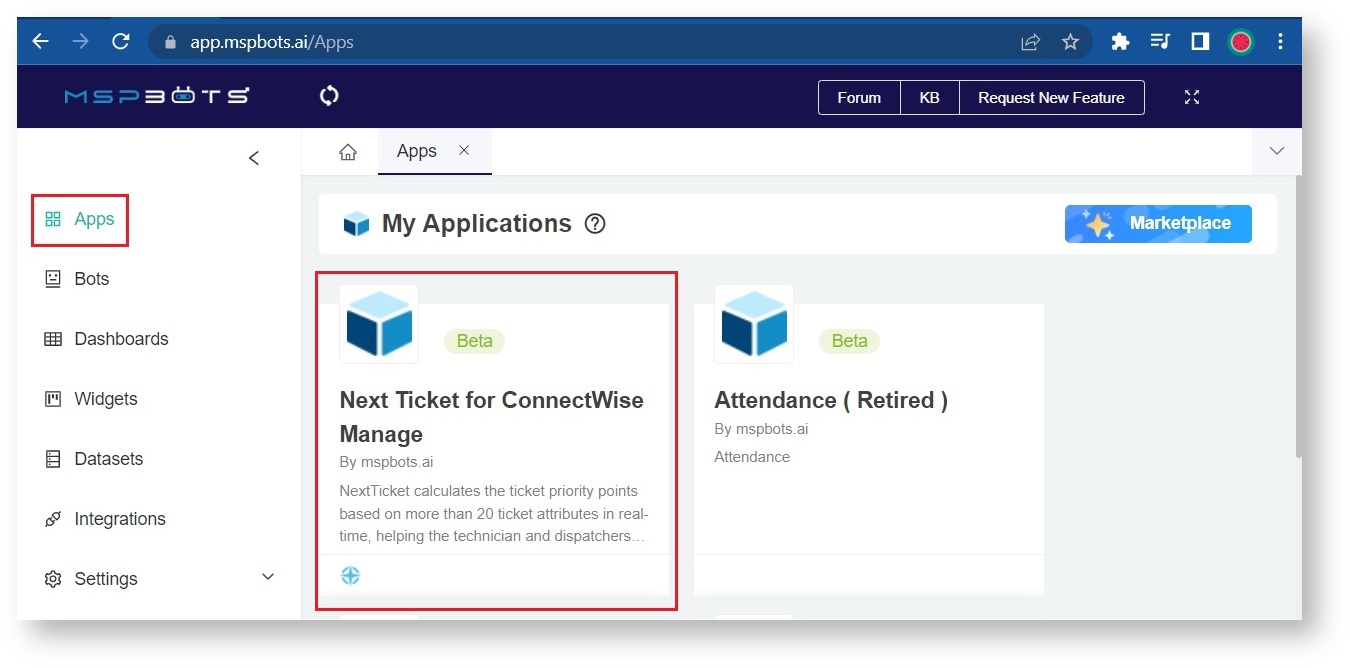
- Navigate to Apps and click Next Ticket for ConnectWise Manage.
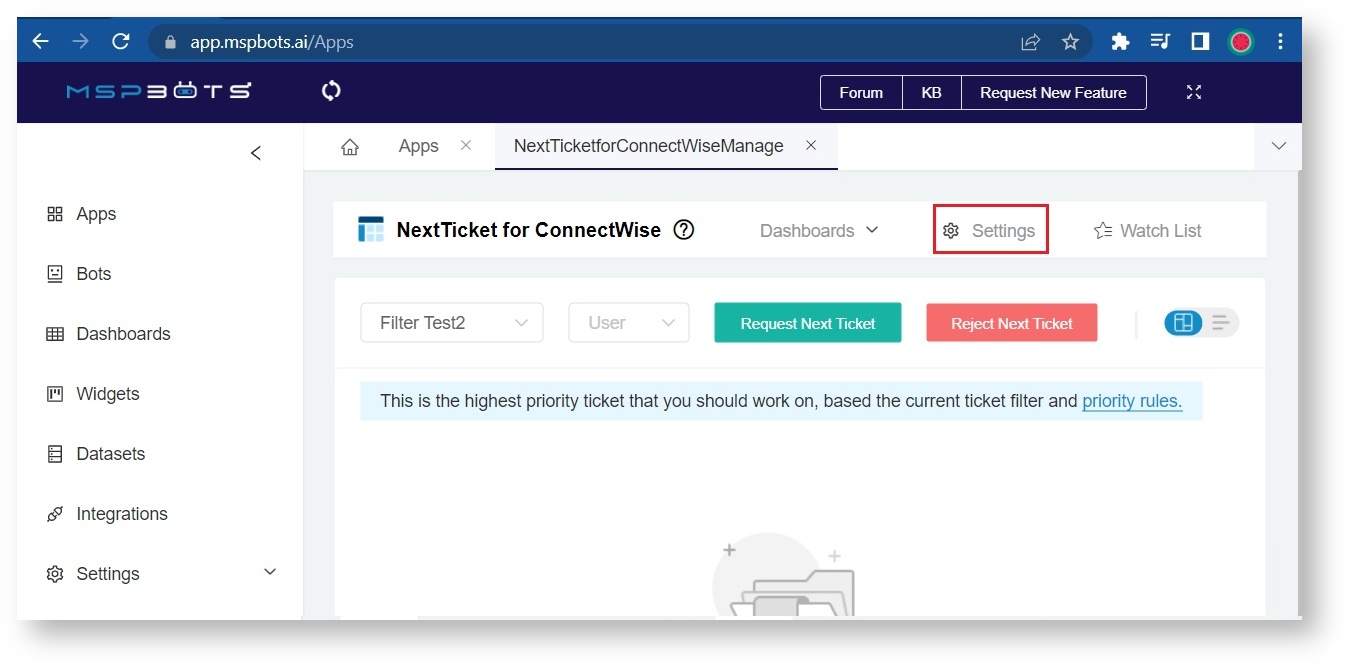
- Click Settings.
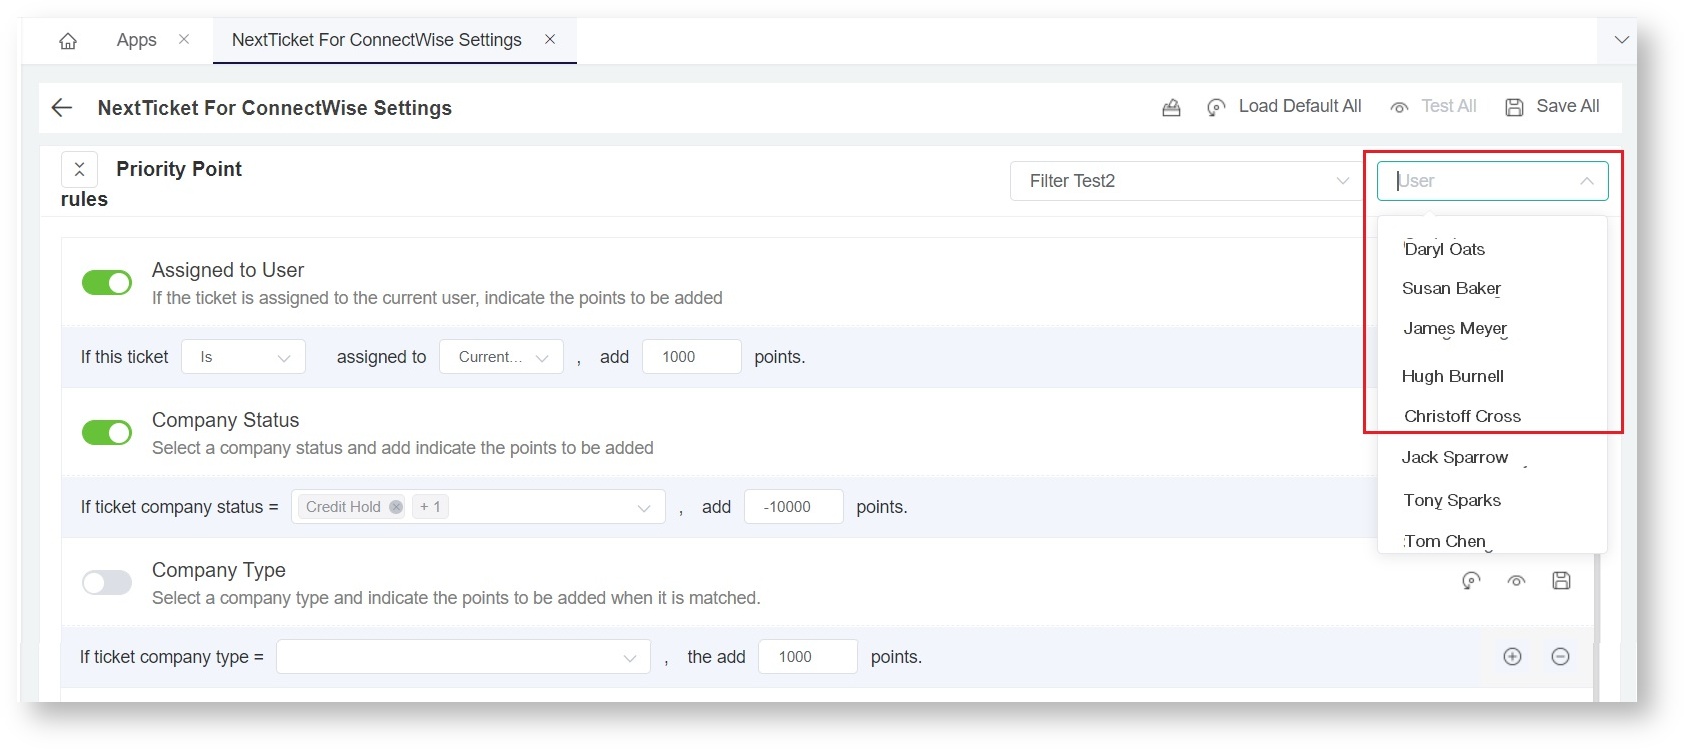
- Go to the user dropdown menu on the upper right side of the app's screen. Select a user for testing the new rule.
- Go to the Priority Point rule Assigned to User. Use the following values for this rule:
If this ticket Is assigned to Current User, add 20000 points.
If this ticket Is assigned to No One, add 20000 points. - Click the eye icon on the right side. This will save the modification and test how the change will affect prioritization.
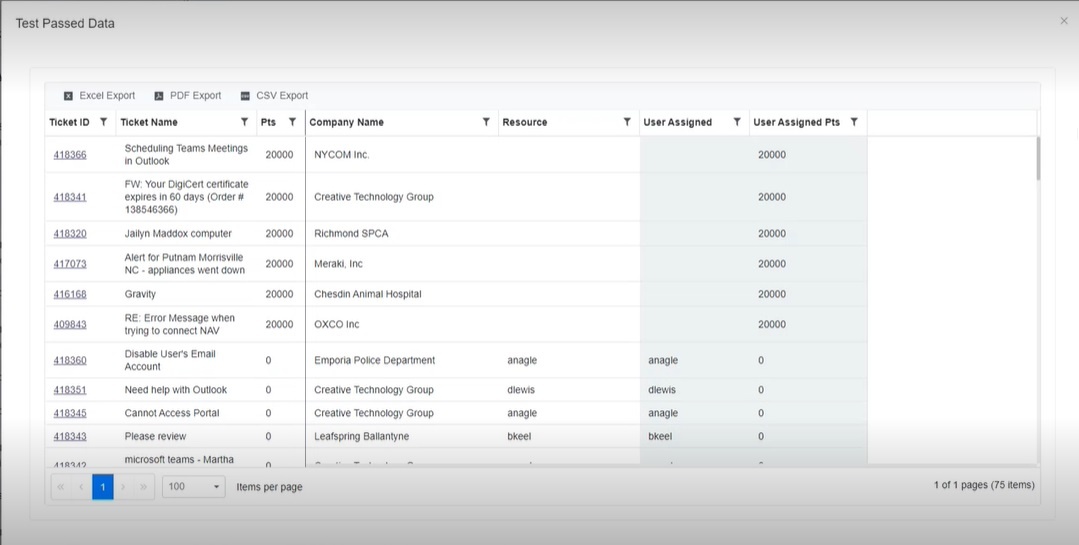
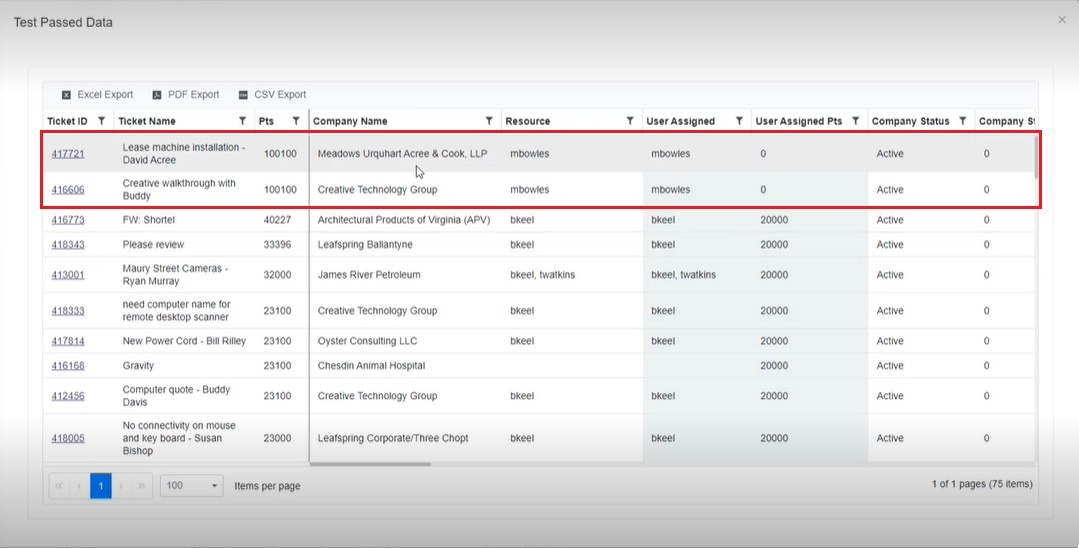
- Review the updated list of priority tickets that come up on the Test Passed Data window. It should now show tickets that follow new the rule you have set. For this page's example, it will look like the list below:
The new rule that you have applied may be affected by the other existing priority rules. To test how other rules affect your new rule:
- Select the user for whom you are testing the rule.
- Click Test All on the upper right-hand corner of the screen. This will apply all the rules in the configuration.
- Check the new list on the Test Passed Data window. It should apply the new rule that you have just set. If there are tickets that seem to be misplaced or are not prioritized correctly, scroll to the right and check which existing rule could possibly be overwriting your new rule.
For this page's example, the first two entries on the list are prioritized more than the third entry.
After scrolling to the right to check, you will see that the Schedules Status Priority Rule is set to prioritize all expired tickets above everything else. The third ticket on the list is thus deprioritized. - Once you have identified the overwriting rule, go to its corresponding section in the Priority Point rules to view and adjust accordingly.
- Click Test All again to check. Do steps 1 to 4 until the priority list shows your desired prioritization.
