 N O T I C E
MSPbots WIKI is moving to a new home at support.mspbots.ai![]() to give you the best experience in browsing our Knowledge Base resources and addressing your concerns. Click here
to give you the best experience in browsing our Knowledge Base resources and addressing your concerns. Click here![]() for more info!
for more info!
 N O T I C E
MSPbots WIKI is moving to a new home at support.mspbots.ai![]() to give you the best experience in browsing our Knowledge Base resources and addressing your concerns. Click here
to give you the best experience in browsing our Knowledge Base resources and addressing your concerns. Click here![]() for more info!
for more info!
This process is the easiest way to create a bot from any report or widget. Prepare the following before continuing:
- An email address - This is needed when choosing to send the alerts through email, chat, or a Teams channel.
- The alert message - Prepare the message that will be sent to the receiver of the alert.
- An escalation message, if an escalation step is needed.
Note: The grid type of widget is the recommended widget type for creating a bot.
Do the following procedure to create a bot from a widget:
1. Set up the name and email of the technician who will receive the bot alert.
a. Navigate to Widgets on the MSPbots app menu.
b. Select the widget for which you need to create a bot.
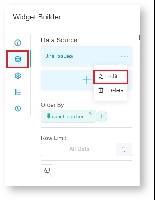
c. When the Widget Builder appears, click Dataset. Hover over the ellipsis ... button and click Edit.
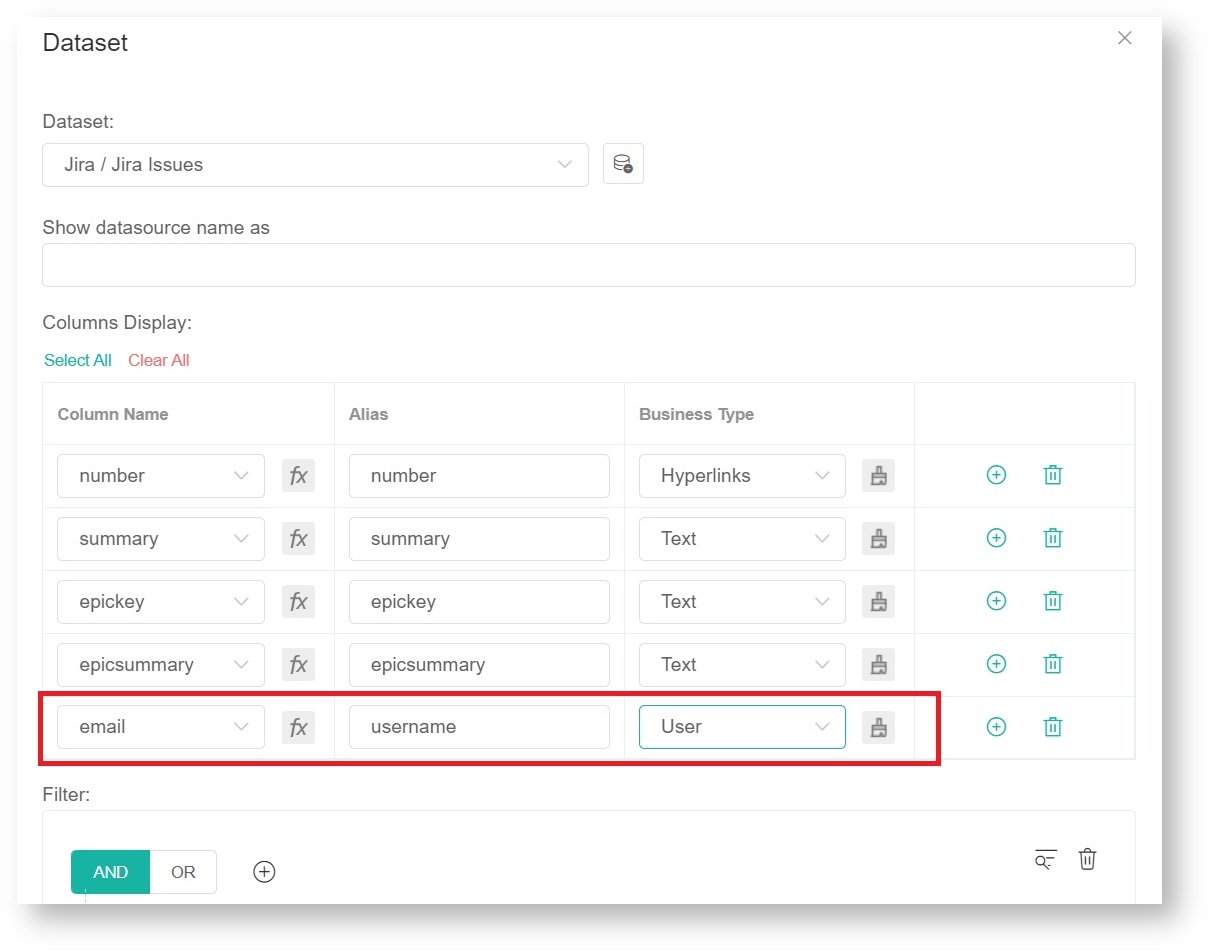
d. On the Dataset window that appears, add a column for email on the existing widget. Assign an alias and select User as business type.
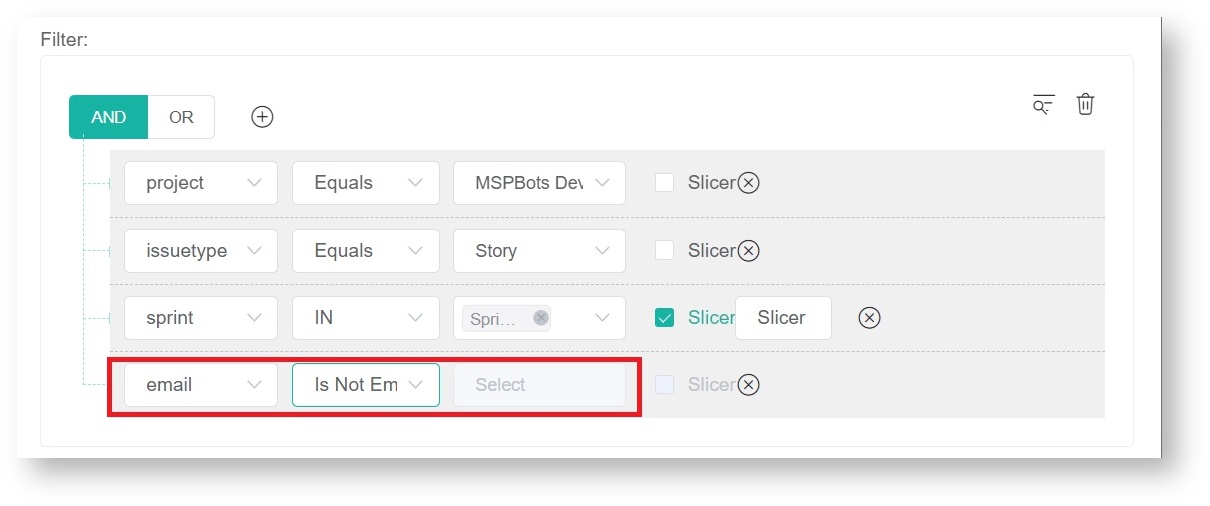
e. Next, add a filter saying the email should not be empty.
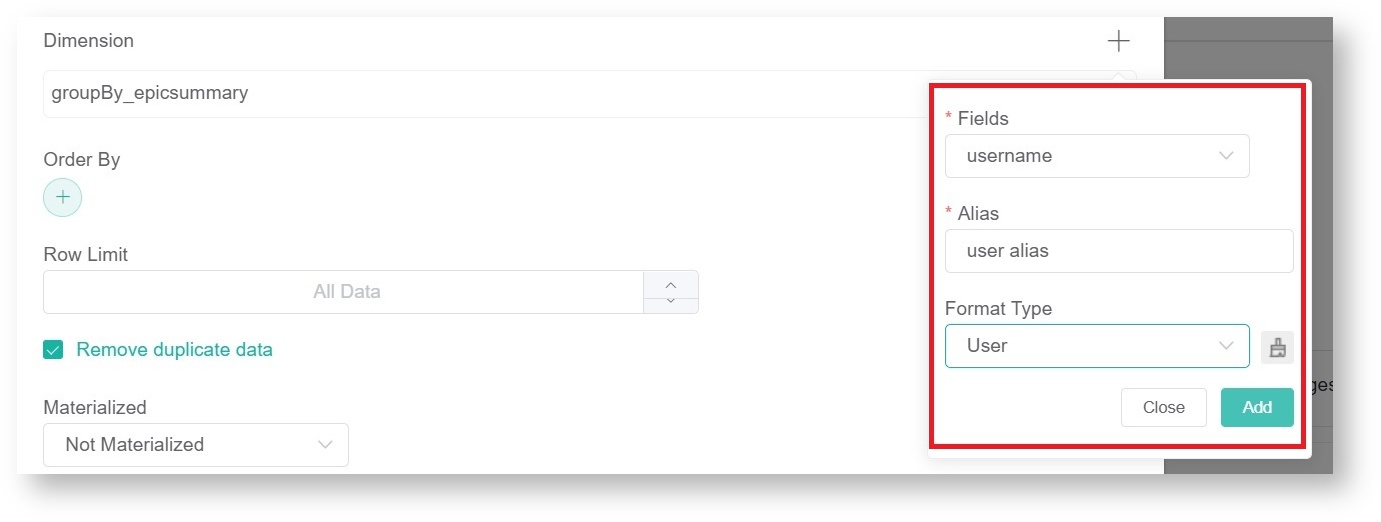
f. Add a dimension to show the email address or username of the receiving technician. Select Username for Fields, give an Alias, select User as format type, and click Add.
g. Click Save and Apply.
h. Click the Copy Share Link icon to copy the link to this widget and save it for later.
i. Close the widget.
2. Select the widget for bot creation.
a. Go to the Dashboard where the widget is located.
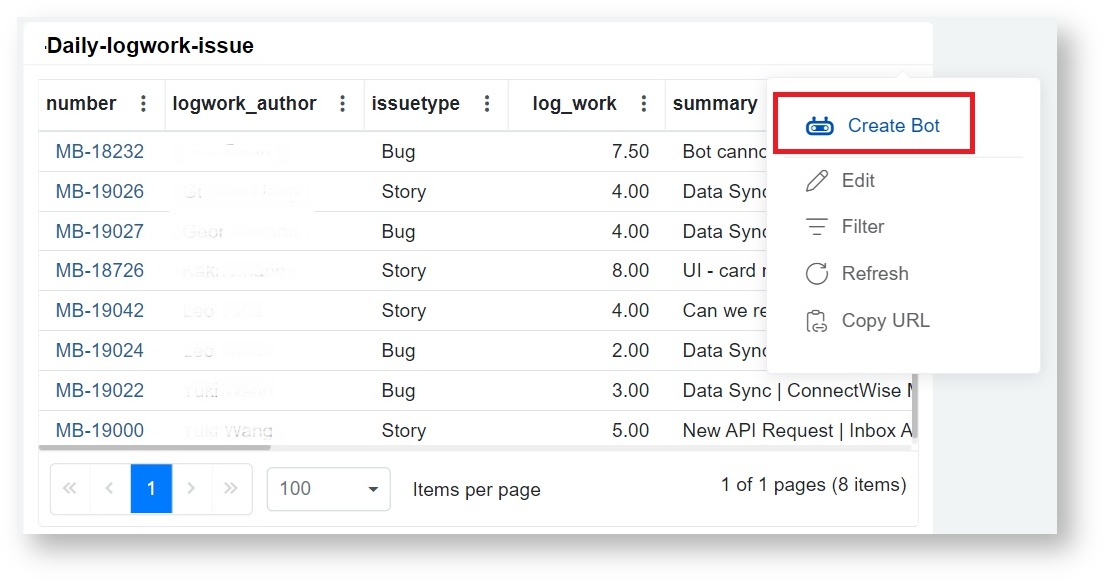
b. Find the widget. Hover over the ellipsis ... button, then select Create Bot.
3. Create the bot.
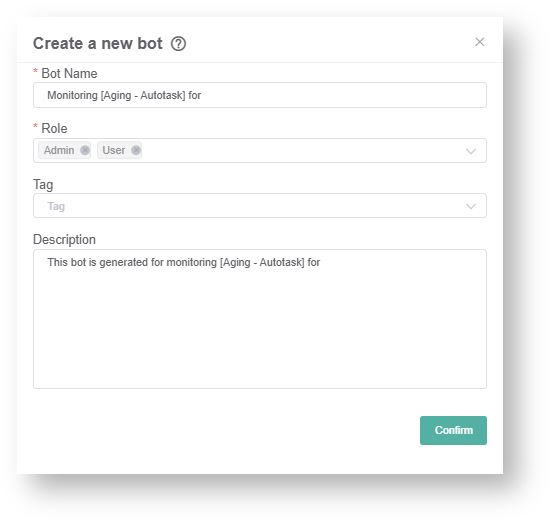
a. When the Create a new bot window opens, enter a name in the Bot Name field.
b. Next, identify the Role that will have access to the bot.
c. Add a clear Description of the bot. (Recommended)
d. Then click the Confirm button. This action opens the Trigger screen.
Note: The Trigger screen or form is also accessible from the Design tab.
4. Set up the bot trigger.
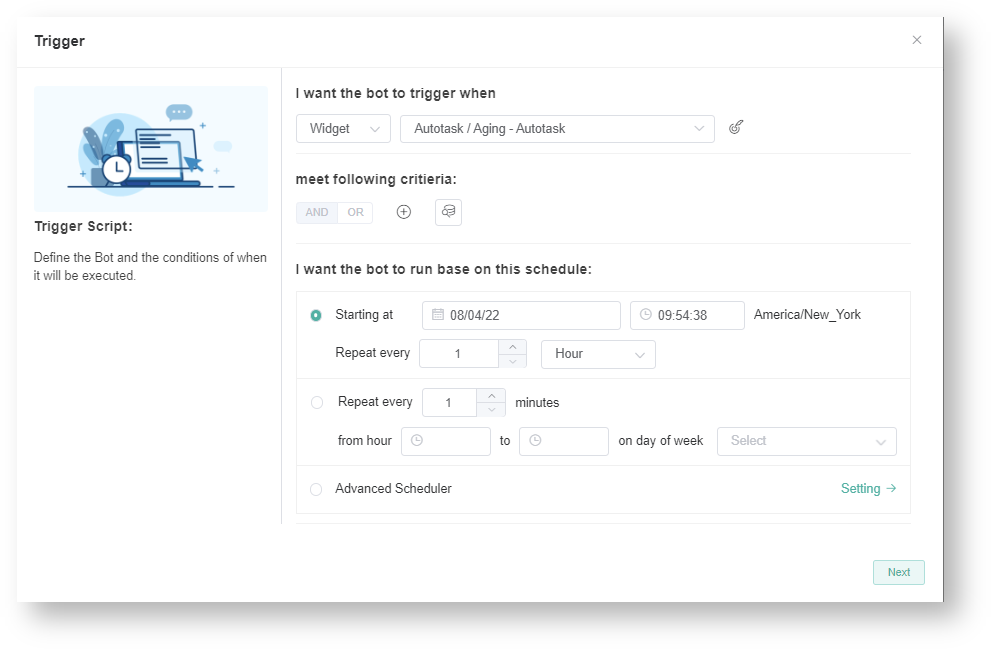
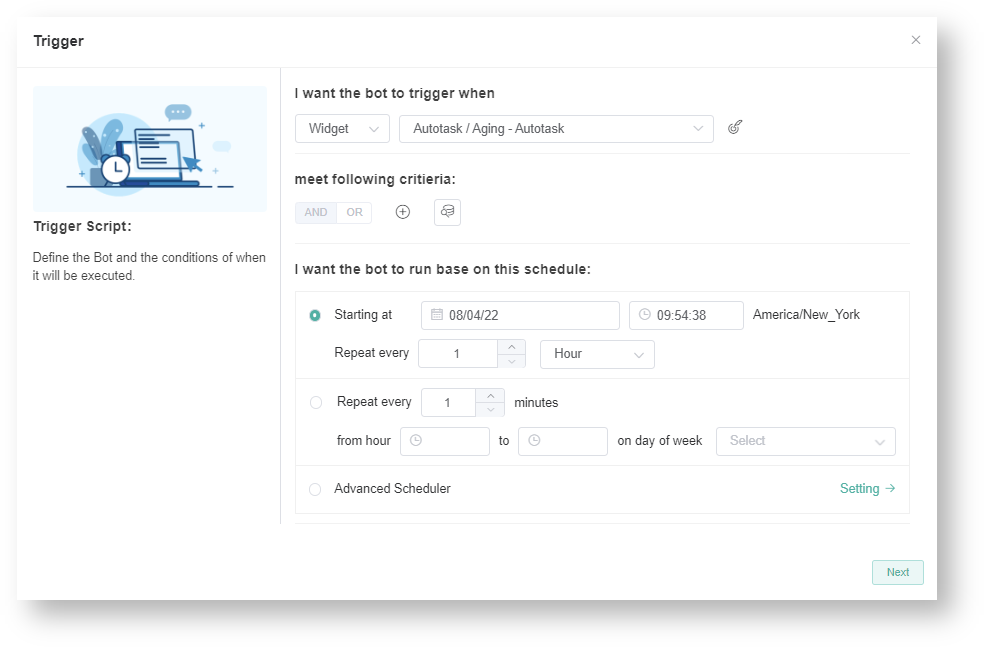
a. Proceed by setting the Trigger script. The widget field inherits the name of the widget selected in Step 2b.
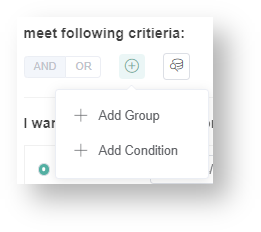
b. Next, go to the meet following criteria section and define the criteria for triggering the bot. Hover over the icon and click +Add Group or +Add Condition.
If you want to preview the data, click the Data Inspector icon.
c. Go to the I want the bot to run based on this schedule section and set the time and frequency for running the bot.
5. Set up Advanced Scheduling (Optional)
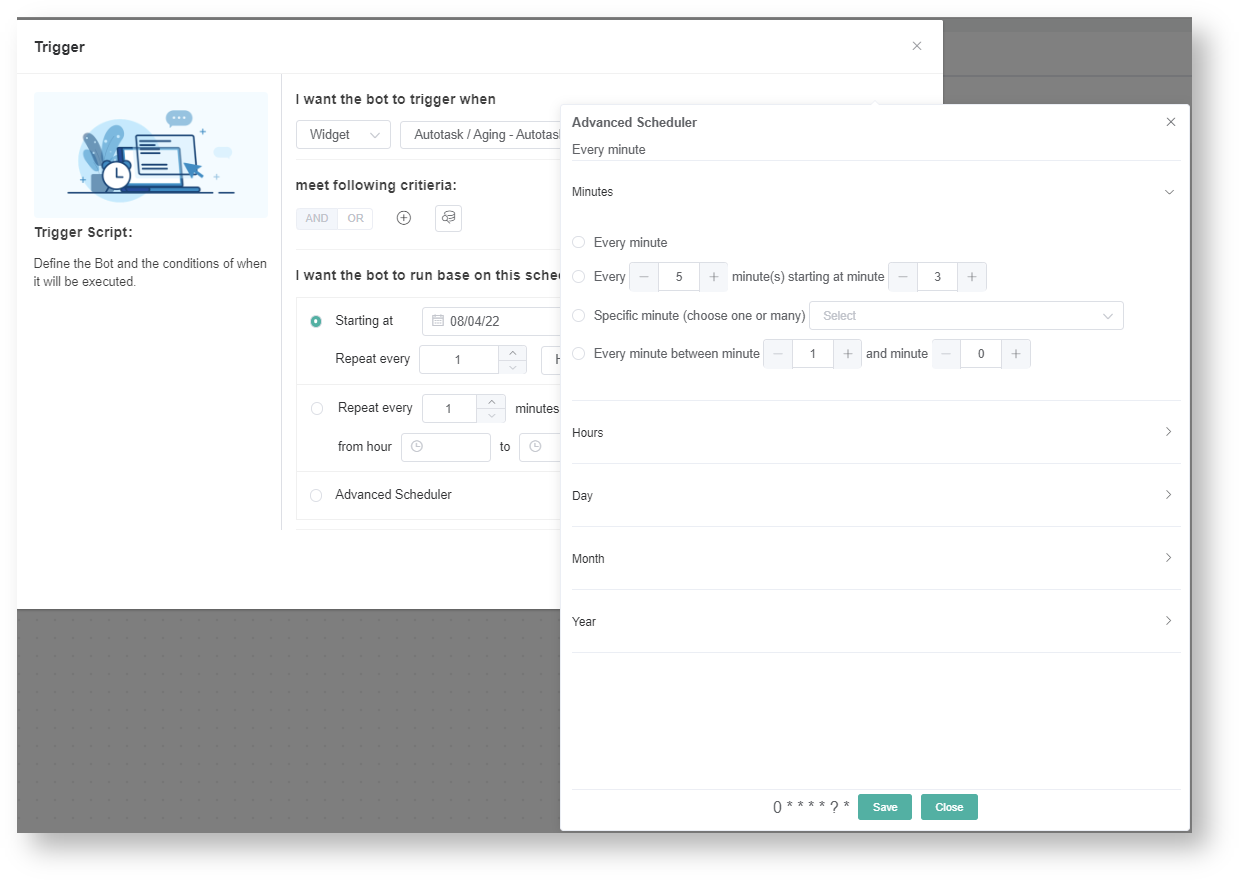
a. To set up advanced scheduling, scroll down to the Advanced Scheduler section on the Trigger screen.
b. Click the Setting link to open the Advanced Scheduler window.
c. On the Advanced Scheduler window, configure the bot to alert in Minutes, Hours, Day, Month, or Year, then click Save.
d. Click the Next button to continue to the steps for defining the bot alert script.
6. Define the bot alert script.
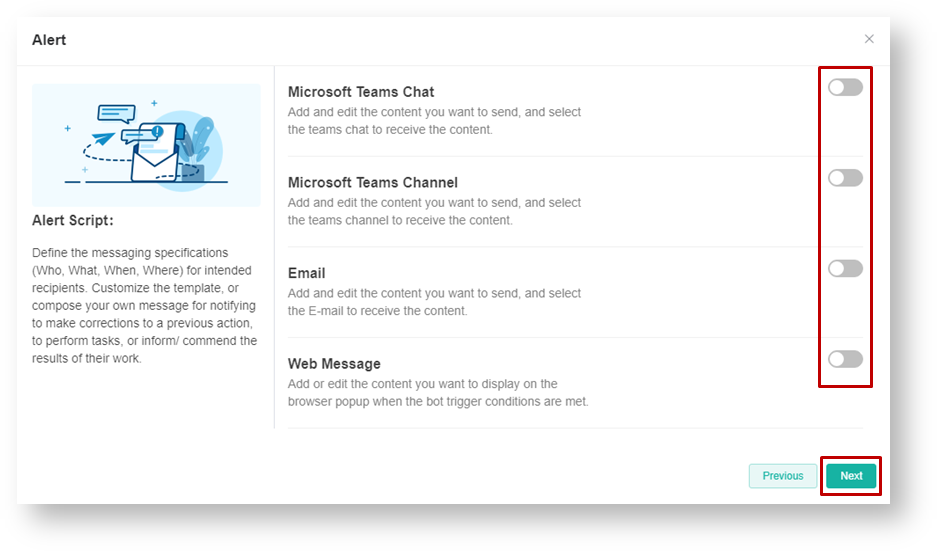
a. Start by activating the channel where the bot will send the alert message. Click the slide button for any of the following to switch it ON:
- Microsoft Teams Chat
- Microsoft Team Channel
- Web Message
You may select multiple channels, depending on your requirement.
b. Set up the alert message.
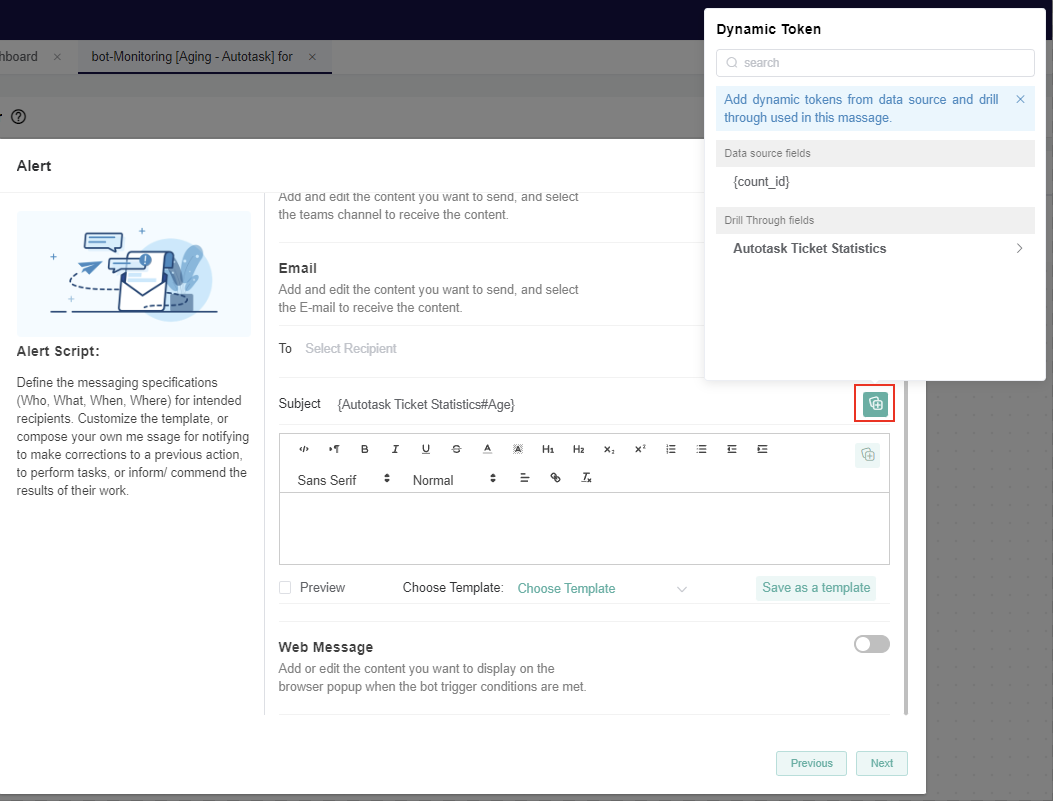
Example: To set an Email alert, fill in the following fields:
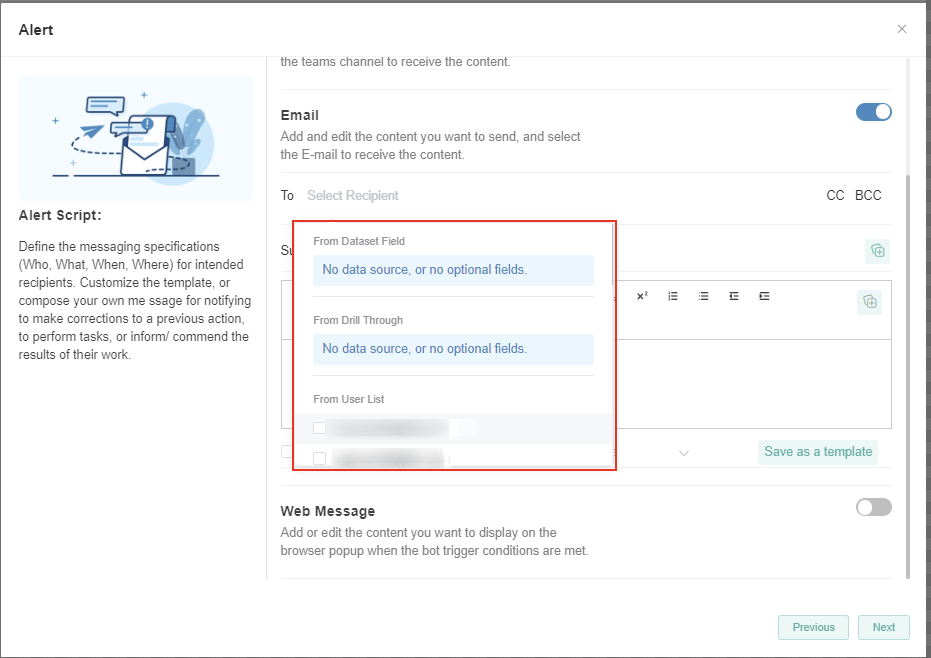
- To - Select a receiver or recipient from the Dataset Field, Drill through, or User List.
-
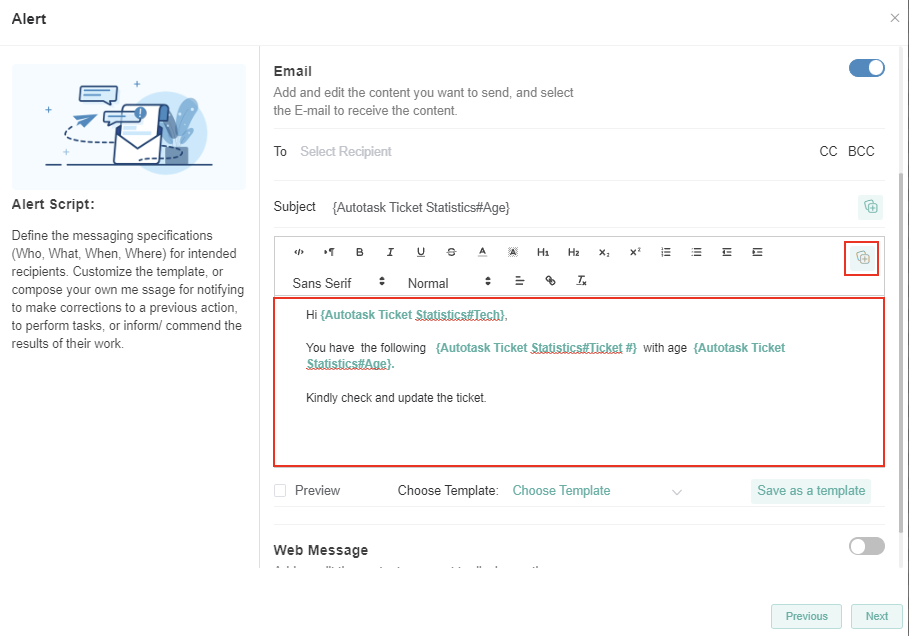
- Subject - Input a subject manually and/or select one using a Dynamic Token.
-
- Message Type - Type a custom message for the alert message.
- Message Type - Type a custom message for the alert message.
-
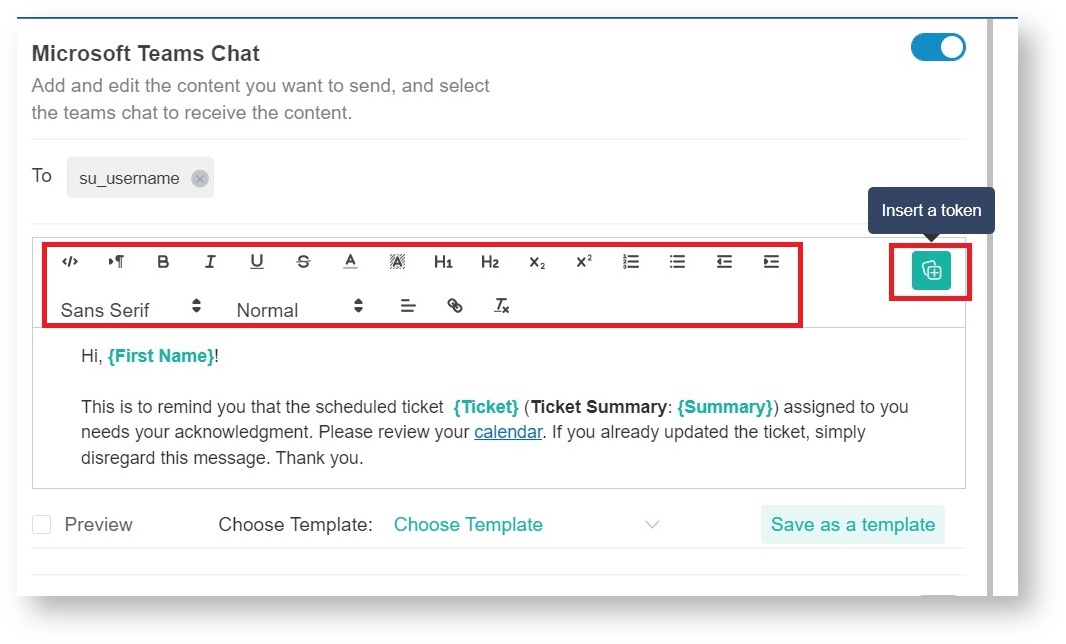
You can use the Insert a Token button to select data to include in the message. Formatting options are also available to highlight message sections.
c. Click Next when done. This action takes you to the escalation script setup.
7. Set the escalation script.
The escalation recipient can be a manager and/or a next-level manager, depending on your requirement. You can also set several escalation steps as needed.
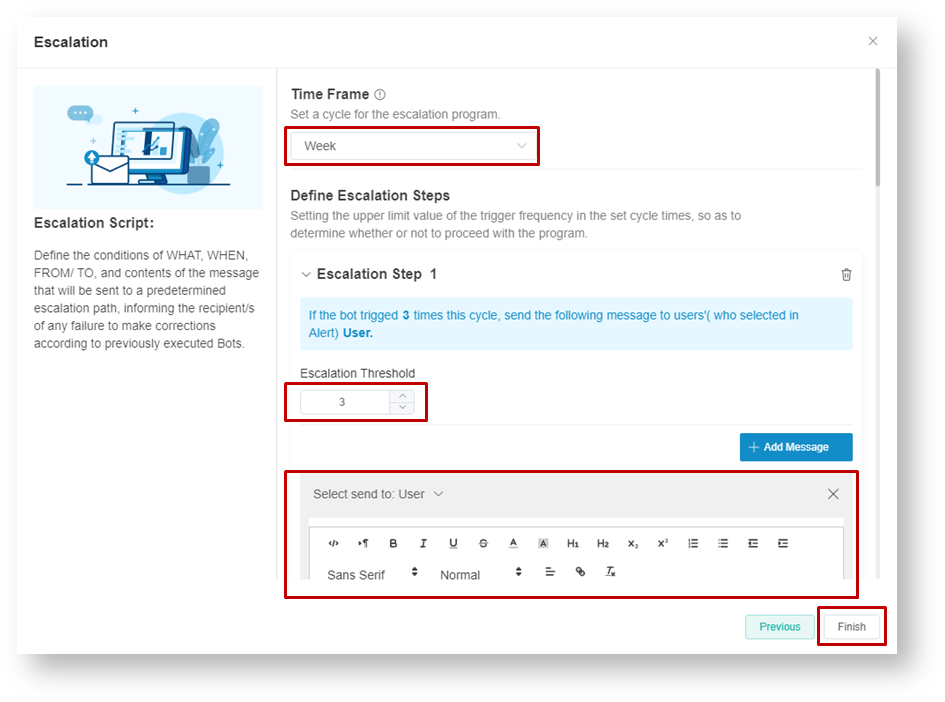
a. Select a Time Frame for the escalation cycle. Choose from Day, Week, or Month.
b. Define the escalation steps by selecting an Escalation Threshold.
c. Write the Escalation message. Click the + Add Message button to add another message.
For example, if you select Week for Time Frame and 3 for Escalation Threshold, the escalation message would be sent when the bot is triggered 3 times in a week.
d. Click the Finish button when done.
8. Activate the bot.
To start sending alerts, activate the bot by going to the Detail tab and turning the following switches ON:
Trigger - Switch this ON to make the bot available and running.
Alert - Switch this ON to enable the sending of alerts.
Escalation - Switch this ON to activate the escalation setup.
