 N O T I C E
MSPbots WIKI is moving to a new home at support.mspbots.ai![]() to give you the best experience in browsing our Knowledge Base resources and addressing your concerns. Click here
to give you the best experience in browsing our Knowledge Base resources and addressing your concerns. Click here![]() for more info!
for more info!
 N O T I C E
MSPbots WIKI is moving to a new home at support.mspbots.ai![]() to give you the best experience in browsing our Knowledge Base resources and addressing your concerns. Click here
to give you the best experience in browsing our Knowledge Base resources and addressing your concerns. Click here![]() for more info!
for more info!
To connect OneDrive to MSPbots
- Open a web browser and navigate to https://portal.azure.com.
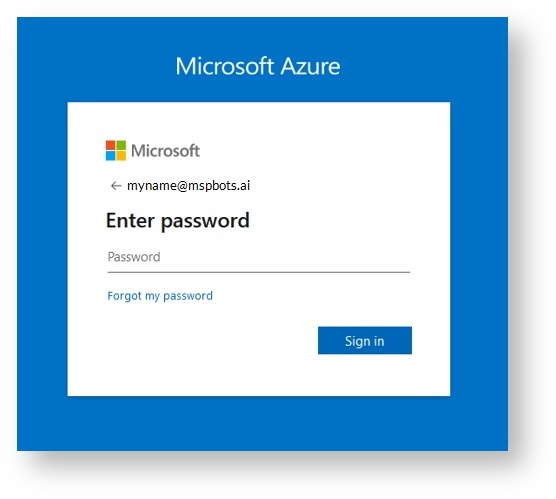
- Log in using a Microsoft Global Admin account.
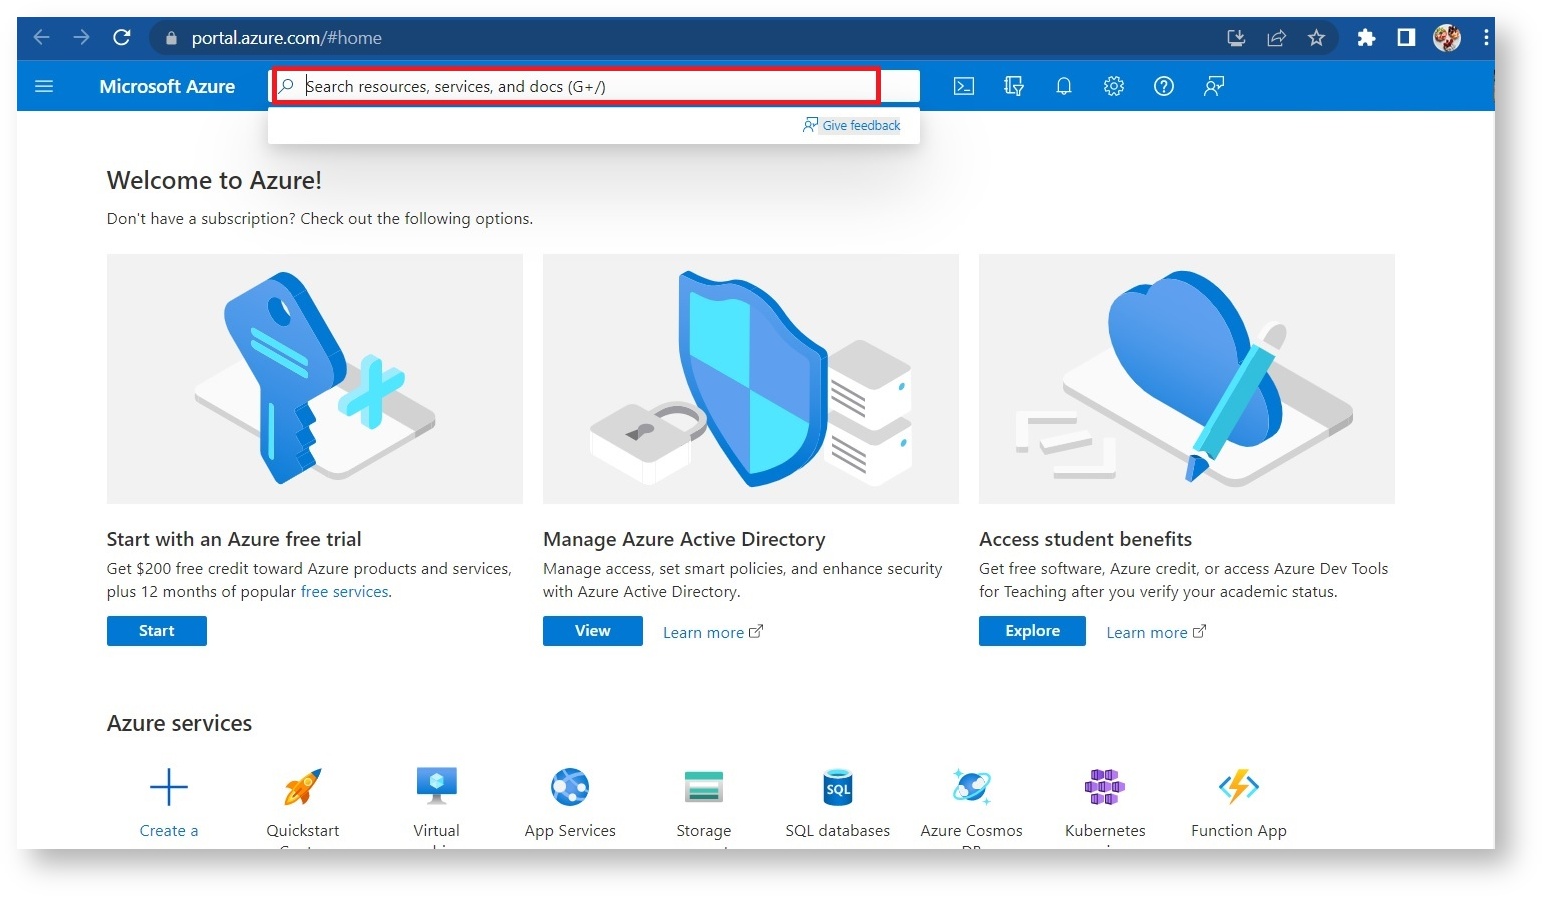
- Once logged in, you will see this screen with a search bar.
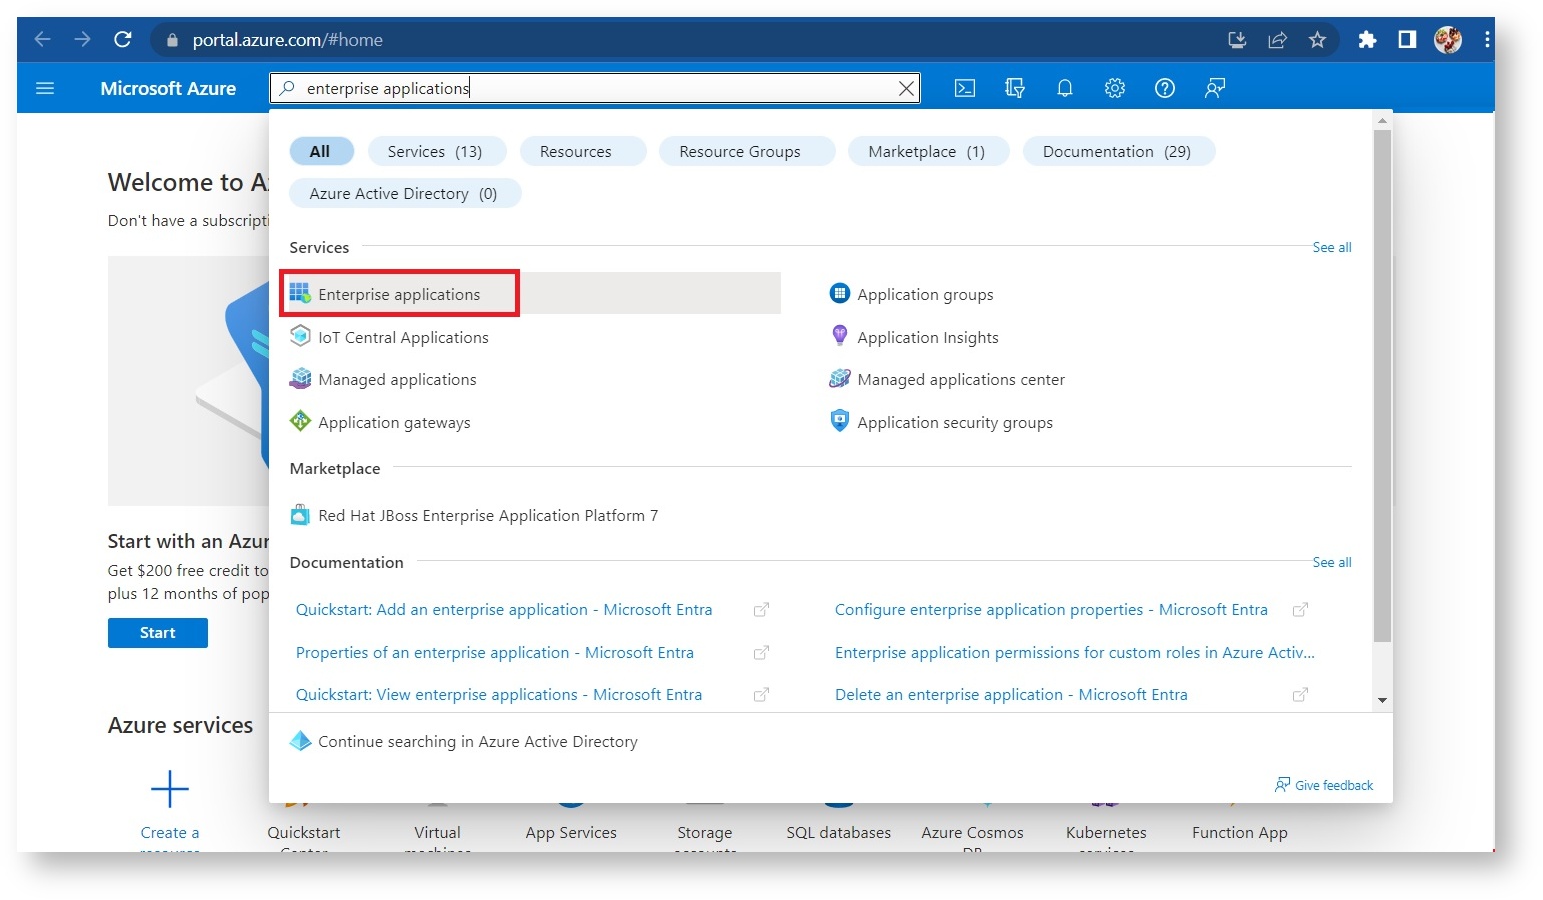
- Type Enterprise Applications on the search bar, then click Enterprise Applications on the search results window.
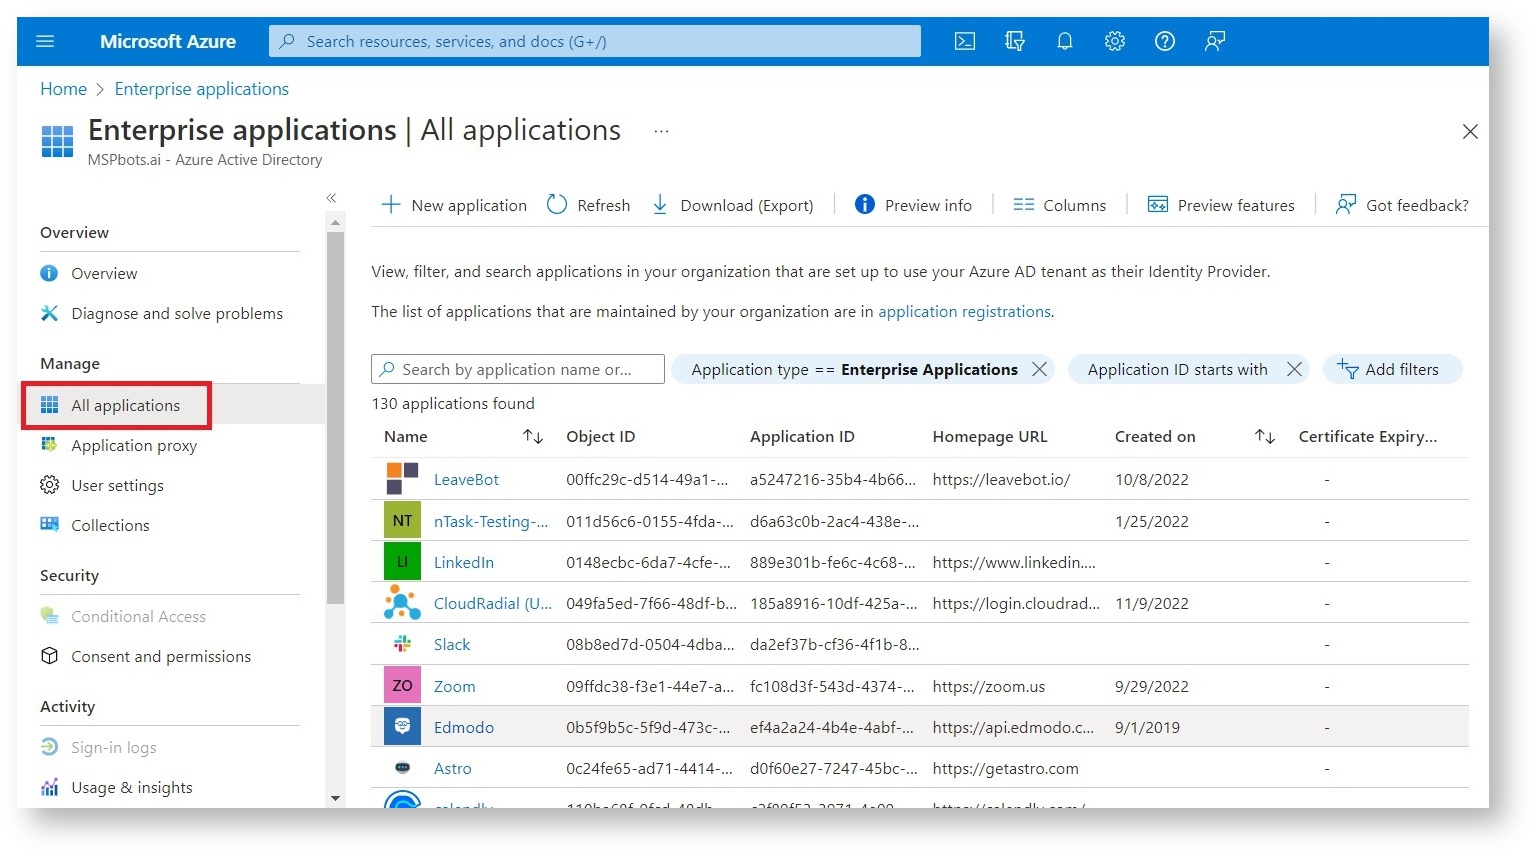
- Next, navigate to All Applications on the left.
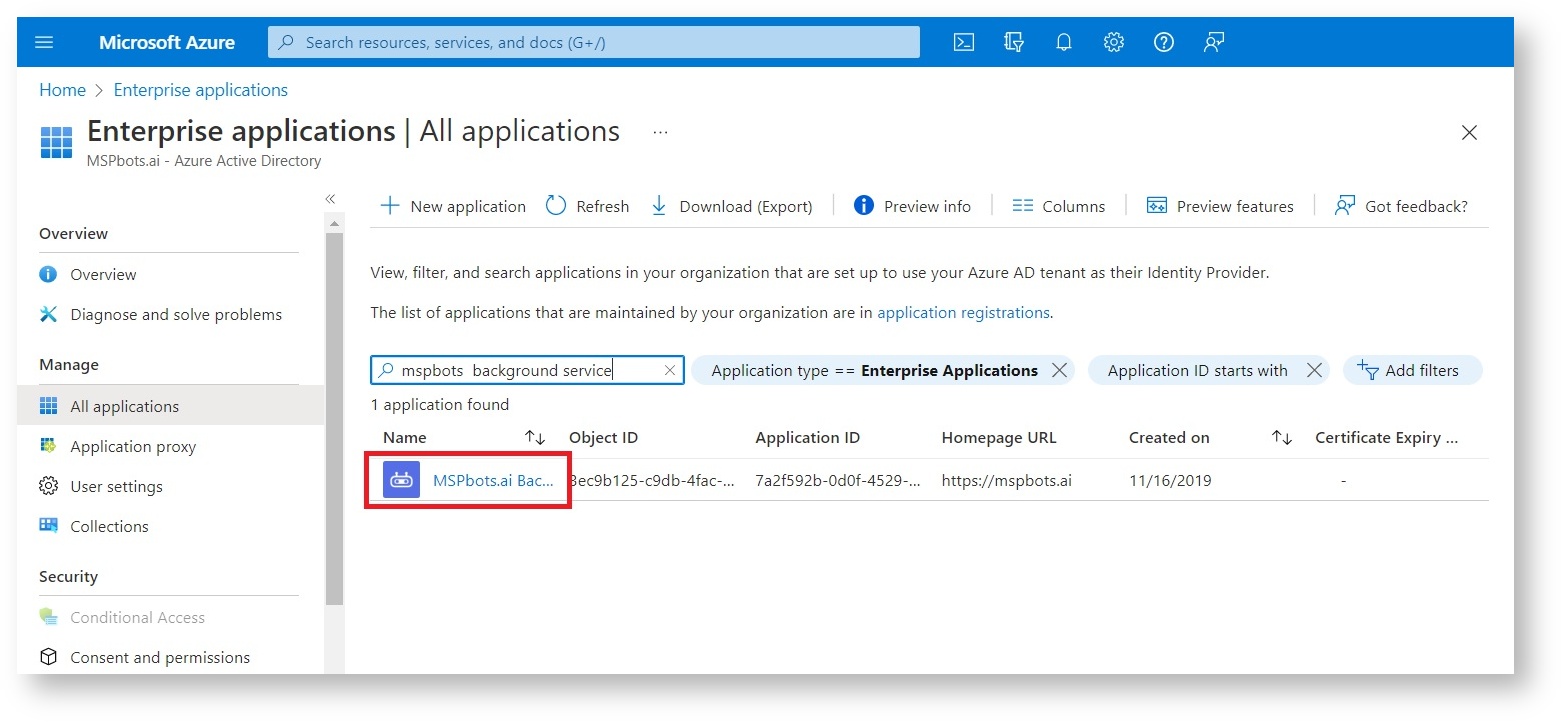
- Go to the search bar in the middle of the screen and search for MSPbots Background Service.
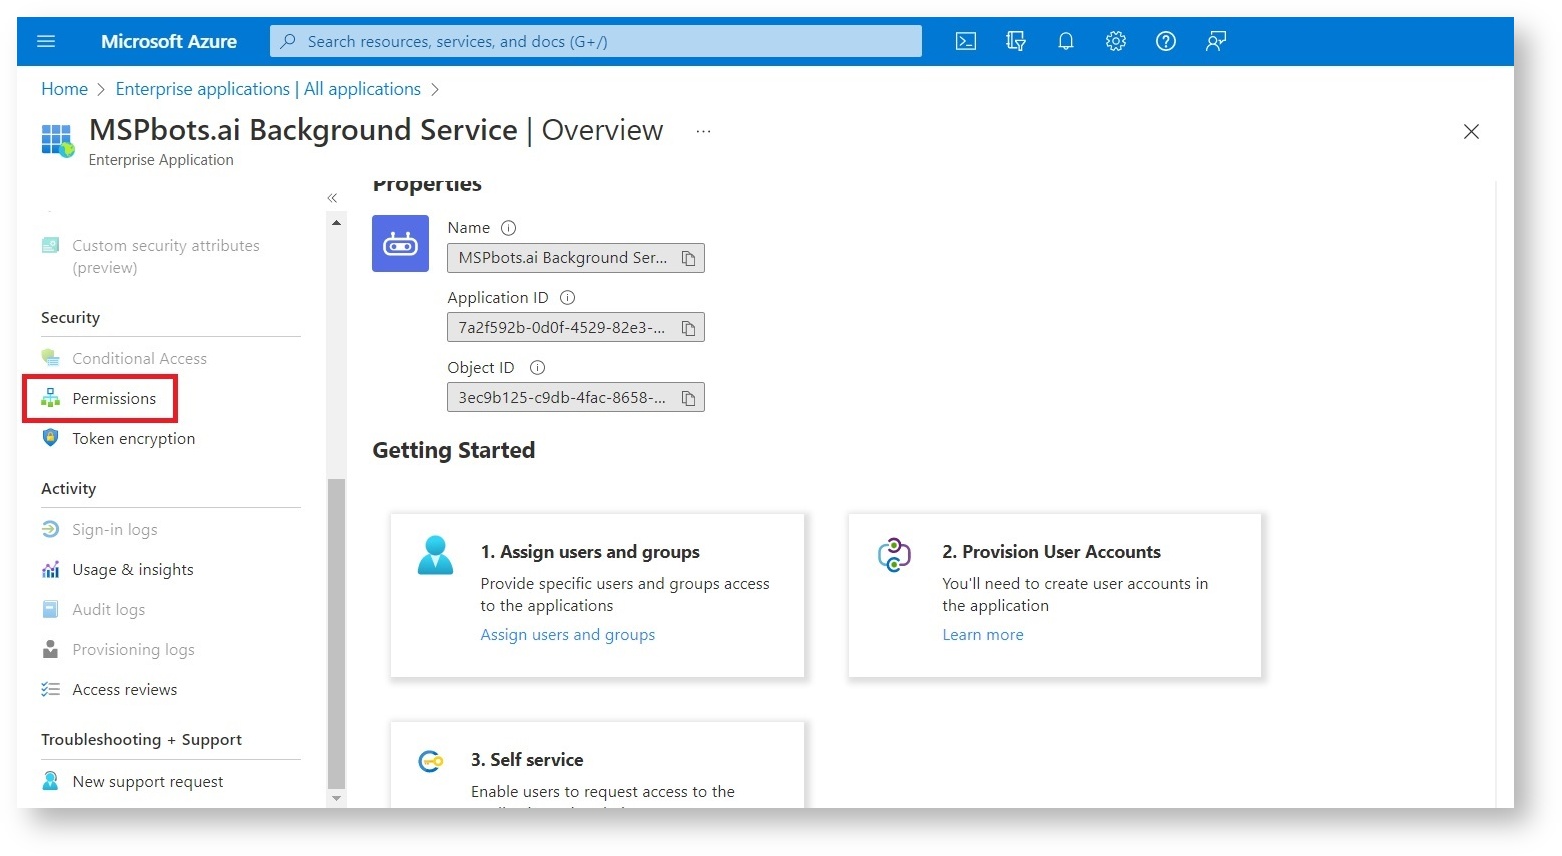
- Click on the MSPbots Background Service which will open an Overview page.
- Scroll down on the left menu and click Permissions.
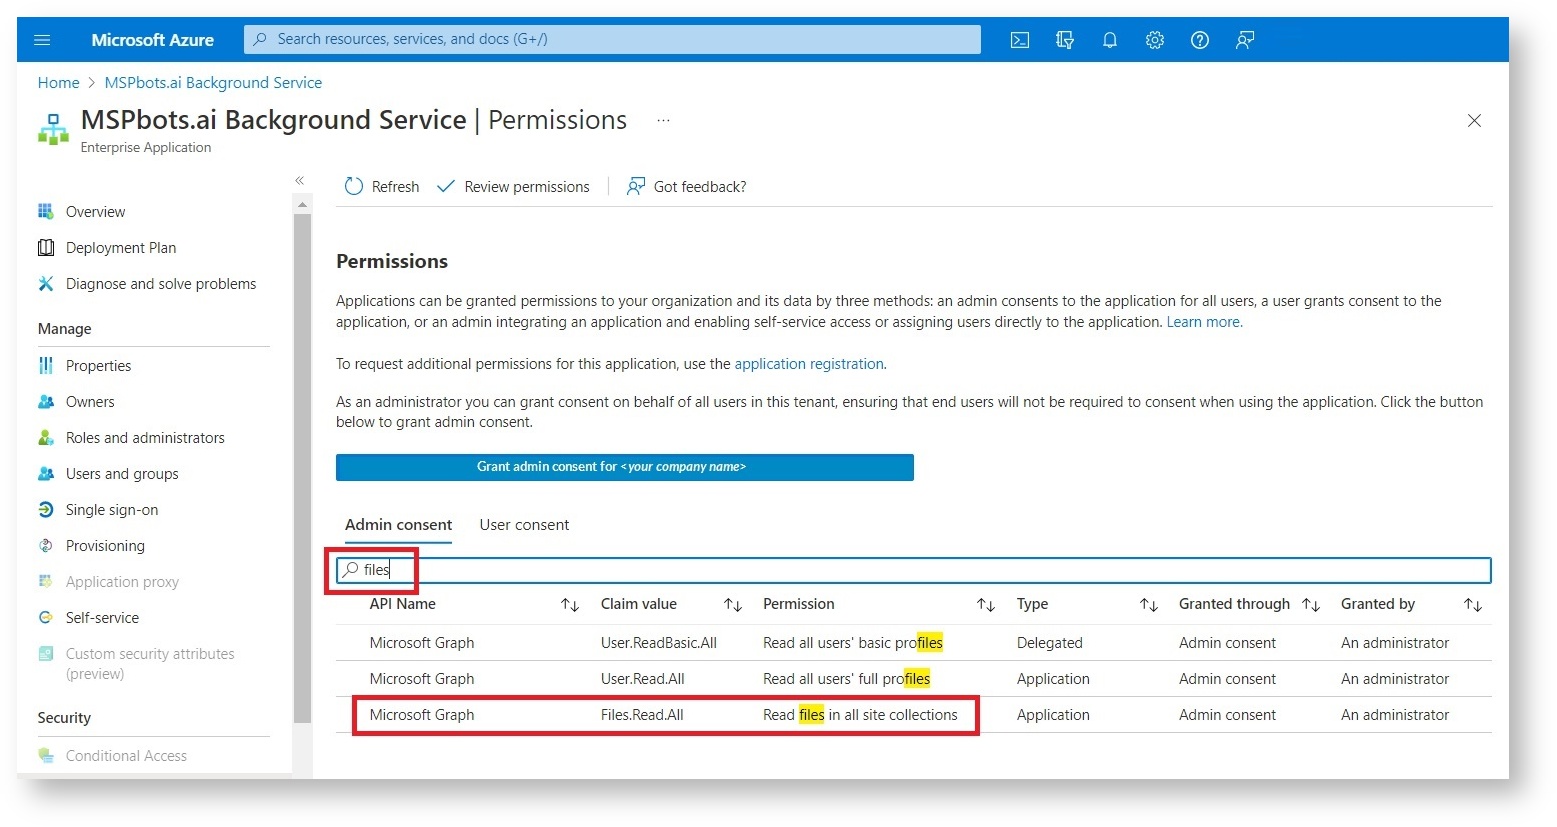
- Next, navigate to the search bar on the Permissions page and type Files.
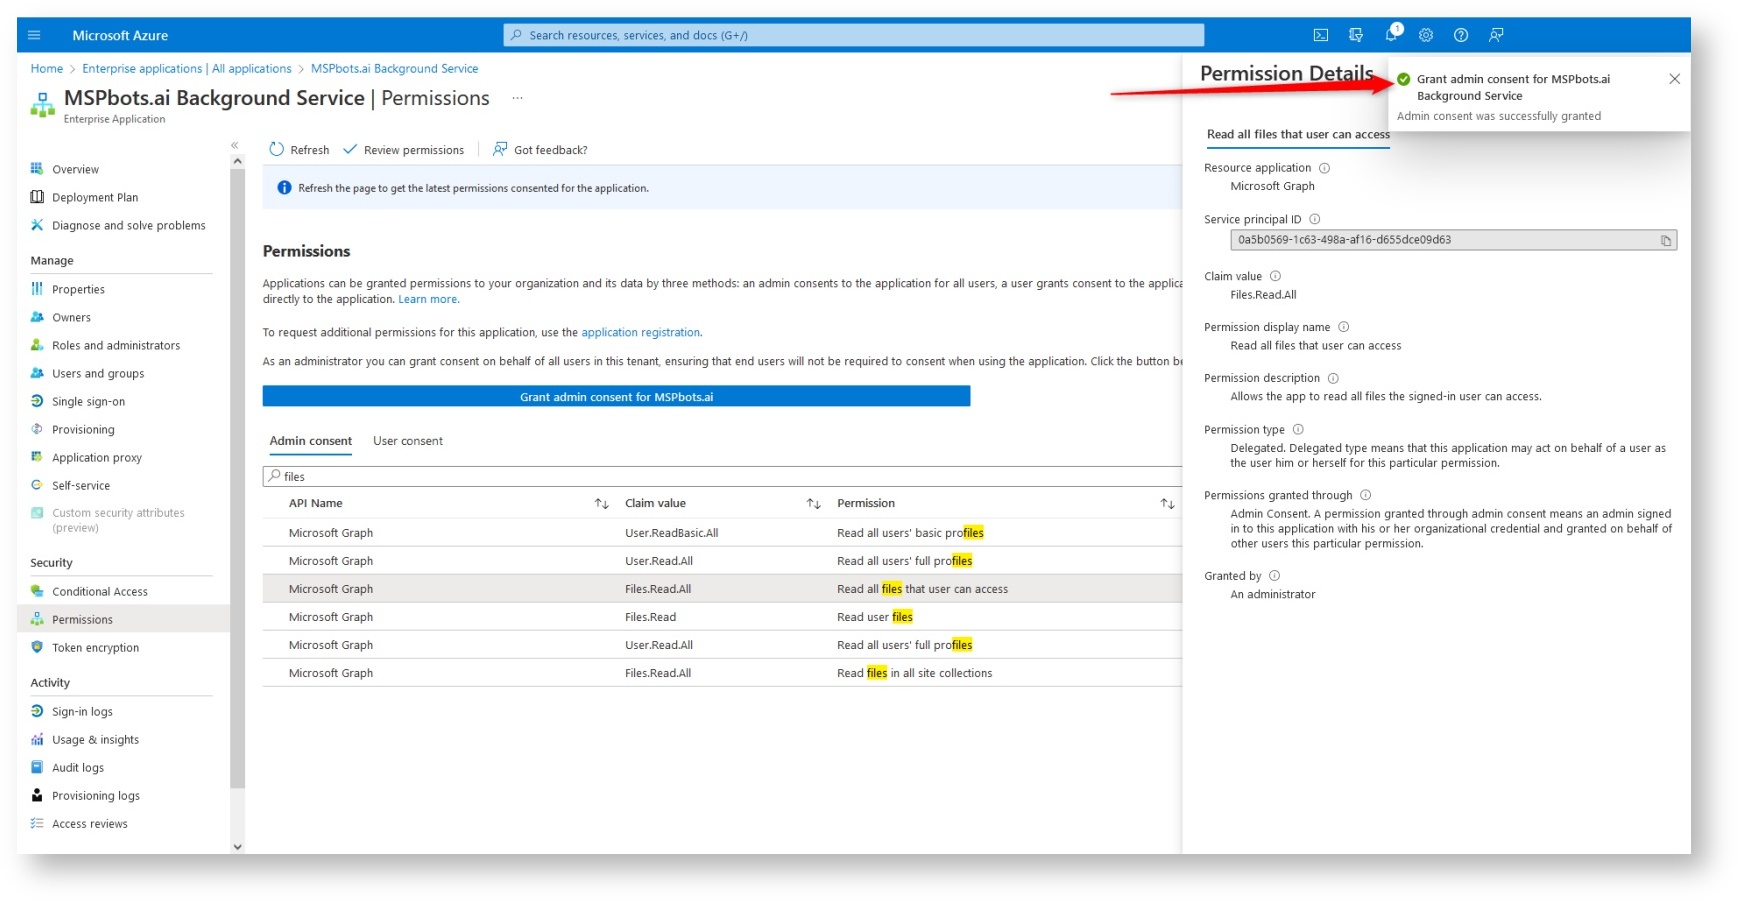
- Click on the row with the Claim Value Files.Read.All and the Permission Read all files in all site collections. This will show a flyout menu on the right.
You will also notice that the blue bar on the page now shows your company's name.
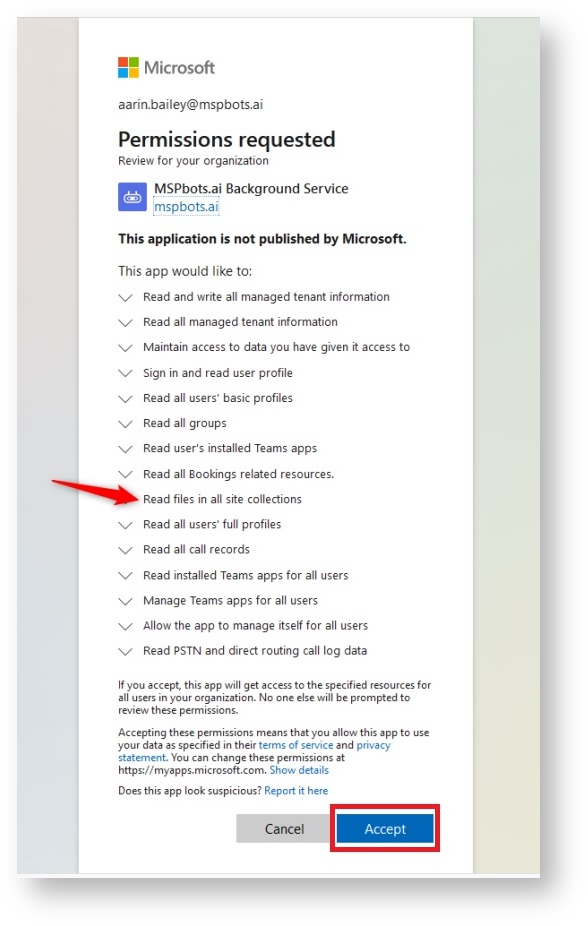
If a login prompt comes up, log in using your Global Admin account again. - The Grant Permissions window will pop up and show that Read files in all site collections is now included in the Permissions. Click Accept.
Your OneDrive integration is successful when the confirmation of the permission being added appears on the top right.
To set up and connect OneDrive to MSPbots
- Log in to the MSPbots dashboard as an administrator.
- Go to Integrations and search for OneDrive.
- After clicking the Sync button, the login interface of Microsoftonline will pop up, enter your own username and password for authorization.
- A message saying that you have successfully linked Dropbox appears. Click the Save button.
- Test the connection.
To add a CSV file
- Go to Integrations on the MSPbots app.
- Locate the Dropbox integration.
- Click the ellipsis ... button, then select the Files option.
- On the window that appears, select the user that has the CSV file in their profile.
- Next, enter the filename in the File name field then click the search button. You can also use the file extension for search. For example, if the file extension is .csv, search for *.csv to show return all CSV files that the user has.
- On the search results, click the file for conversion into a dataset.
- Click the Save button.
Overview
Content Tools
