 N O T I C E
MSPbots WIKI is moving to a new home at support.mspbots.ai![]() to give you the best experience in browsing our Knowledge Base resources and addressing your concerns. Click here
to give you the best experience in browsing our Knowledge Base resources and addressing your concerns. Click here![]() for more info!
for more info!
N O T I C E
MSPbots WIKI is moving to a new home at support.mspbots.ai![]() to give you the best experience in browsing our Knowledge Base resources and addressing your concerns. Click here
to give you the best experience in browsing our Knowledge Base resources and addressing your concerns. Click here![]() for more info!
for more info!
Setup in ConnectWise Automate
Create a dedicated Automate user account with the following settings:
Create a new user: "MSPbots"
Create a new user class: "MSPbots"
Make sure the user class has all the read-only permission. 
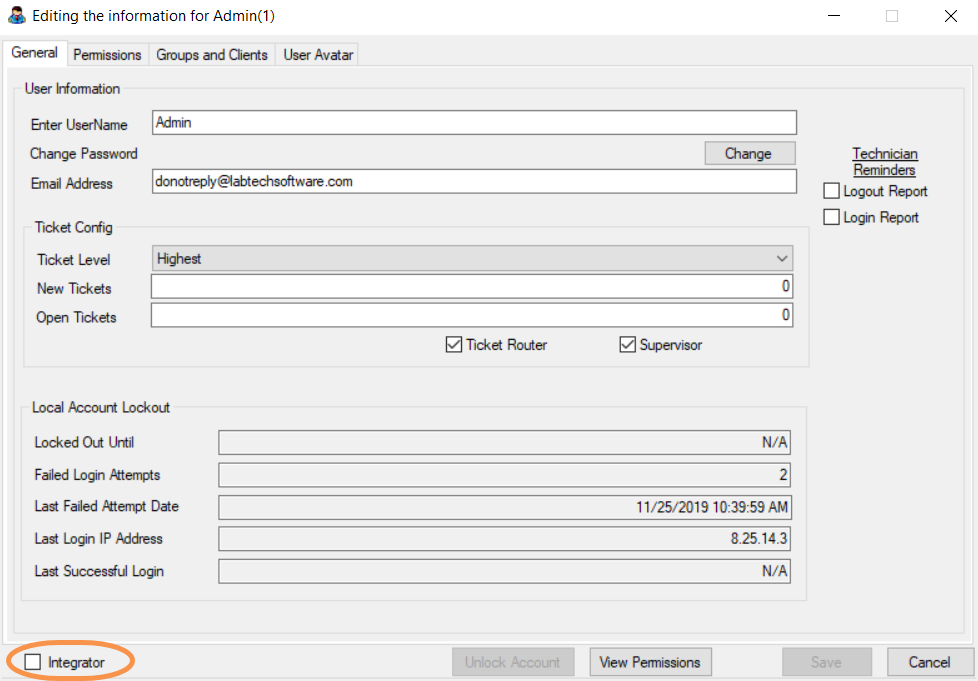
General tab
- Select the Integrator checkbox in the bottom-left corner of the window. This will bypass Multi-Factor Authentication (MFA) for accounts used for integrations.
Permissions tab
Allow read-only permissions to clients and select the Allow HTTP Tunnel checkbox. If you haven't modified the user class default settings, you can select Help Desk Users.
Our suggestion is to give READ-ONLY to all assets that you can select since we are developing more widgets and dashboards every week. This will save you the trouble of adding more permissions. However, if there is any data that you are not comfortable sharing, you can leave them unchecked for now.
Groups and Clients tab
Add All Agents and All Clients to Group Membership.
Setup in MSPbots
- Go to https://app.mspbots.ai/Integrations
- Find ConnectWise Automate.
- Input your Automate URL, Username, and Password.
- Click Save and Sync.
Overview
Content Tools
N O T I C E
MSPbots WIKI is moving to a new home at support.mspbots.ai![]() to give you the best experience in browsing our Knowledge Base resources and addressing your concerns. Click here
to give you the best experience in browsing our Knowledge Base resources and addressing your concerns. Click here![]() for more info!
for more info!