 N O T I C E
MSPbots WIKI is moving to a new home at support.mspbots.ai![]() to give you the best experience in browsing our Knowledge Base resources and addressing your concerns. Click here
to give you the best experience in browsing our Knowledge Base resources and addressing your concerns. Click here![]() for more info!
for more info!
Page History
...
Visit the following wiki Link on how-to integrate your software/s: https://wiki.mspbots.ai/display/MKB/Integrations
...
3. Search N-able Benchmarking package. Then, click and install.

Step 3 - Setup your Accounting Mapping using the N-able template
...
2. Go Settings menu > Click Accounting Mapping

3. Under the Accounting Mapping Dashboard,
3.1. Select your Accounting Software integration e.g. Quickbooks Online.
3.2. And then, select only the Profit & Loss Statement option
...
5. To categorize, drag and drop the items (accounts) from the left to the correct mapping on the right.

6. To save, Then click Save button to save the mapping.
Step 4 - Configure your N-able Benchmark Categories
...
3. Under My Application page, Search N-able Benchmarking
4. Click to open.
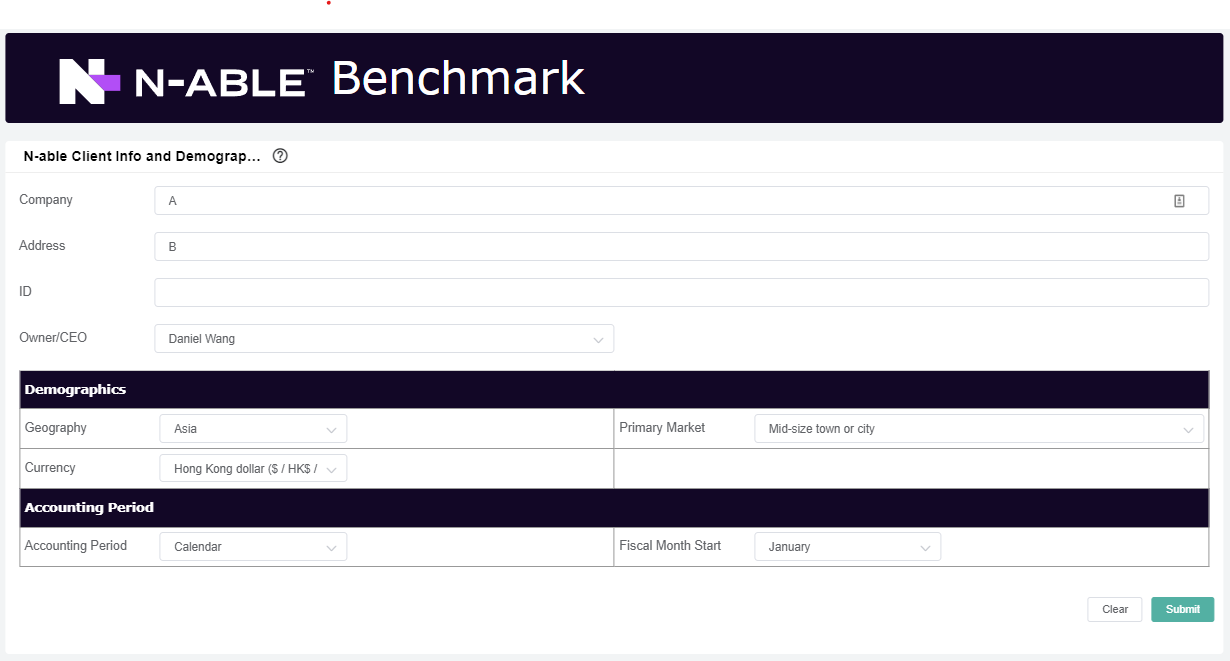
54. Hover to into Settings menu. Then, click N-able Benchmarking Client Info and Configuration Form
...
6. How-to Configure the N-Able Client and Benchmark Configuration Form:
| Form Name | Description | Section/Categories | Fields | Steps |
|---|---|---|---|---|
N-able Client Info and Demographics Form: |
|
|
| 1. Update the ff:
2. Click Submit. |
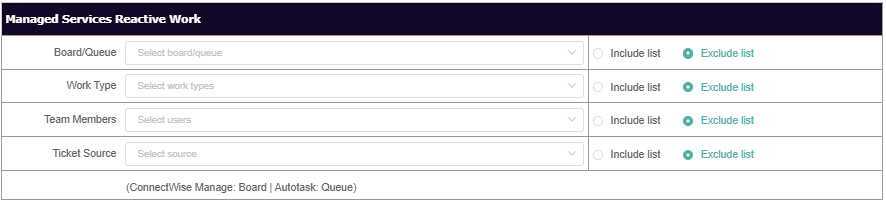
N-able Benchmark Configuration Form |
|
|
|

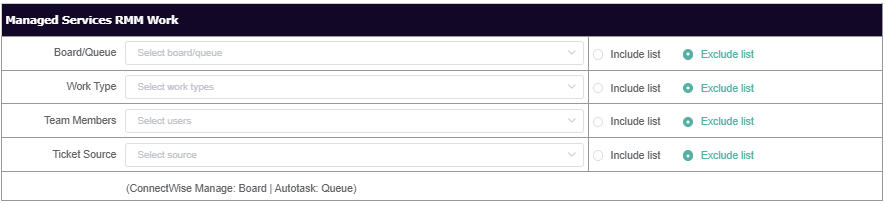
1. Select the filter types for the ff:
|
2. For each field select either "Include List" or "Exclude List".
|
|
| |
|
|
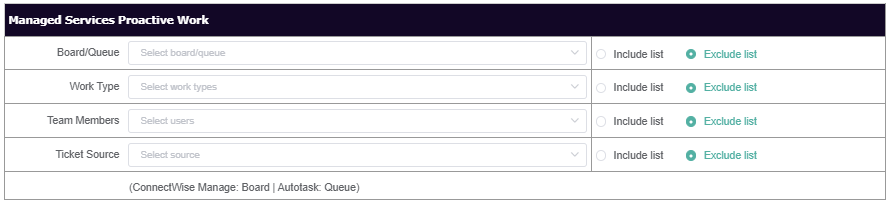
3. Select the filter types for the ff:
|
4. For each field select either "Include List" or "Exclude List". (see note at step |
2) | |
|
|
|
|
|
|
|
|

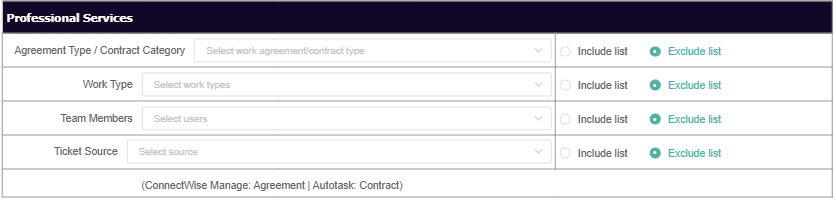
5. Select the filter types for the ff:
|
6. For each field select either "Include List" or "Exclude List". (see note at step |
2) | |
|
|

7. Select the customer/s you want to exclude in the Top 3 Clients results. |
Customer
98. Click Submit. | ||||||
N-able Configuration Supplementary Form |
|
|
|
|
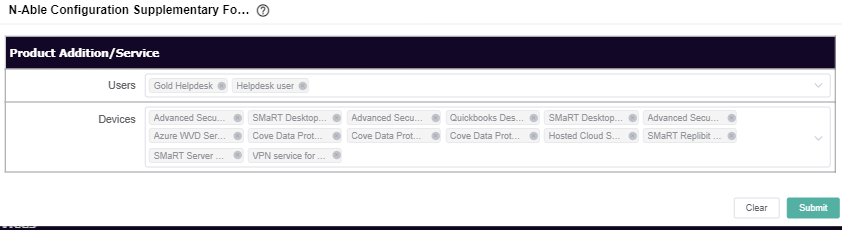
1. Select the the additional Managed Product or Services.
|
2. Click Submit |
Step 5 - Update your N-able Headcount
...
Overview
Content Tools