 N O T I C E
MSPbots WIKI is moving to a new home at support.mspbots.ai![]() to give you the best experience in browsing our Knowledge Base resources and addressing your concerns. Click here
to give you the best experience in browsing our Knowledge Base resources and addressing your concerns. Click here![]() for more info!
for more info!
Page History
...
9. The slicer is now added to your dashboard. To

Note: In order for the slicer to work with all the other widgets in the dashboard. You need to update all the Widgets and add the slicer as one of its filter setup.
10. To add the slicer into the widget, hover into the widget ellipsis (...) click and select edit.

11. Click Datasource icon. Then, click (...) ellipsis and click edit.

12. Hover into the Filter section. Add new condition. Click + Icon > + Add Condition.

13. Click AND. Then,
a. Select the column name for the slicer e.g. "customer_name".
b. Select IN as query string.
c. Click slicer Checkbox.
d. Click the Slicer field, then select the specific slicer under specific integration.
e. Select the Slicer setup. e.g. Customer slicer
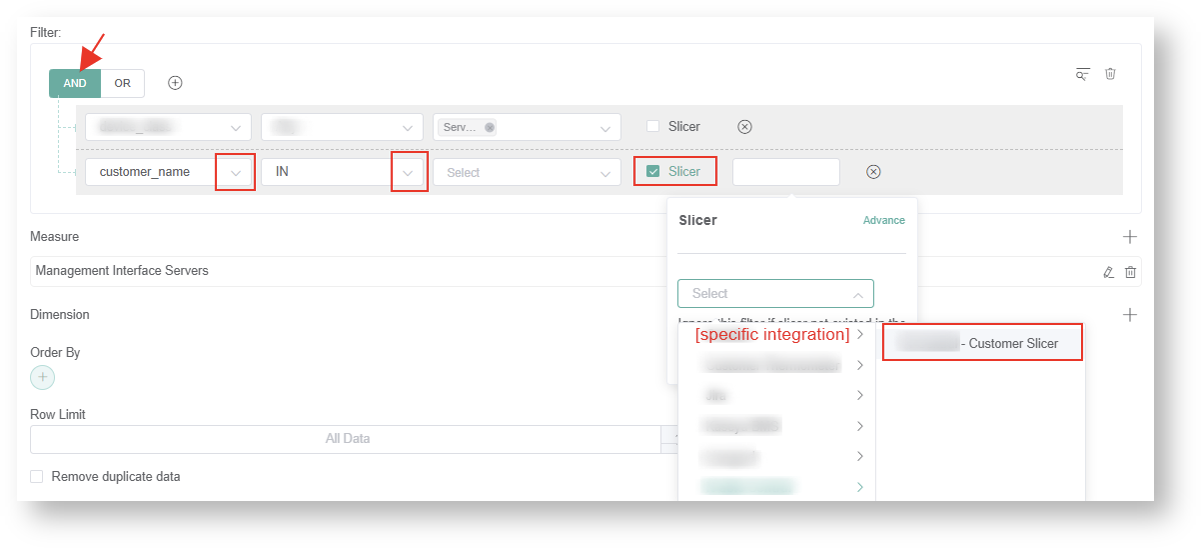
Note: Do not select the OR option for Slicers.
14. Click Save button. To save chagnes.
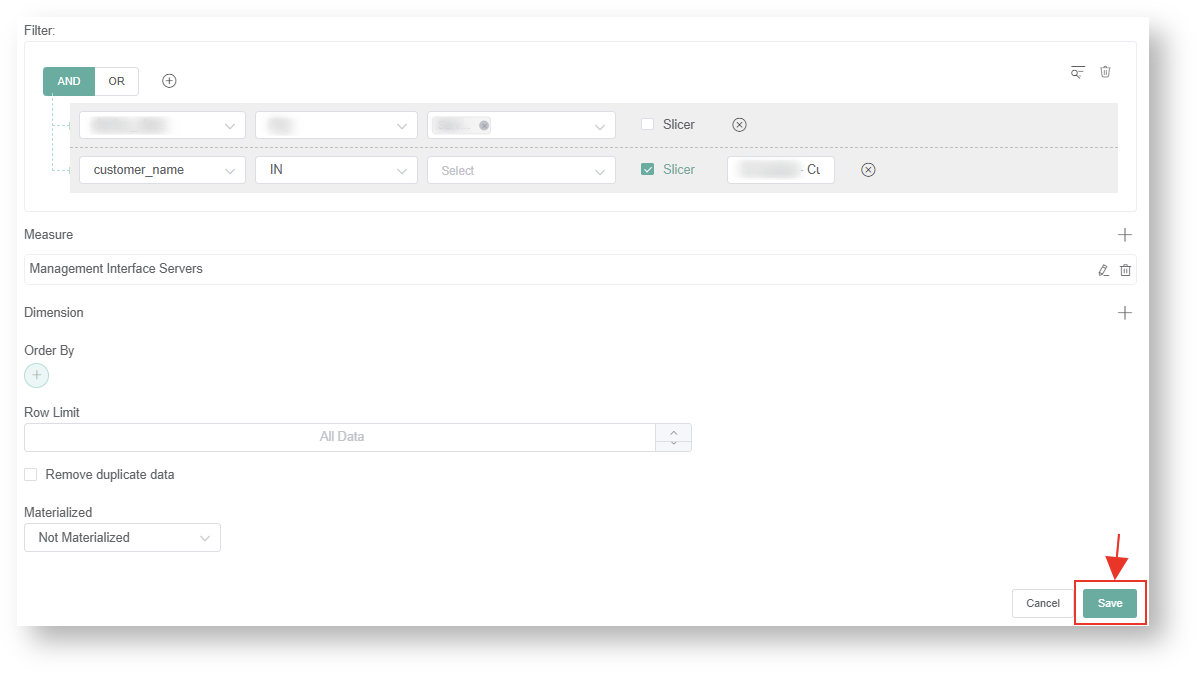
15. In the Widget Builder, Click Apply to enable the Slicers setup in the widget.

16. Depending on the number of widgets you have in the dashboard. You have to repeat steps 10-15 for all the widgets in order for the slicer (e.g. company_name) to work dynamically on all Widgets.
Overview
Content Tools