 N O T I C E
MSPbots WIKI is moving to a new home at support.mspbots.ai![]() to give you the best experience in browsing our Knowledge Base resources and addressing your concerns. Click here
to give you the best experience in browsing our Knowledge Base resources and addressing your concerns. Click here![]() for more info!
for more info!
Page History
This article has the following information on Autotask Late Time Entry Alert Bot 3.0 Template:
| Table of Contents |
|---|
How is this bot helpful?
...
AutoTask Autotask Late Time Entry Alert Bot 3.0 (Real-Time) bot alerts Template sends real-time alerts to users whenever they log a late time entry. Enabling this bot will automatically remind your techs reminds technicians to charge time entries right after they finish working on a ticket to improve their . This improves KPIs, compute ensures the accurate computation of utilization rate and agreement profitability accurately, increase increases the revenue and profit of your the company, and maintain maintains a positive collaboration between techstechnicians.
How to
...
1. Go to Bots menu. Click Template Bots tab.
2. Search for Autotask Late Time Entry Alert Bot 3.0 Template.
3. Follow through the steps mentioned in the following wiki: How to Clone a Template BOT
Bot Configuration Details
After cloning the bots,
...
configure the Late Time Entry Alert Bot
...
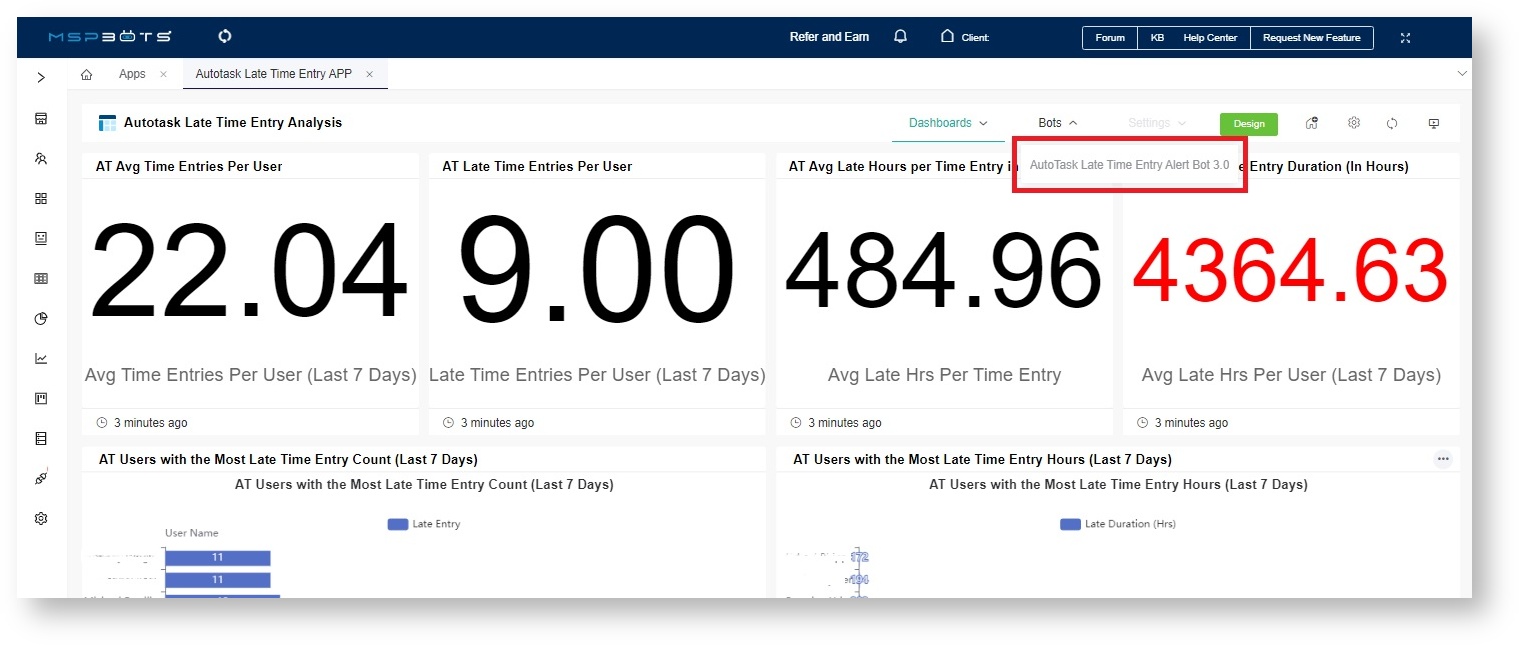
- Go to Apps on the MSPbots menu.
- Find the Autotask Late Time Entry App and click it to open the app.
- Click Bots and select Autotask Late Time Entry Alert Bot
...
- .
...
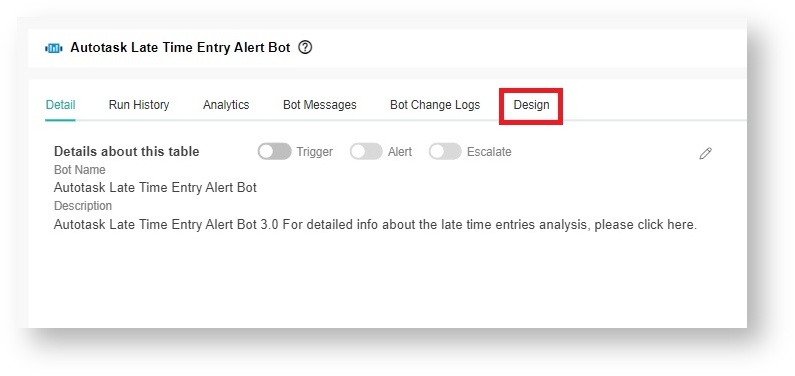
2. Click the Design tab.
3. Default Data Source : Autotask -Timentry. Click Next.
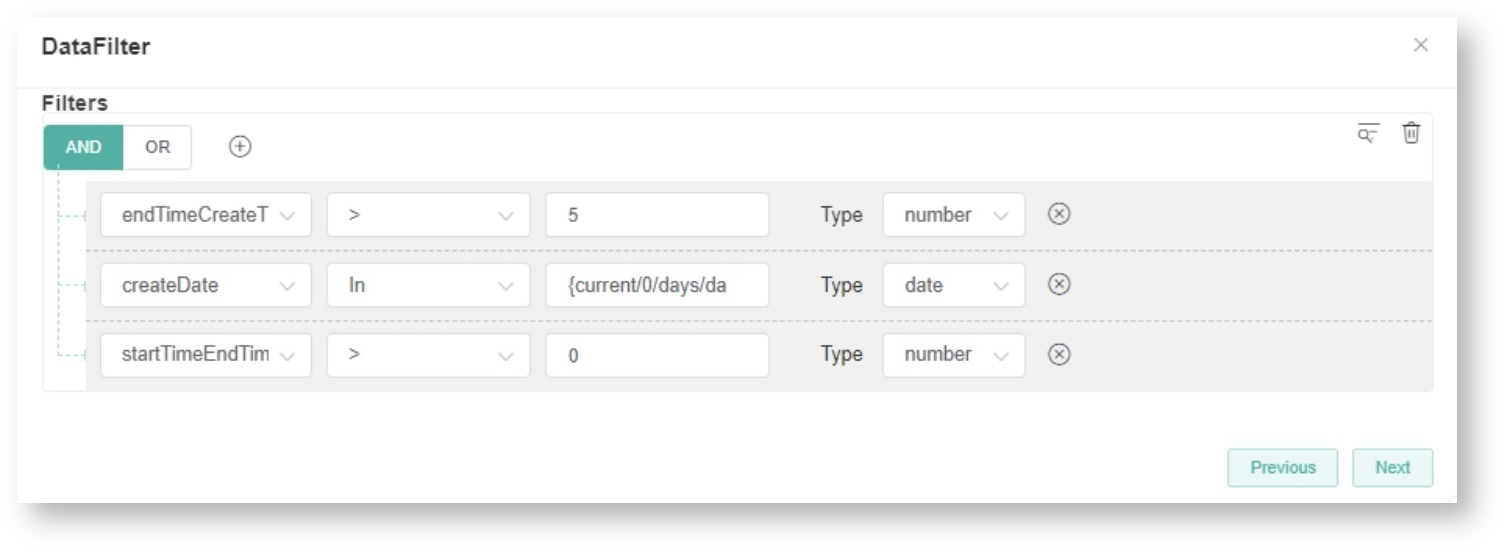
4. Default Data Filter setup. Click Next.
5. Default Alert Message setup
...
- Click Design to open the Real-time Data window.
- Next, select Autotask-Timeentry as Data Source then click Next.
- When the DataFilter window opens, do not change the default settings and click Next.
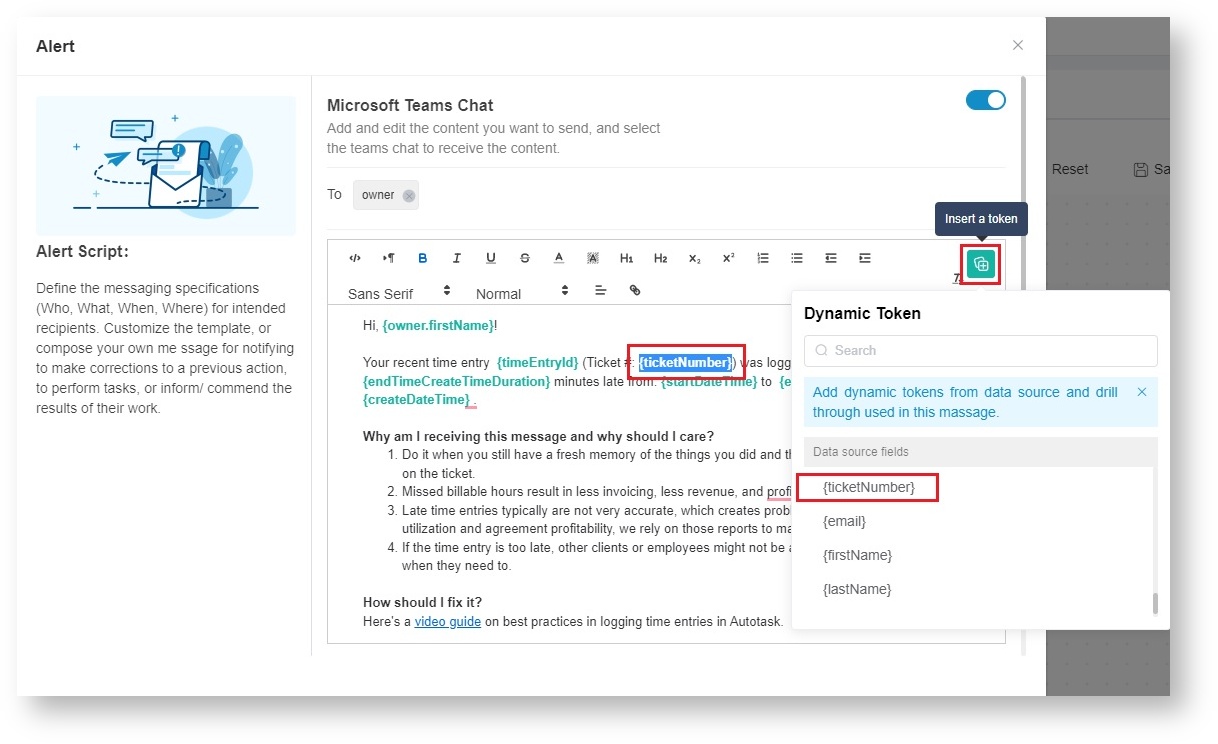
- When the Alert window opens, go to the text for the Alert message and review if it meets your requirements.
- Next, make sure {Ticket #} uses
...
- the dynamic token "{ticketNumber}" instead of "{ticketID}".
...
- The "{ticketNumber}" link redirects
...
- to your Autotask PSA system.
...
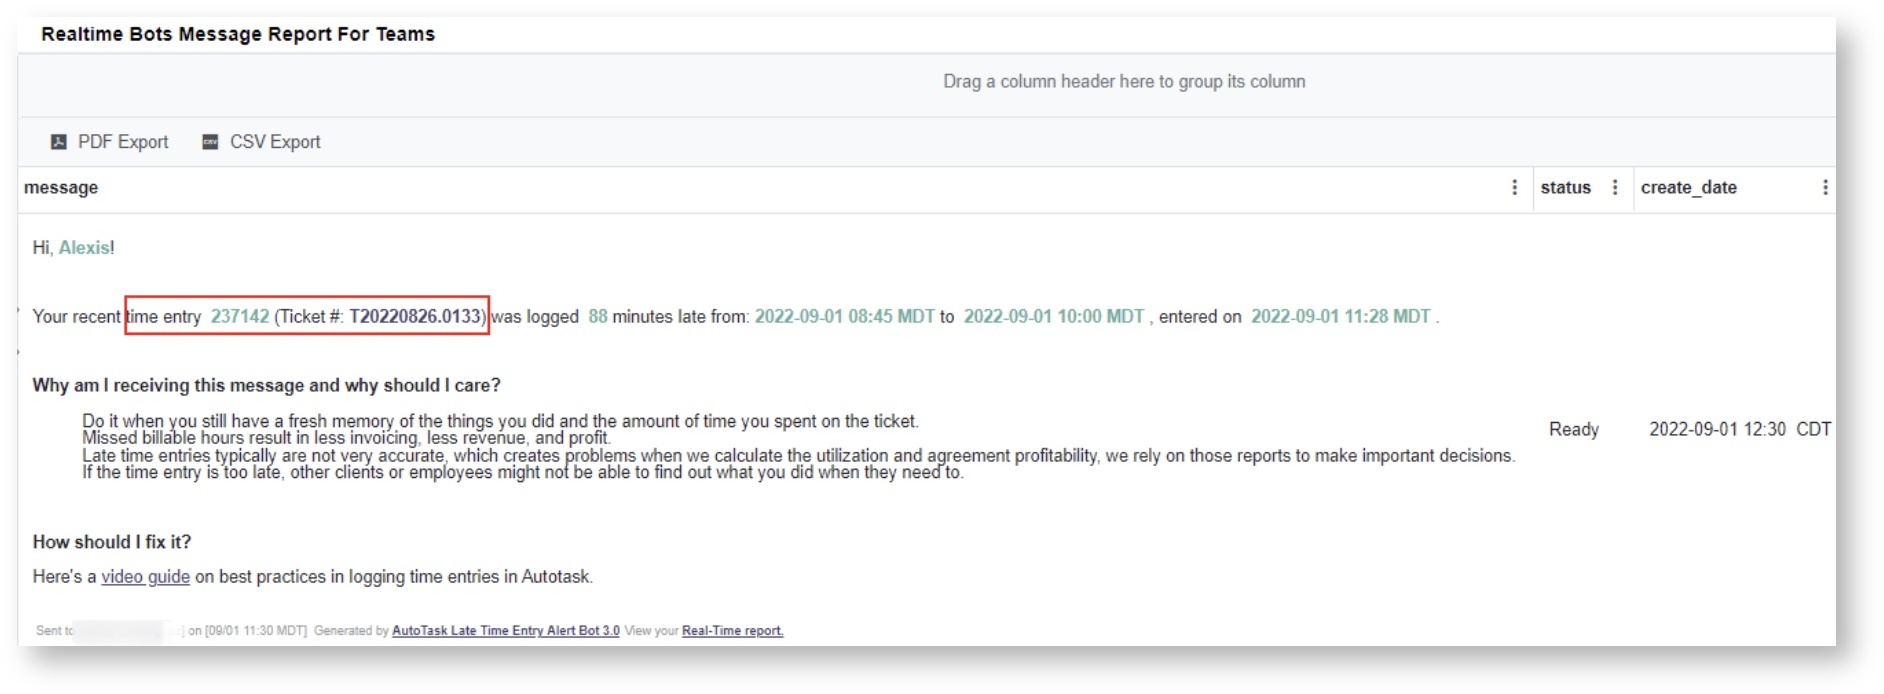
- Below is an example of the message:
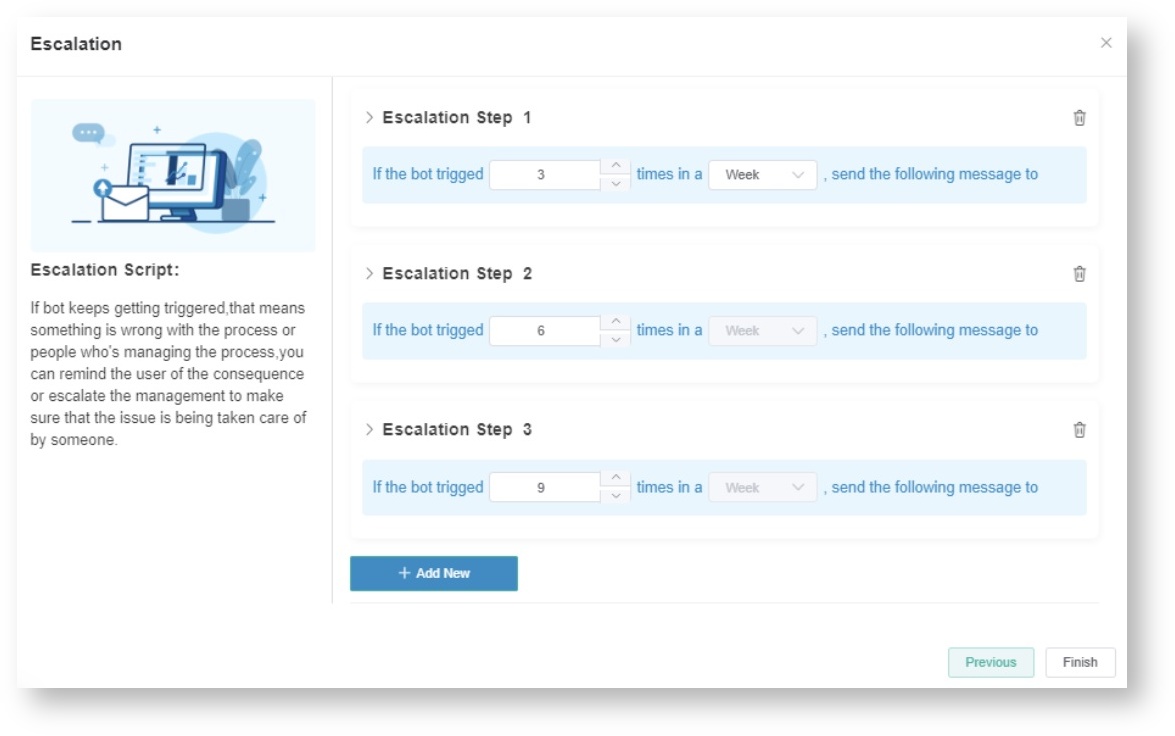
- Click Next to open the Escalation window.
- If needed, modify the default Escalation setup. When done modifying or if there is no change, click Finish.
- Lastly, go back to the Design tab and click Save to apply all the changes.
Sample actual bot messages generated:
6. Click Next.
7. Default Escalation setup
8. Click Finish to save changes.
How to activate the
...
bot
...
To activate
...
a bot, read the instructions on the Activating a Bot on the MSPbots App
...
5 page.


