 N O T I C E
MSPbots WIKI is moving to a new home at support.mspbots.ai![]() to give you the best experience in browsing our Knowledge Base resources and addressing your concerns. Click here
to give you the best experience in browsing our Knowledge Base resources and addressing your concerns. Click here![]() for more info!
for more info!
Page History
The Holidays List is where you can add or edit holidays to ensure that these are recognized by the MSPbots app. The modifications made on this list are applied to the Bot Advanced Scheduler so that the bot will not send notifications on non-working days.
What's in this article:
| Table of Contents |
|---|
Creating the Holidays List
...
- Open the MSPbots app and go
| Table of Contents |
|---|
...
Background Information
Create a list of the holidays that apply to your work and company. You can use this list to edit the settings in MSPbots features, like excluding holidays in the Bot Advanced Scheduler.
To Create Holidays
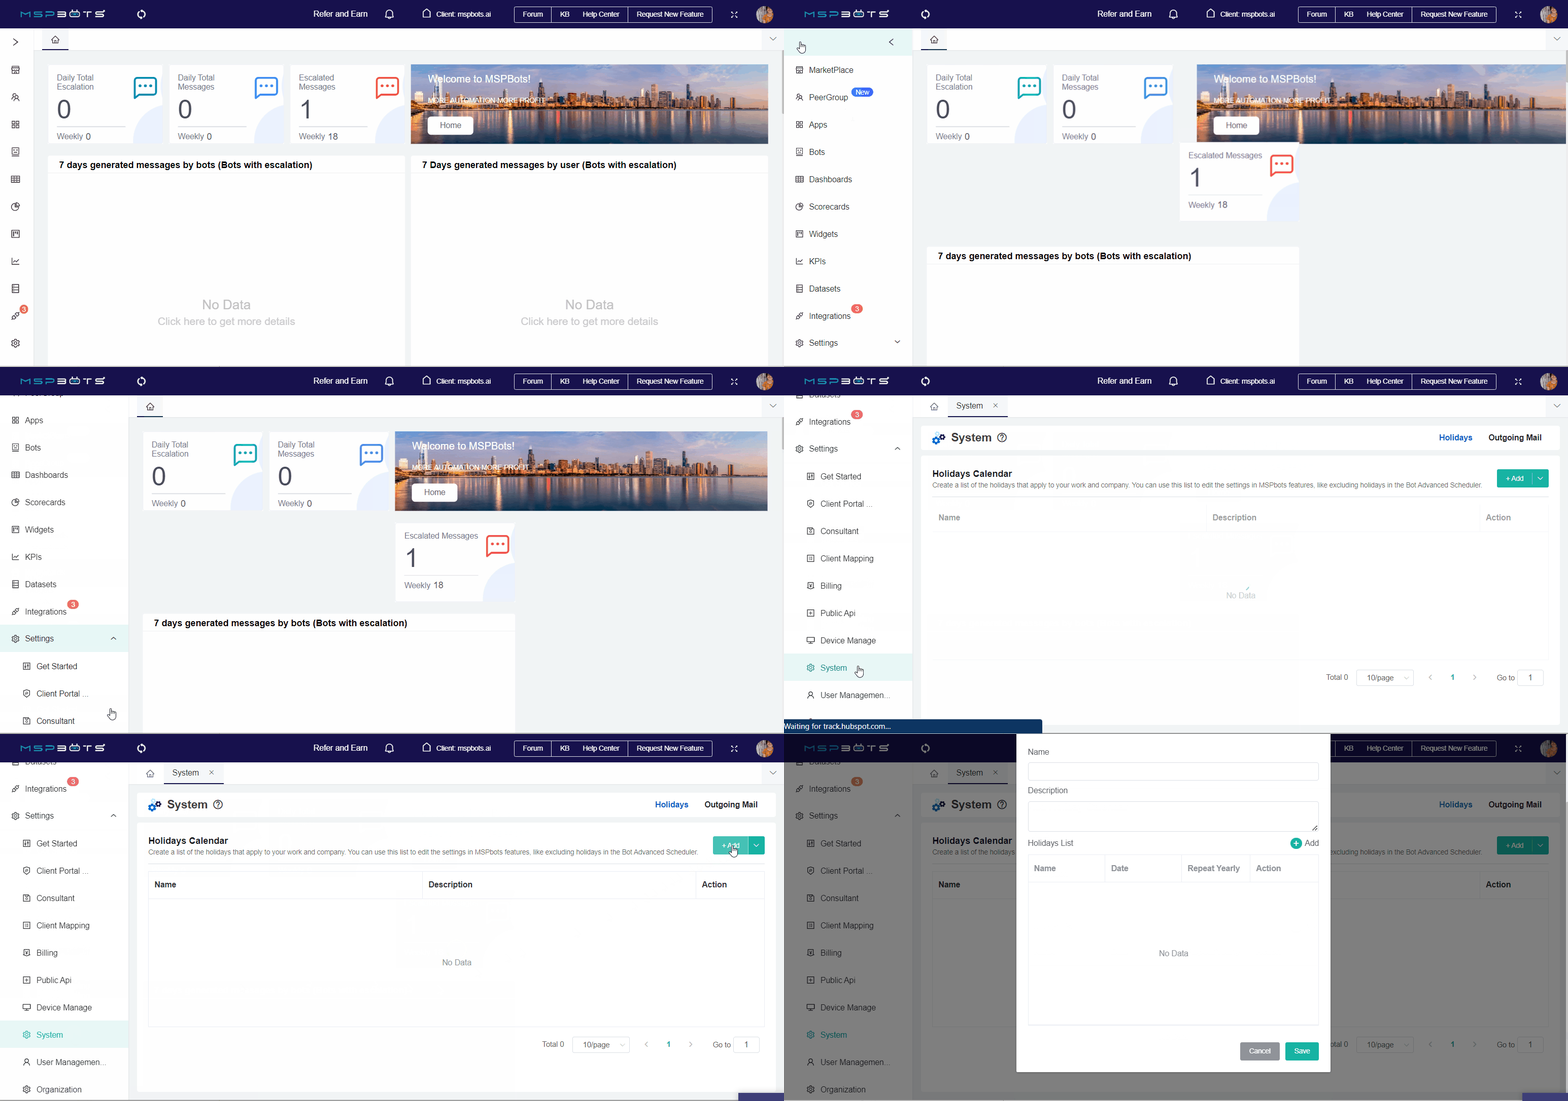
- Go to Settings > System.
- Click the Add button On the System tab, clickto open the Add Holiday Calendar window.
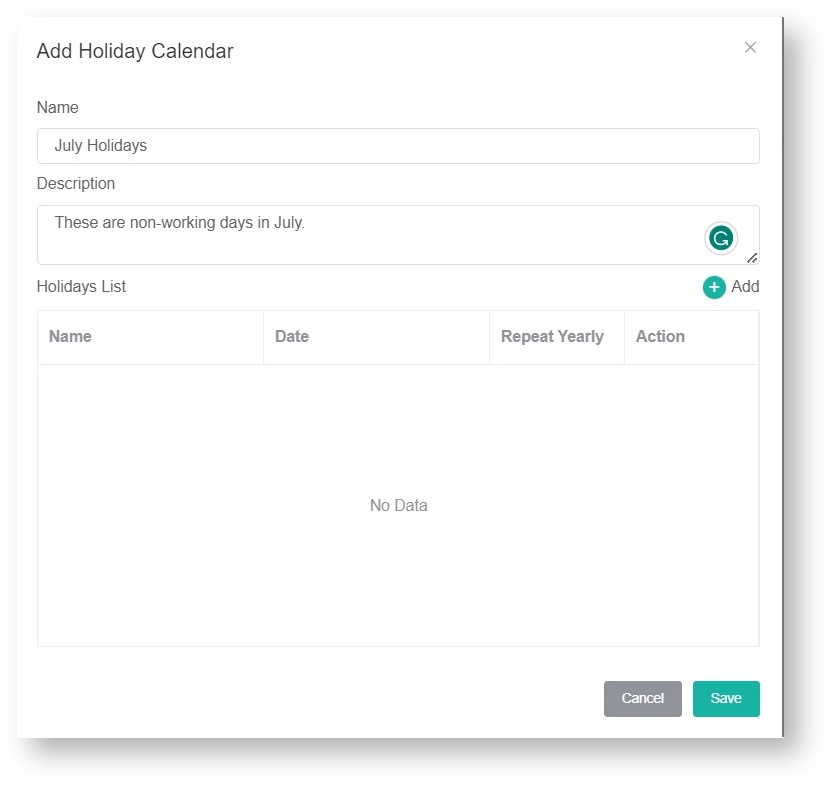
- On When the Add Holiday Calendar window , opens:
- Give the holiday calendar a
- Description - Give the holiday calendar a short description.
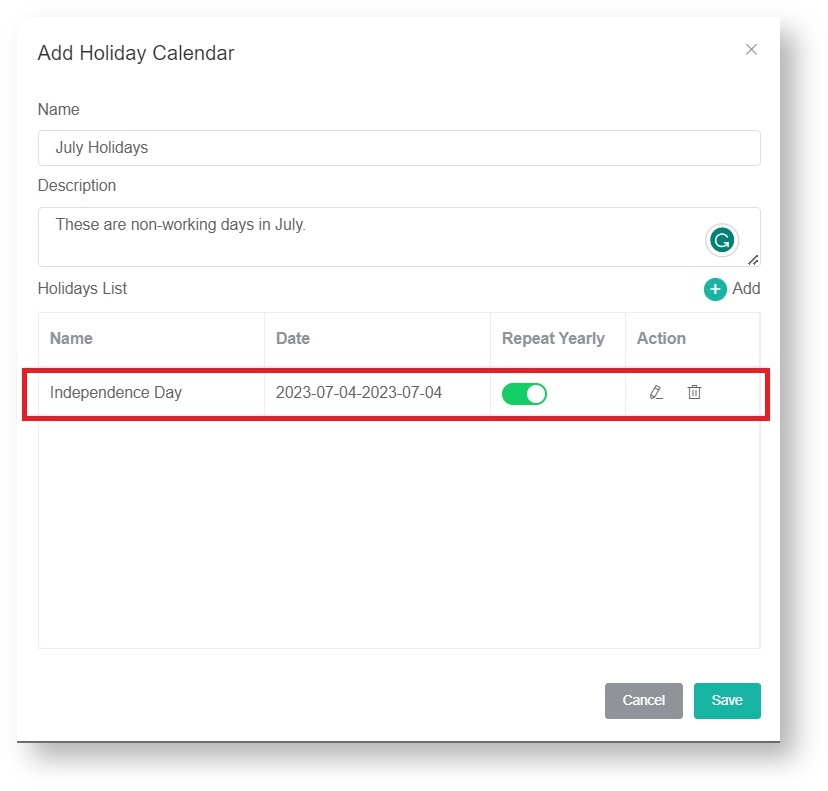
- Holidays List:
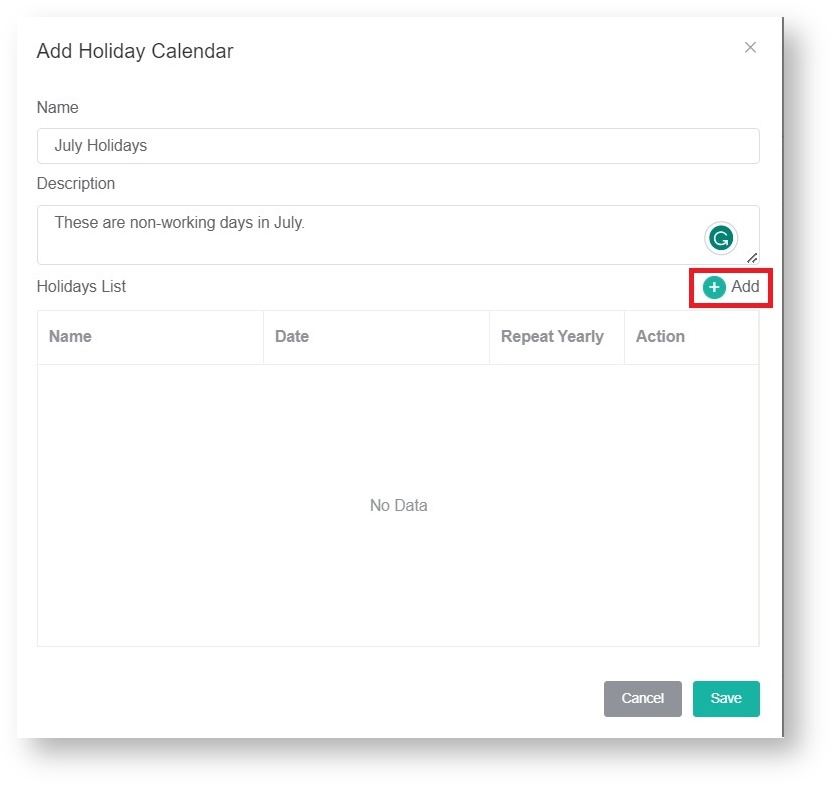
- Click the Add button to open Add Holiday window.
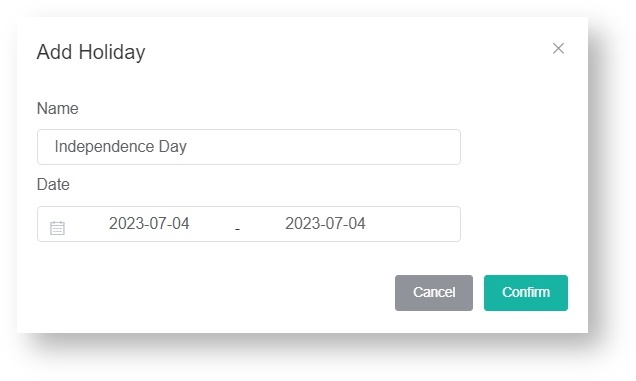
- Name - Give the holiday a name.
- Date - Select the start and end time of the holiday.
- Click Confirm to save the settings and automatically return to the Add Holiday Calendar window.
- Click the Add button to open Add Holiday window.
- Other optional settings are:
- Repeat Yearly - Toggle to repeat the holiday yearly.
- You can edit or delete holiday from the existing holiday list.
- If you need to add more holidays to the Holidays List, please repeat steps a and b.
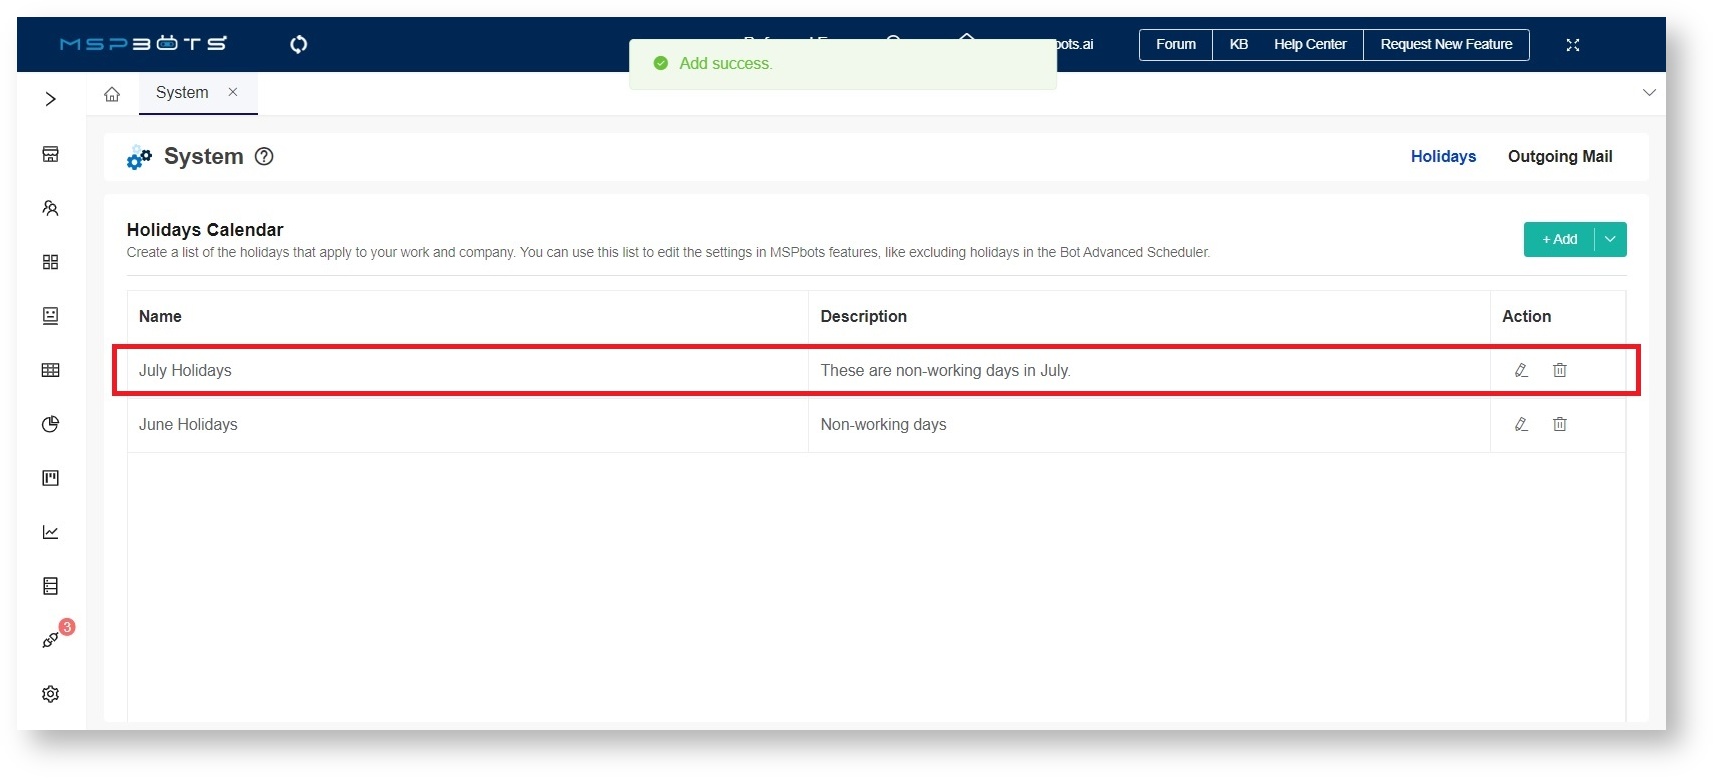
- Click Save.This will show the holiday calendar you created.
Other optional settings are:
You can edit or delete the holiday calendar from the existing holiday calendar list.
To Add a Holiday Calendar from the Template
- Name and a Description.
- ClickAdd to create the Holidays List.
- When the Add Holiday window opens, enter a Name for the holiday and select a start and end Date for the holiday.
- Click Confirm. This adds the holiday to the list.
- Repeat Steps 3b to 3d to add more holidays to the list.
- Click Save when done. You will see the message "Add success" and the holiday will appear on the Holidays Calendar.
- Name and a Description.
Other configuration options in the Holidays Calendar:
- Repeat Yearly - Enable the switch to repeat the holiday yearly.
- Edit - Click to modify the holiday settings.
- Delete - Click to remove the holiday from the list. You
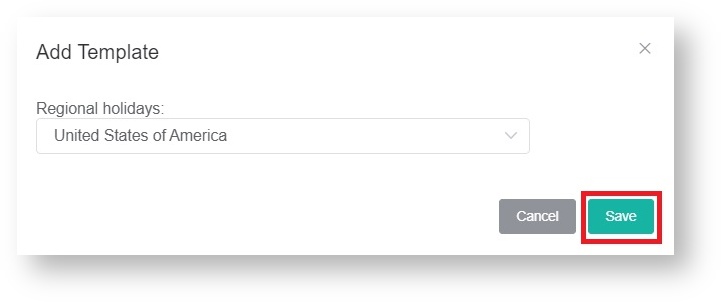
- Click and Select Template to open Add Template window.
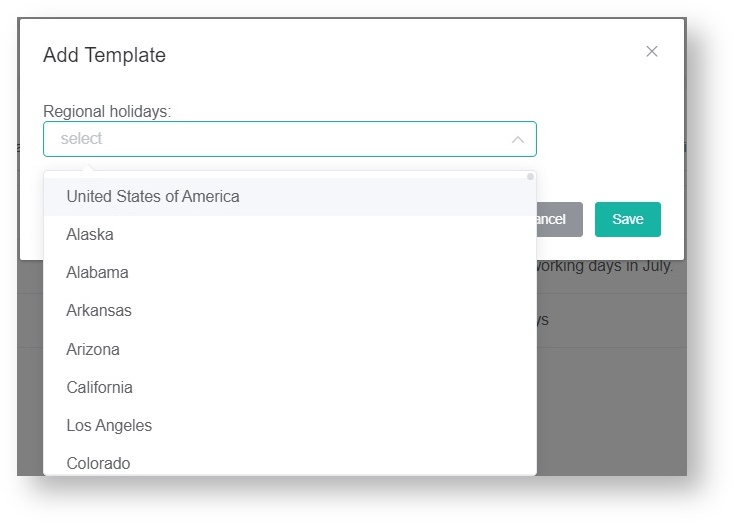
- Select Regional holidays.
- Click Save.
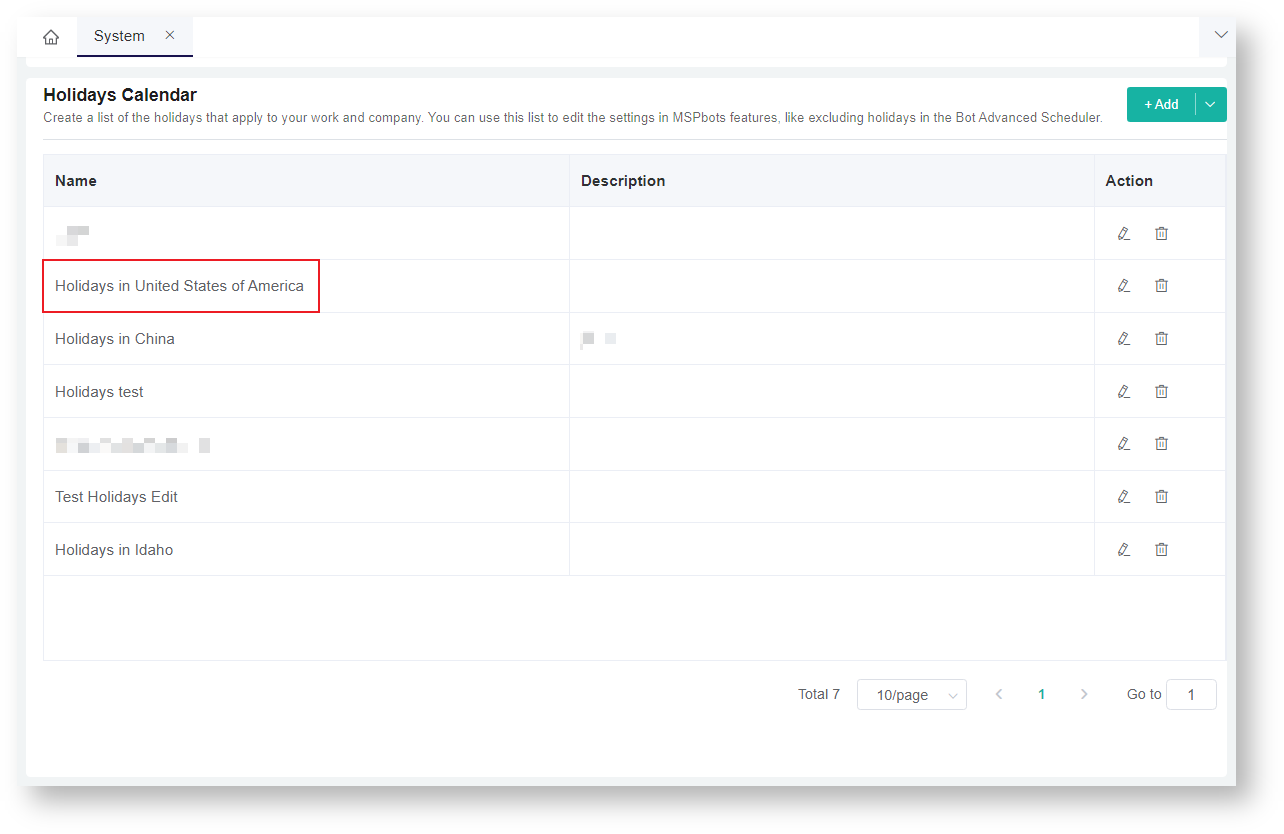
- This will show the holiday calendar template you created.
- Name - You can modify the name of the holiday calendar template.
- Description - You can set a short description for the holiday calendar. Holidays List - You can add new holidays to the calendar and toggle the Repeat Yearly button to have them repeat every year. Additionally, you
- can edit or delete holidays from the existing holiday list.
- Click Save.
- If you want to delete the holiday calendar template, click the delete button in the Action column.
To Configure the Outgoing Mail
Background Information
- Users wish to use an email address from their own company instead of support@mspbots.ai to communicate with their customers.
Main Section
Adding a Holiday Calendar from a Template
...
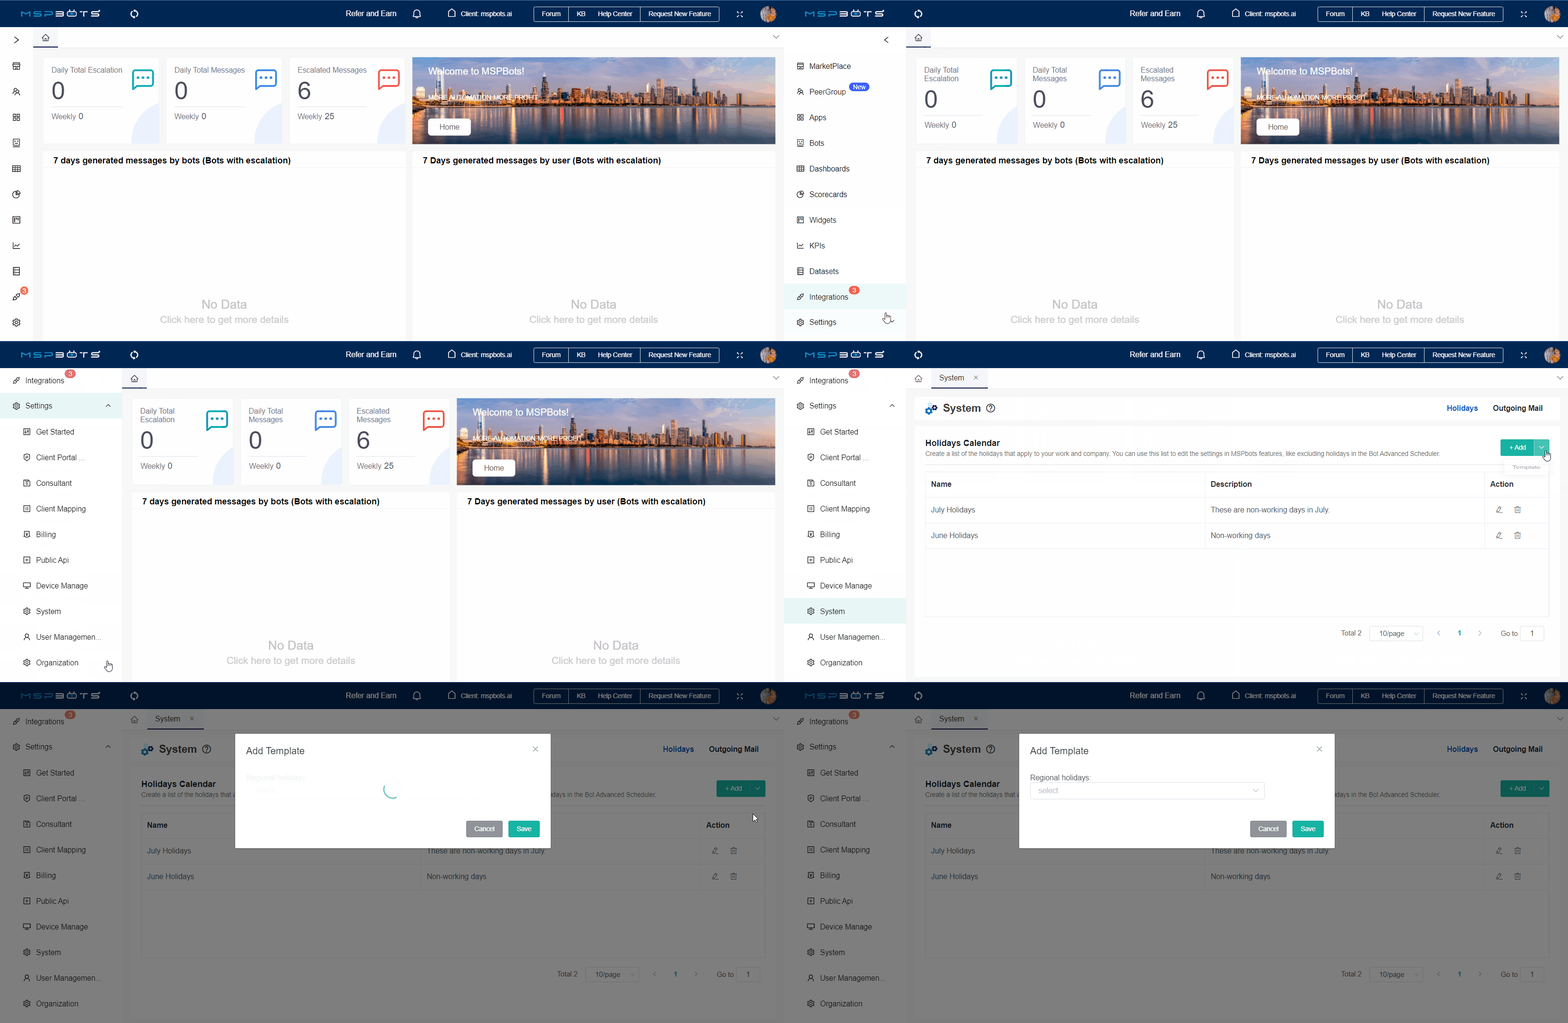
- Open the MSPbots app and go to Settings > System.
- On the System tab, click and select Template to openAdd Templatewindow.
- Select from the Regional holidays dropdown list.
- Click Save.
- This will show the holiday calendar template you created.
The options to Edit, Delete, and enable the Repeat Yearly switch are also available for the Holiday Templates. Go to Settings > System andClick Outgoing Mail in the upper right corner. - Click Add.
- We recommend that you first click Test Connection to test the connection status and, once the connection is successful, click Confirm to save the settings.
- The page will prompt you with the message: "Verify Email Access: We have sent a verification email to ’The email address that you want to configure.‘. Please click the verify button in the email to complete the verification of your email."
- Please log into the email address ’The email address that you want to configure.‘ and click Verify in the email.
- When the status of this email address is Verified, it signifies that the SMTP server configuration is complete.
- Once the configuration is finished, you can configure the sending email address in the SNAPSHOT or Bots.
- Other option settings are:
- Verify Email Address - If you want to verify your email, click the verify button and then we will send a verification email to ’The email address that you want to configure.‘, you need to click the verify button in the email to verify your email.
| Info |
|---|
Please be aware that the Password isn't your email login password, but an App Password that needs to be requested. For instance, if you're using Office 365, please request it on this page. |
