 N O T I C E
MSPbots WIKI is moving to a new home at support.mspbots.ai![]() to give you the best experience in browsing our Knowledge Base resources and addressing your concerns. Click here
to give you the best experience in browsing our Knowledge Base resources and addressing your concerns. Click here![]() for more info!
for more info!
 N O T I C E
MSPbots WIKI is moving to a new home at support.mspbots.ai![]() to give you the best experience in browsing our Knowledge Base resources and addressing your concerns. Click here
to give you the best experience in browsing our Knowledge Base resources and addressing your concerns. Click here![]() for more info!
for more info!
The Brightgauge Migration app is a tool that helps you request and monitor the migration of your data from Brightgauge to MSPbots. You get full control over which dashboards will be migrated singularly or in big or small batches, and identify which ones should be prioritized over the others. This article discusses more about this app and shows how you can request, prioritize, and monitor the migration of your dashboards.
What's on this page:
Why should I use the Brightgauge Migration app?
The Brightgauge Migration app facilitates smoother and more efficient migration with the following features and benefits:
- Organized request process - Choose the assets you want to migrate, migrate in small or big batches, indicate your preferred prioritization, and send your request with one button click. You can also cancel requests at any time.
- Dashboard for progress - Track the status of your migrations in one comprehensive dashboard that includes. There is no need to follow up on updates.
- Effective communication - Send a comment at any time during the migration process and receive a prompt response from the MSPbots Migration Team.
Prerequisites
The following must be done before you can start using the Brightgauge Migration app:
- Install the Brightgauge Migration app.
- Set up admin access in your BrightGauge for da@mspbots.ai.
- Share all the dashboards, gauges, goals, and reports that you actively use and need to recreate or migrate to MSPbots.
- Provide admin permissions to the person in charge of modifying the migration settings and monitoring progress in the app.
What are the dashboards and settings available in the app?
The Brightgauge Migration app has dashboards for migration requests and monitoring migrations.
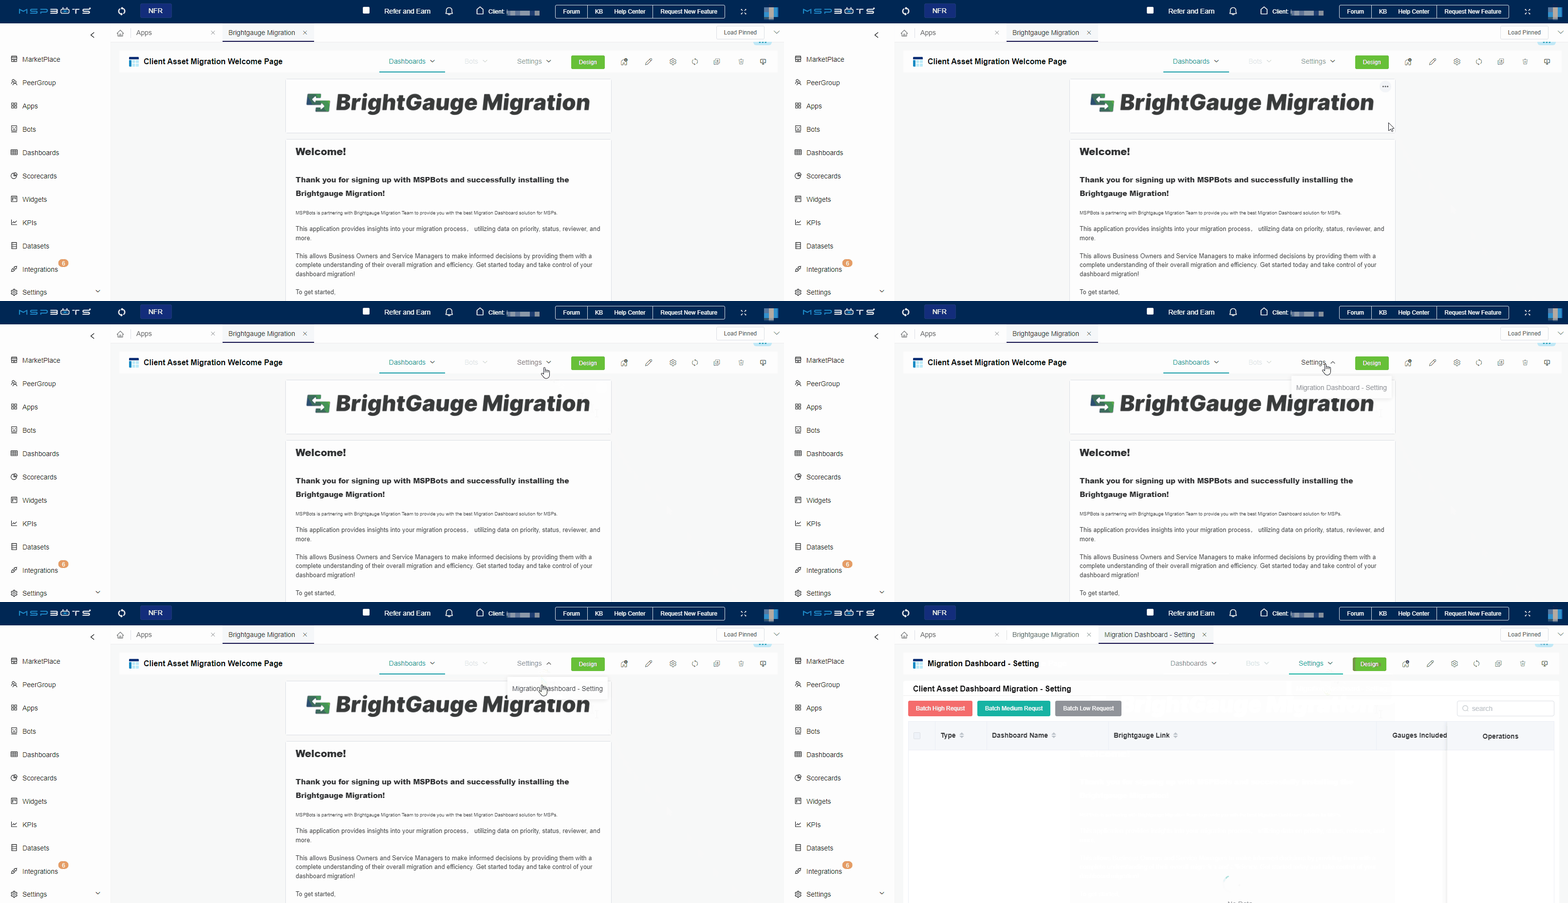
- Client Asset Dashboard Migration - Setting. This dashboard lists the Brightgauge assets that are available for migration and has columns for the Brightgauage Link, Dashboard Name, Gauges Included, Operations, and Type (of asset). This is where you select assets and request their migration.
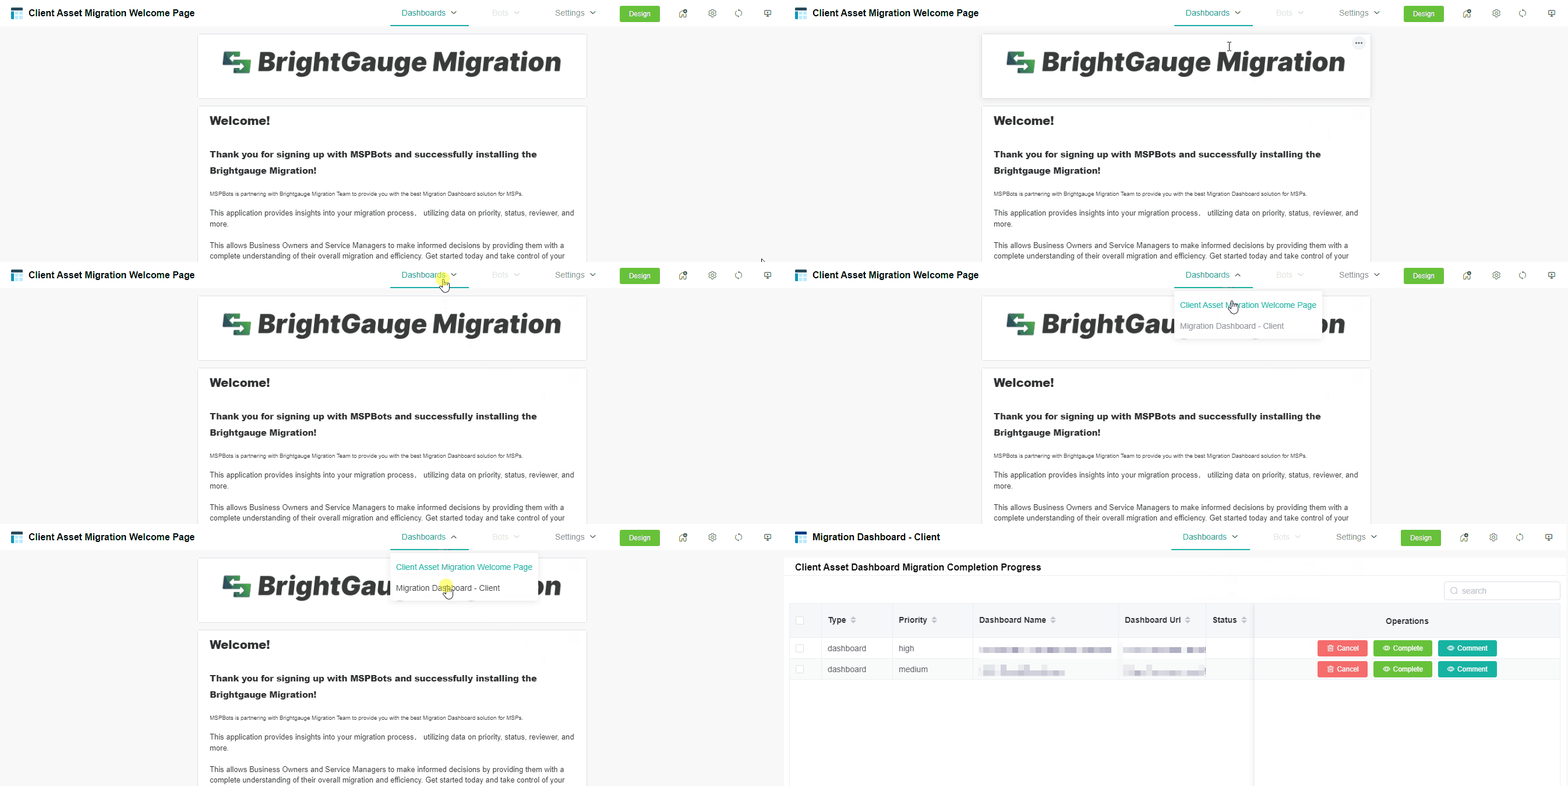
- Migration Dashboard - Client. This dashboard is where you track the completion progress of your migrations and perform operations like comment and cancel your request. Some of the information in this dashboard is Priority, Status, Complete Rate, and ETA.
How to Set the Priority of Client Asset Dashboard Migration
The Client Asset Dashboard Migration - Setting lists the Brightgauge dashboards that are available for migration. dashboards you have in Brightgauge, where you can configure the priority of synchronizing these dashboards to MSPbots on this page.
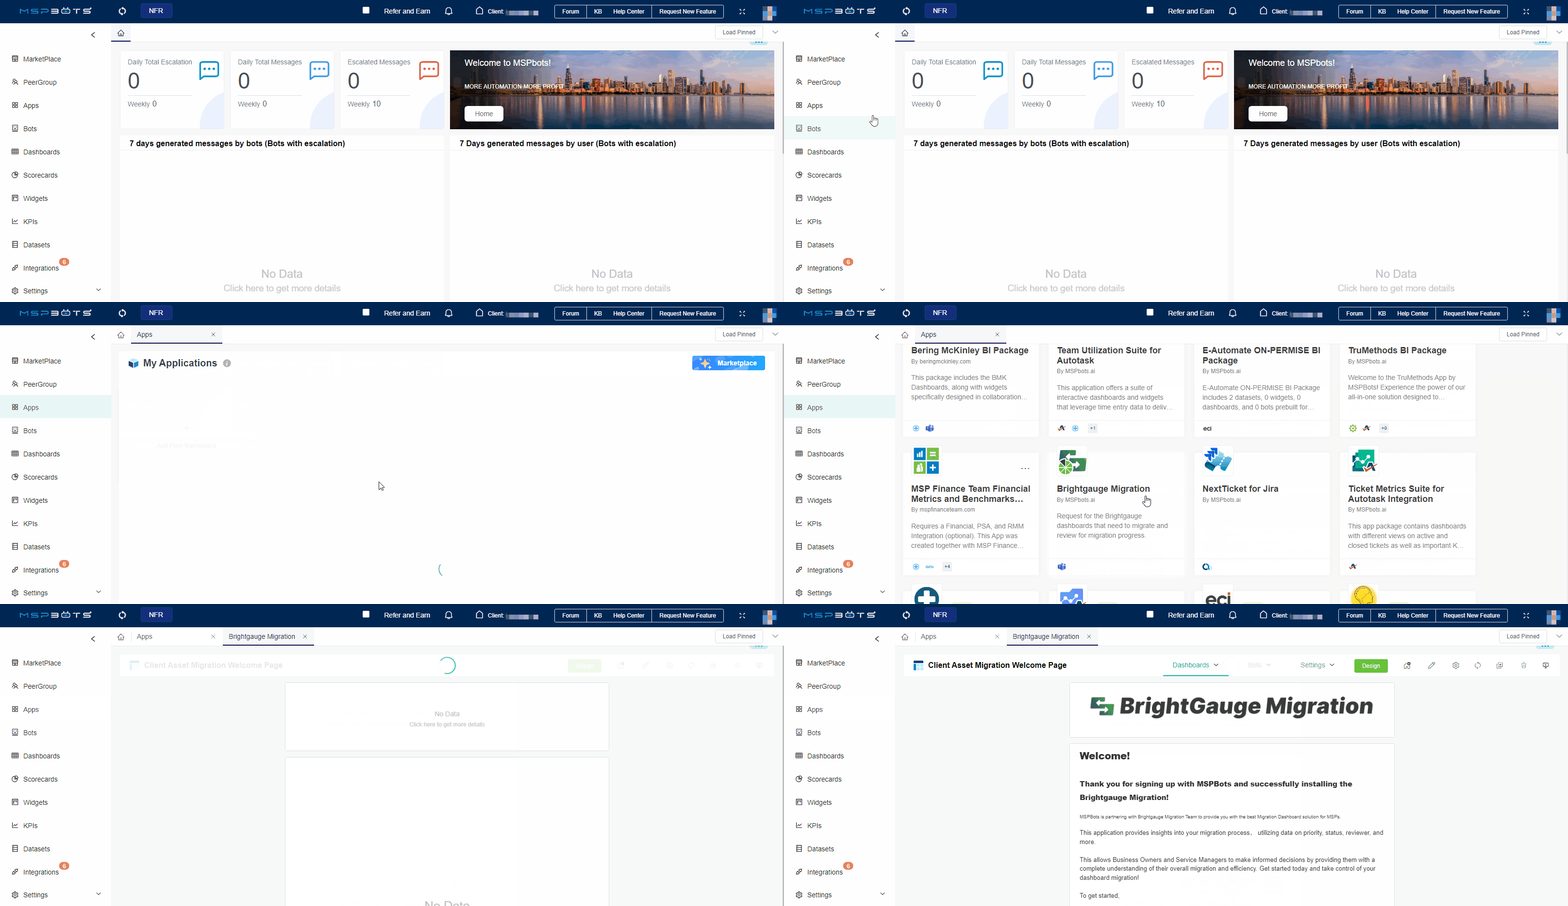
- Log in to the MSPbots app with the Admin role.
- Go to App > Brightgauge Migration.
- Hover your mouse over Settings and select Migration Dashboard - Setting.
- Configure the priority of dashboards to be migrated.
- Bulk configure the priorities of dashboards.
- Select one or more dashboards.
- Click on the button in the top right corner.
- Batch High Request
- Batch Medium Request
- Batch Low Request
- Click Confirm.
Configure the priority of a specific dashboard.
Select the Brightgauge dashboard that the client wishes to migrate.
Click on Request in the Operations column to open a pop-up window.
Pop-up Window Fields:
Dashboard - The name of the dashboard.
BG Link - The link to the dashboard in Brightgauge.
Priority - Select high, medium, or low from the drop-down menu.
Remark - Add any additional remarks or comments.
Click Confirm to save the configuration.
- Bulk configure the priorities of dashboards.
How to Manage the Migration of Client Asset Dashboards
Once your dashboards start migrating, you can view the progress of the migration, verify the accuracy of the migrated dashboards, complete the migration, cancel the migration, or add comments to these dashboards here.
- Log in to the MSPbots app with the Admin role.
- Go to Apps > Brightgauge Migration.
- Hover your mouse over Dashboards and select Migration Dashboard - Client.
- On the Migration Dashboard - Client page, you can manage the migration of dashboards.
- Cancel - Click the Cancel button, and click Confirm to cancel the migration of the dashboard.
- Complete - When the Complete Rate of the dashboard migration shows 100%, you can click on the link in the Dashboard Name column to check the accuracy of the data on that dashboard.
- If it is correct, please click the Complete button to finish the migration of that dashboard. The Status of both the dashboard and the widgets within the dashboard will be displayed as Published.
- If you find any inaccuracies in the data, please click the Comment button to open the pop-up window, add comments to indicate which data is incorrect, then click Confirm; and we will address it promptly.
- Cancel - Click the Cancel button, and click Confirm to cancel the migration of the dashboard.


