 N O T I C E
MSPbots WIKI is moving to a new home at support.mspbots.ai![]() to give you the best experience in browsing our Knowledge Base resources and addressing your concerns. Click here
to give you the best experience in browsing our Knowledge Base resources and addressing your concerns. Click here![]() for more info!
for more info!
Page History
These are the steps for creating a bot in the MSPbots app.
What's in this article:
| Table of Contents | ||
|---|---|---|
|
1. Set Set up a new bot.
...
- Log in to the MSPbots app using your Office 365 account.
- Navigate to Bots on the left menu then click the New Bot button on the Bots screen.


You can also start creating a bot from a widget on your dashboard. Click the ellipsis button and select Create Bot.

- Choose how to start creating your bot. In the Create a new bot window, select Start From Blank or Start From Bot Template, then click on a bot type.
- Start From Blank - Select this option to create a new bot customized according to your needs.

New Integration Trigger - Select this bot type to create a bot triggered by integration events.
Trigger - Select this bot type to create a bot triggered by specific conditions in datasets or widgets.
Real-time Data - This type of bot is triggered by user-selected data sourced from a data synchronization source. For example, if the user sets up ConnectWise Manage-Ticket as the data source, a ticket created or updated in the ConnectWise Manage app and synchronized to MSPbots will trigger the bot.
Trigger or logic of real-time bots:
- The synchronization program actively retrieves the lastUpdateTime from the database of the data source you have set up, every 3 minutes, for data updated in the past 3 minutes.
- Put the newly obtained data into the message queue.
- Real-time Data bots will listen to this message queue, and if there are eligible tickets, the bot will be triggered.
Message Command - Select this option if you want to trigger the bot using commands from MS Teams or Slack.
- Start From Bot Template - Select this option to customize a fully functional bot available to your PSA.


- Start From Blank - Select this option to create a new bot customized according to your needs.
- Next, do the following steps in the Create a new bot window:


- Enter a name in the Bot Name field.
- Identify the Role that will have access to the bot.
- Select one or multiple Tags to label the new bot you create.
- Type a clear Description of the bot. (Recommended)
- Click the Continue button to open the tab with the details and settings for your new bot.
...
- Click the Design button on your bot's tab.


This opens the Trigger window where you configure the trigger script. - Start defining the trigger by selecting Widget or Dataset, and your PSA.


- Next, go to the meet following criteria section and define the criteria for triggering the bot. Hover over the plus
 icon and click +Add Group or +Add Condition.

If you want to preview the data, click the Data Inspector icon.
 - Go to the I want the bot to run based on this schedule section.
- Schedule - Set the time and frequency for running the bot.
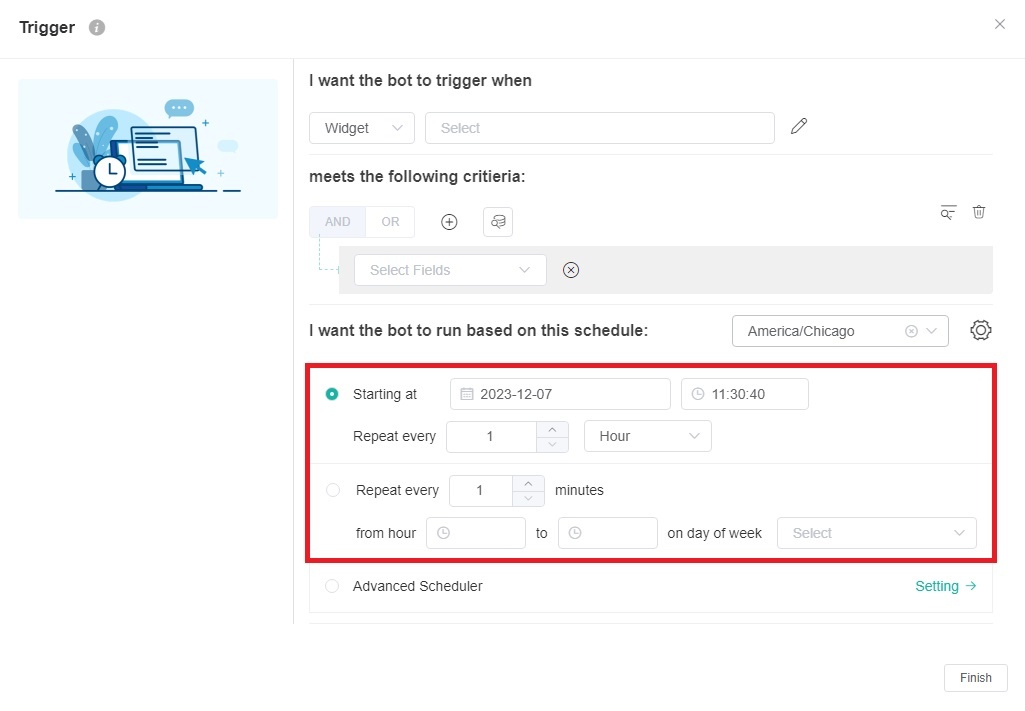
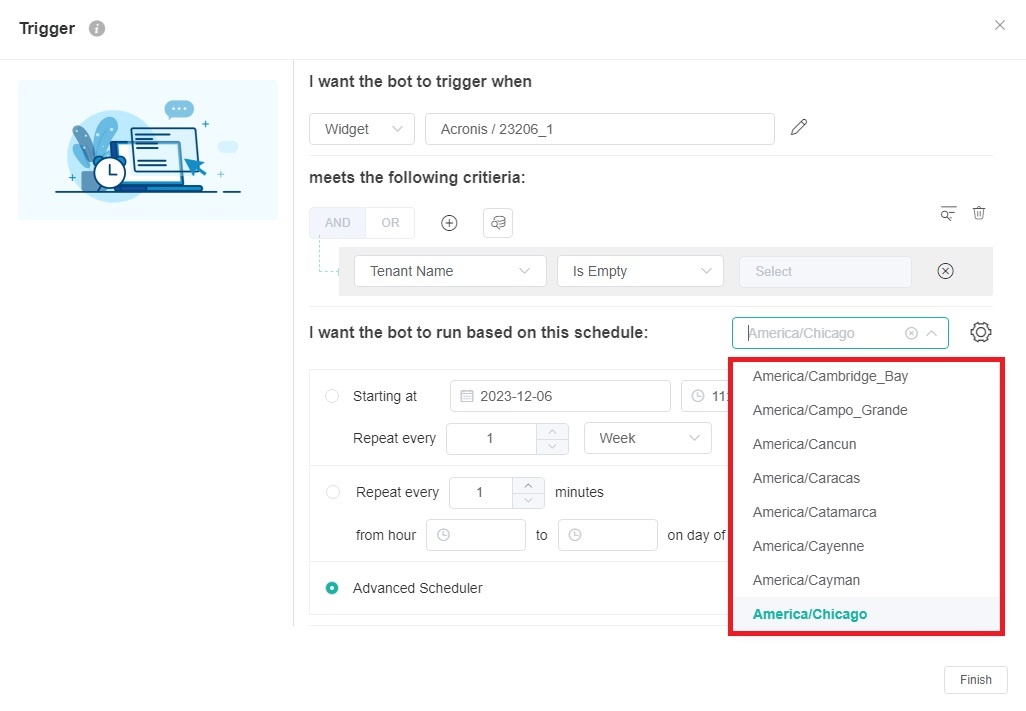
- Time Zone - Select the time zone to be used by this bot to send messages.
Note Please note that when you clone a Trigger bot, the cloned Trigger bot will inherit the time zone value from the original Trigger bot. If you are in a different time zone and you want the bot to run in your time zone, you will need to specify the time zone for the Trigger block of the cloned bot.
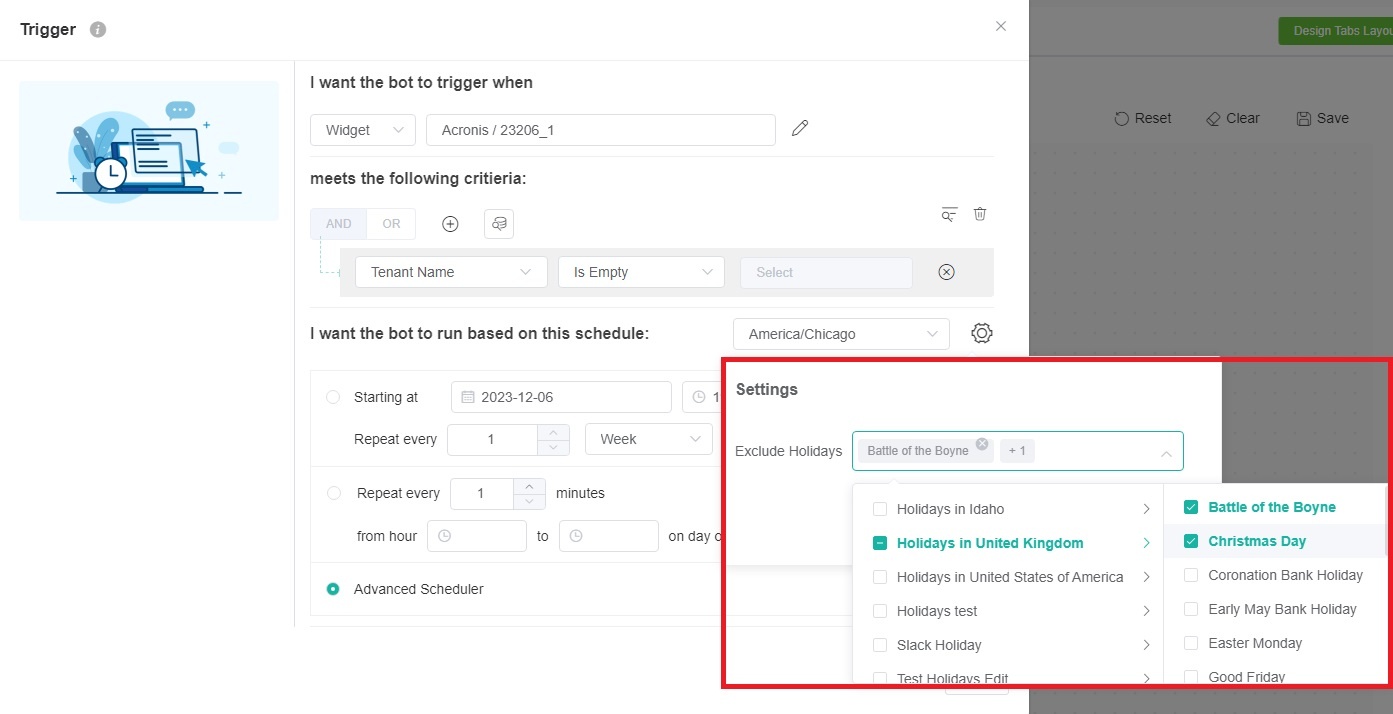
- Settings - Click Settings to select which holidays the bot should not send messages on. Holidays are custom-defined in the Holidays section of System in your Settings. For more information, please refer to: How to Configure the Holidays List in the MSPbots App.
- Schedule - Set the time and frequency for running the bot.
- Click the Design button on your bot's tab.
...
- To set up advanced scheduling, scroll down to the Advanced Scheduler section on the Trigger screen.
- Click the Setting link to open the Advanced Scheduler window.
- On the Advanced Scheduler window, configure the bot to alert in Minutes, Hours, Day, Month, or Year, then click Save.
- Click the Next button to continue to the steps for defining the bot alert script.


4. Define the bot alert script.
...
- Start by activating the channel where the bot will send the alert message. Click the toggle for any of the following to switch the channel ON:
- Microsoft Teams Chat
- Microsoft Teams Channel
- Web Message
- Slack Chat
- Slack Channel


You can choose more than one channel based on your needs.
- Set up the alert message.
For example, to set an email alert:- Click the Email toggle switch. This will show the email fields and the checkbox for Hide the message footer.
- (Optional) Select the Hide the message footer checkbox to remove the additional information from the bottom of the email message.


- Select a sender from the From dropdown list.


- Next, click the To field and select the recipients from the From Dataset Field, From Drill Through, or From User List fields. You can also click CC or BCC to add recipients to these fields.


- Type the Subject of the email.


- In the section for the email message, compose a custom message for the alert message.


You can use the Insert a Token button to select data to include in the message. Formatting options are also available to highlight message sections.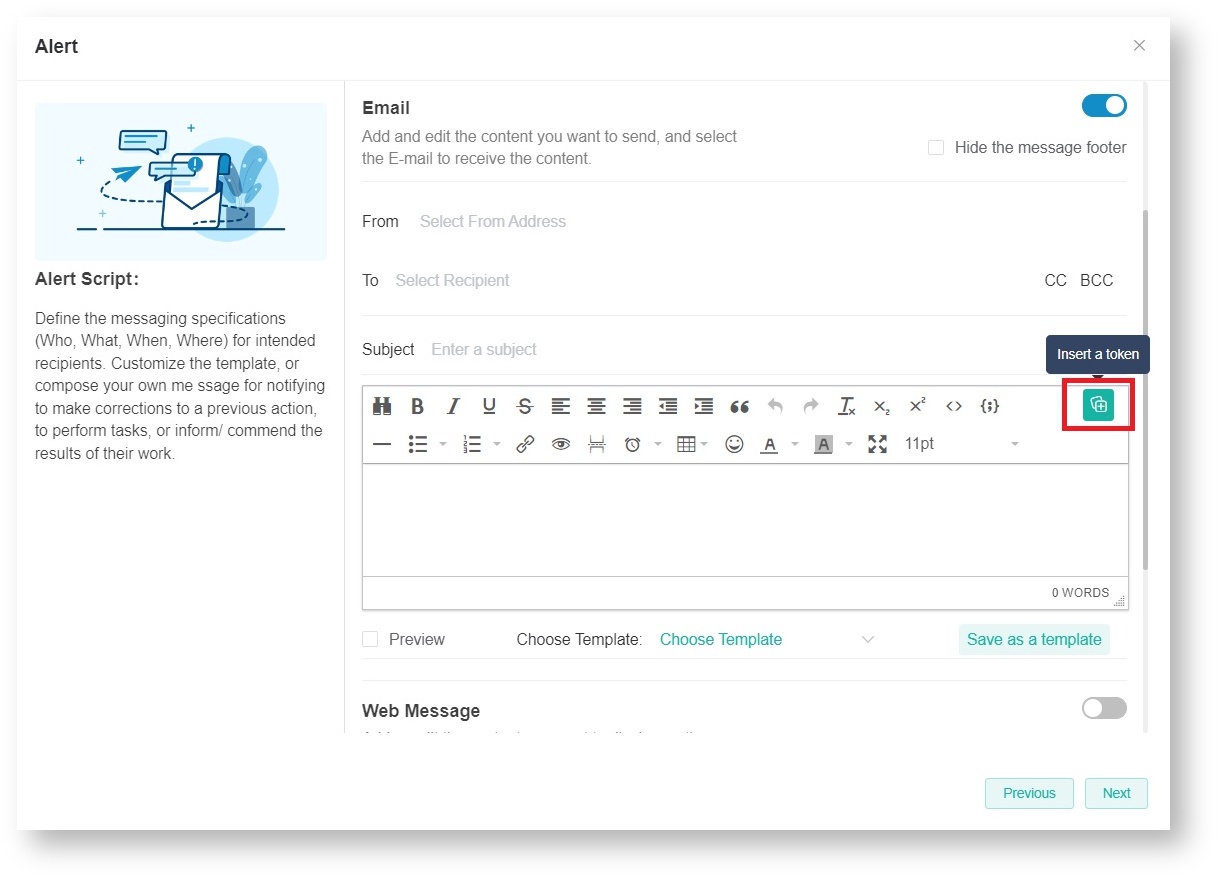
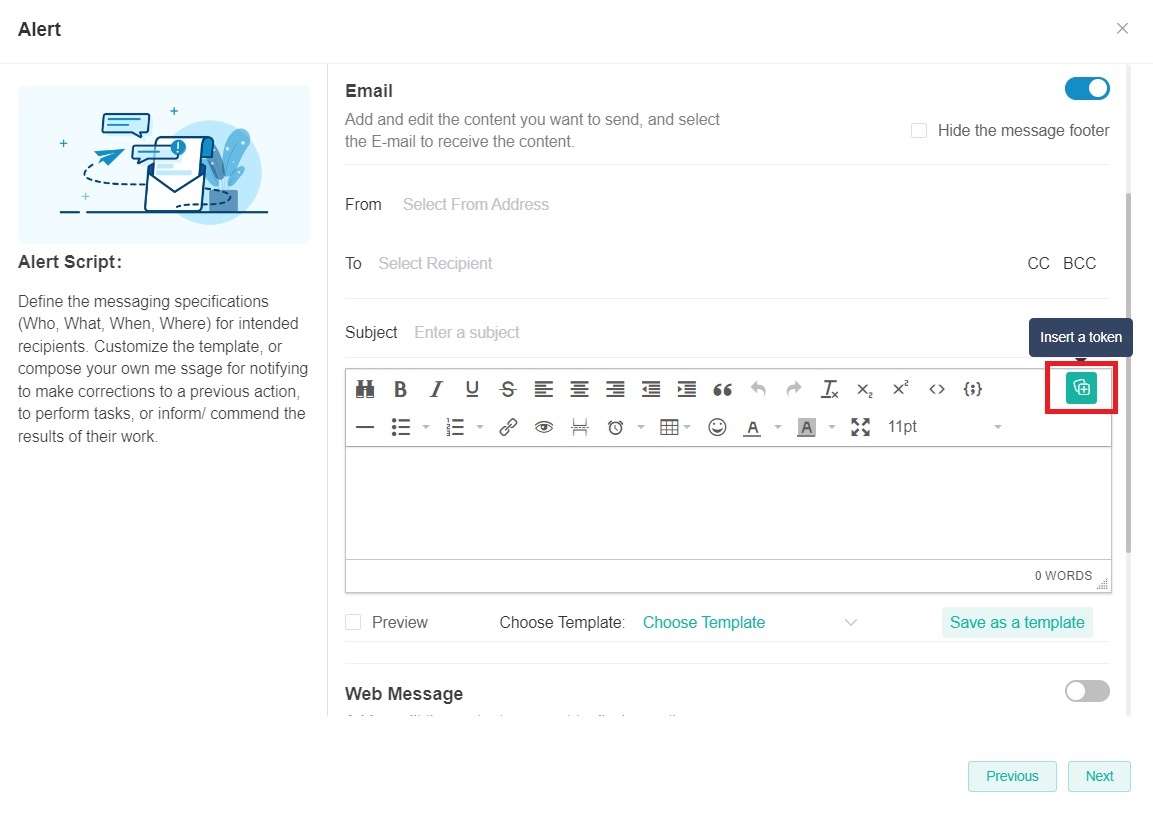
- Select the Preview checkbox to show a preview of your message.


When Preview is selected, the toggle for Light Mode or Dark Mode also appears. Light Mode is enabled by default. Click the toggle to apply Dark Mode to your email.

- Next, click Choose Template and select the message template you want to use.


Selecting a template automatically changes the message in the message box.
You can also save your message and turn it into a template.- Click Save as a template.
- Type a Template Name and select a Template Type.
- Select View After Adding to add your template in Choose Template dropdown menu.
- Click Add to save the current message as a message template.
- Click Next when done. This action takes you to the escalation script setup.
Info For instructions on sending alert messages to MS Teams, refer to the article How to set up MSPbots to send messages to a Microsoft Teams channel.
For instructions on sending alert messages to Slack, refer to the article Slack Integration Setup.
- Start by activating the channel where the bot will send the alert message. Click the toggle for any of the following to switch the channel ON:
...
- Select a Time Frame for the escalation cycle, e.g., Day, Week, or Month.
- Define the escalation steps by selecting an Escalation Threshold.
- Write the Escalation message and click the + Add Message button to create another message.
- Click the Finish button when done.
For example, selecting Week for Time Frame and 3 for Escalation Threshold will send the escalation message on the third time the bot was triggered in the week.


6. Activate the bot.
...
- Trigger - Switch this ON to make the bot available and running.
- Alert - Switch this ON to enable the sending of alerts.
- Escalation - Switch this ON to activate the escalation setup.


Overview
Content Tools