 N O T I C E
MSPbots WIKI is moving to a new home at support.mspbots.ai![]() to give you the best experience in browsing our Knowledge Base resources and addressing your concerns. Click here
to give you the best experience in browsing our Knowledge Base resources and addressing your concerns. Click here![]() for more info!
for more info!
Page History
...
This article is intended for users in administrator roles administrators who need to connect establish a connection for SQL Agent integration, E-Automate On-Premise integration, ConnectWise Automate On-Premise integration, and other integrations.
...
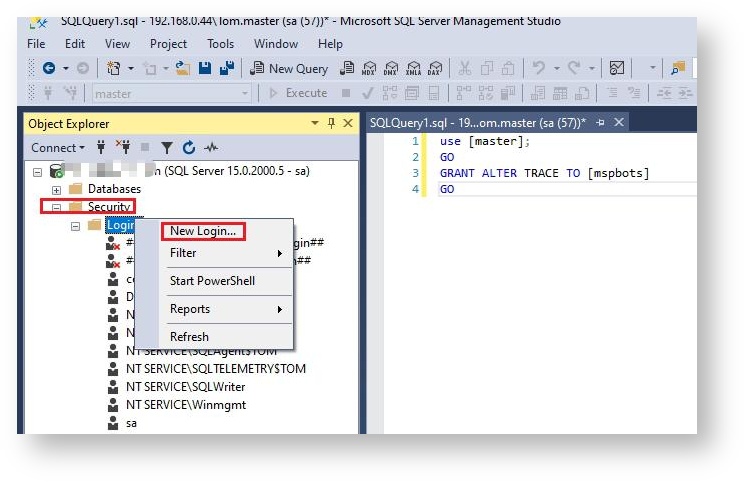
- Log in to Microsoft SQL Server Management Studio.
- Go to Logins under the Security section.
- Right-click on Logins and select New Login to create a new account.
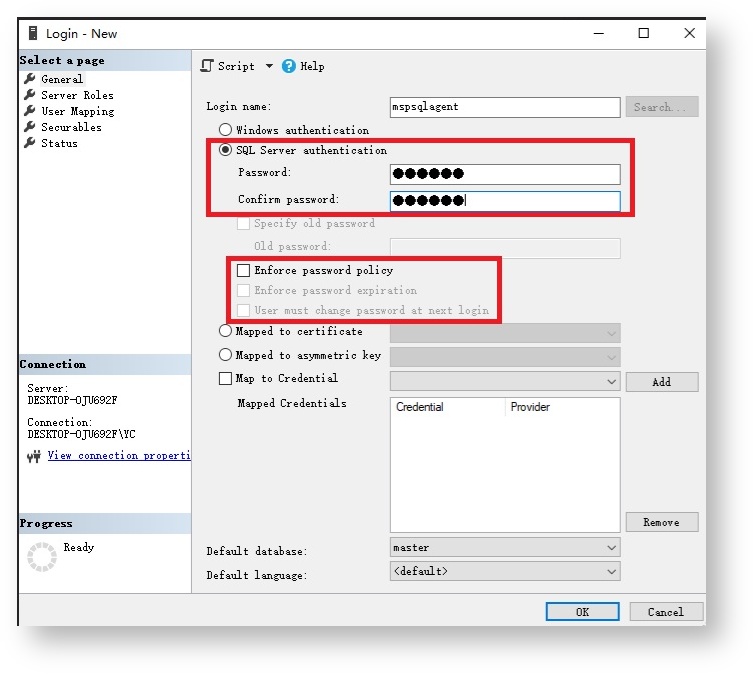
- On the General tabClick General on the Select a page menu then, fill in the following fields.
- Login name - Set a unique Login login name, for example, mspsqlagent.. Example: mspsqlagent
- Select SQL Server authentication.
- Password - Set a password.
- Confirm Password - Confirm Enter the password again.
- Uncheck Clear the checkboxes for:
- Enforce password policy
- Enforce password expiration, and
- User must change password at next login.
- Click OK.
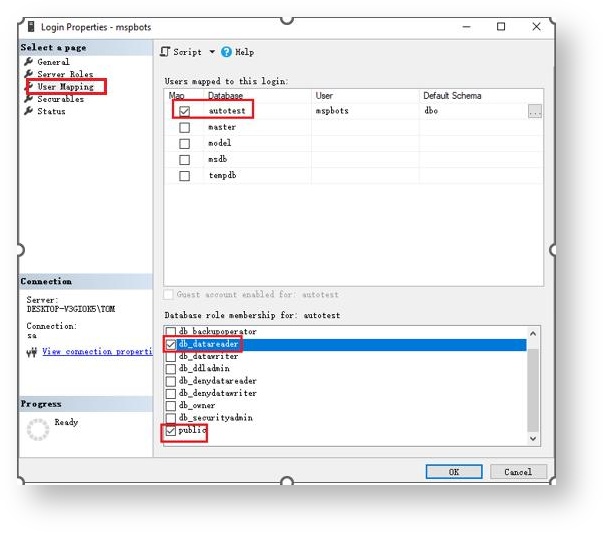
- Next, click User Mapping on the Select a page menu and do the following: Click User Mapping.
In the User mapped to this login section on the right, check select the database name you want to synchronize with MSPbots, for example, . Example: Select autotest.
In the Scroll down the Database role membership for section, check select db_datareader and public.
db_datareader - Permission This option gives permission to read data from your database.
- public - Permission This option gives permission to allow MSPbots access to your database.
Warning Giving any account full DB database access is not recommended.
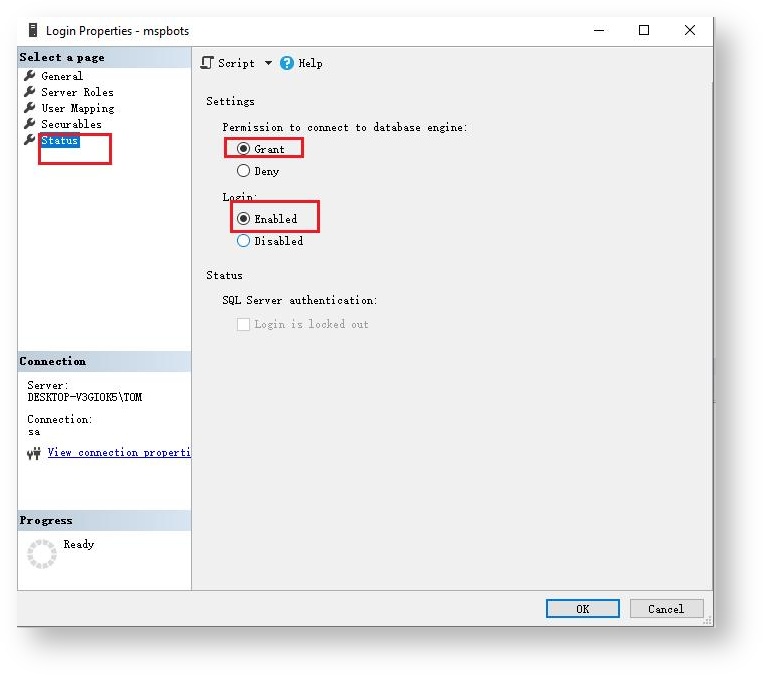
- Go back to the Select a page menu and select Click Status.
- For the Under Settings on the right, select select the Grant option for Permission to connect to the database engine option, check the Grant box.
- For the Login option, Then select Enabled for Login.
- Click OK to save your settings.
...
- Use an account with root or admin privileges to log in to theMySQL Console.
- Enter the following SQL statement to create a new MySQL account.
Where:Code Block CREATE USER 'Login Name'@'%' IDENTIFIED BY 'Password';
- Login Name - The is the login name for the newly created MySQL account, for example, mspbots.
- % - Allow will allow remote access.
- Password is the passcode to log the new user.
Example:
Password - The password used for logging in, for example, 123456.For example,Code Block CREATE USER
CREATE USER'mspbots'@'%' IDENTIFIED BY '123456';
info
alreadyNote If you
pleasehave a user already but want to create a new user,
userdelete the previous user before creating a new
Runone.
:Delete by running the SQL command
For example, if the usernamedrop user 'Username'@'%';
isExample: If you want to delete
enter:the username mspbots,
type drop user 'mspbots'@'%';
Enter the following SQL statement to grant read-only permissions to MSPbots.
Code Block GRANT Select ON Database Name.* TO 'Login Name'@'%';
Where:
- Select - Only means read data only.
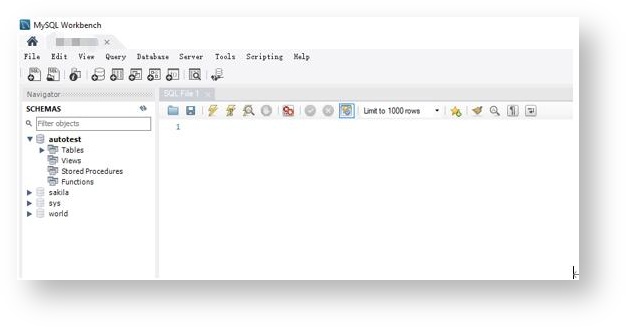
Database Name - The is the name of the database to which you want to sync data to MSPbots, for example, autotest.
- * - All means all tables or you can specify any tablestable.
- Login Name - The is the login name set when creating the MySQL account in the previous step 2, for example, mspbots.For (Step 2).
Example:
example,Code Block GRANT Select ON
GRANT Select ONautotest.* TO 'mspbots'@'%';
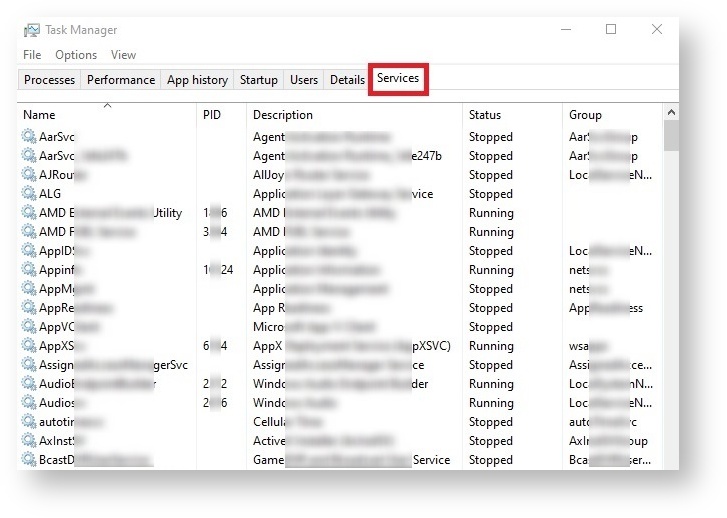
- Open the the Task Manager by typing the key combination Ctrl + Shift + Esc .
- Click Services.
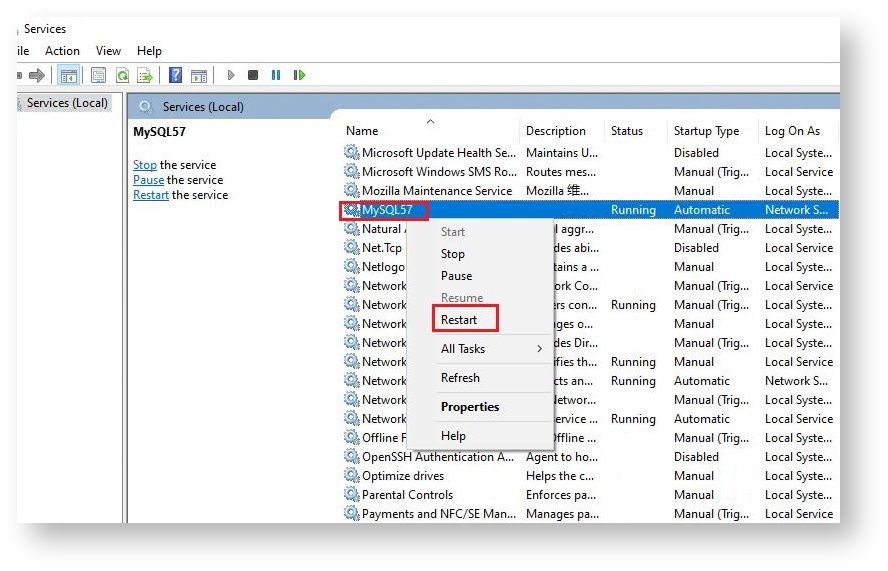
- Find MySQL service and service and right-click on it, then select to show the options, and select Restart to restart your MySQL.
Related Topics
...

