 N O T I C E
MSPbots WIKI is moving to a new home at support.mspbots.ai![]() to give you the best experience in browsing our Knowledge Base resources and addressing your concerns. Click here
to give you the best experience in browsing our Knowledge Base resources and addressing your concerns. Click here![]() for more info!
for more info!
Page History
...
- Prepare the redirect uniform resource identifier (URI) which is https://app.mspbots.ai/web/um/smtp/redirect. Once the authorization is successful, Microsoft will use this URI to notify MSPbots about the authentication result.
You can find this information with the following steps:
Go to Settings > System > Outgoing Mail in MSPbots.
Click v icon beside the +Add button and select OAuth2.
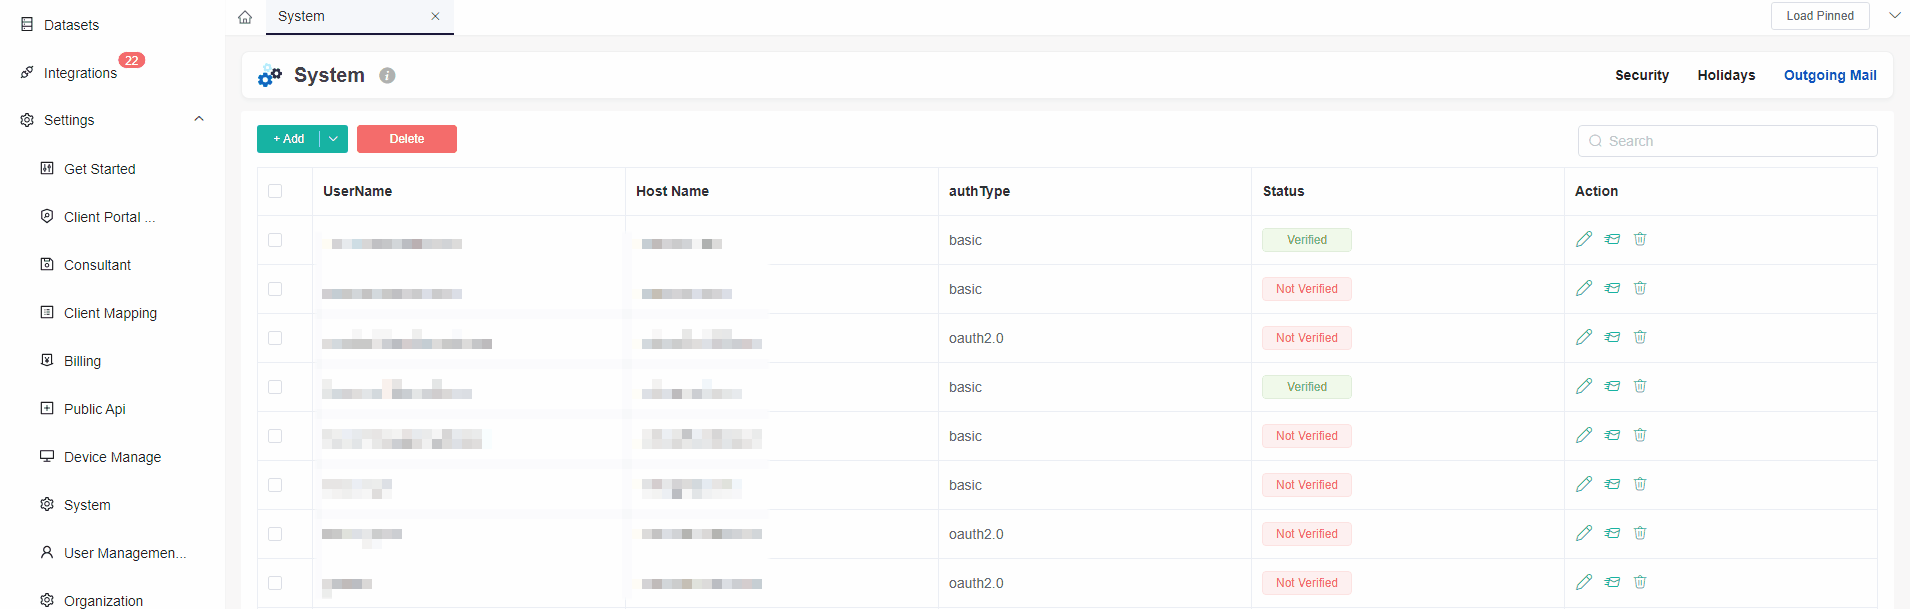
When the Add window opens, go to the Redirect URI field, copy the given URL to Notepad, and save it on your Desktop. You will need this later when adding a New registration.Anchor Redirect URI Redirect URI 
- Sign in to the Microsoft Azure portal and secure the credentials needed for the OAuth 2.0 authorization.
Create a new app registration.
On the Microsoft Azure homepage, click App registrations. If you can't find App registrations on the page, search for it in the search bar.

When the App registrations page opens, click the +New registration tab.

In the Register an application form:
Name - Enter a unique namefor your application.
Supported account types -Select Account in this organizational directory only (MSPbots.ai only - Single tenant) from the options.
Redirect URI (optional) - In the first box, select Web, and in the second box, enter the Redirect URI copied from Step 1.c.
Click Register.

Next, go to Certificates & secrets on the sidebar menu, then click +New client secret on the right under the Client secrets tab.

In the Add a client secret window:Anchor idandsecret idandsecret Description - Add a description.
Expires - Select an expiry date from the dropdown menu.

Note Before the secret expires you must create a new secret and apply it to the MSPbots Outgoing Mail settings.
- Click Add located at the bottom of the Add a client secret window.
The addition is successful once the Update application credentials pop-up window appears.

Click the copyAnchor Value Value  icon in the Value column to copy the value to Notepad and save it on your Desktop. You will need this value later when configuring OAuth 2.0 in the mail settings.
Next, go to API Permissions on the sidebar menu.
- Click the +Add a permission button.

- In requesting API permissions window, go to the Microsoft APIs tab and select Microsoft Graph.

- Next, select Delegated permissions.

- Enter SMTP in the search bar under Select permissions, then click SMTP and select SMTP.Send.

- Enter IMAP in the search bar under Select permissions, then click IMAP and put a checkmark IMAP.AccessAsUser.All.

- Click the Add permissions button.
- The permissions you added will appear in the Configured permissions list.

- Click the +Add a permission button.
- Next, go to the Overview.
Click the copyAnchor Application (client) ID Application (client) ID icon next to the Application (client) ID to copy the value to Notepad and save it on your Desktop. You will also use this value for creating the OAuth 2.0 credential in the mail settings. 
- Click the Endpoints tab.

Copy the OAuth 2.0 authorization endpoint (v2) and the OAuth 2.0 token endpoint (v2) to Notepad and save it on your Desktop, such as Notepad. You will also use these values for creating the OAuth 2.0 credential in the mail settings.Anchor authandtokenurl authandtokenurl 
...
Overview
Content Tools