 N O T I C E
MSPbots WIKI is moving to a new home at support.mspbots.ai![]() to give you the best experience in browsing our Knowledge Base resources and addressing your concerns. Click here
to give you the best experience in browsing our Knowledge Base resources and addressing your concerns. Click here![]() for more info!
for more info!
Page History
This article has the following information:
- What is the client portal?
- How to add new clients
- How to modify a client’s information
- How to assign a role to a client
- Known Issues and Future Improvement
This information applies to ConnectWise and Autotask users.
| Anchor | ||||
|---|---|---|---|---|
|
...
The client portal is used to give your client where you can give clients access to certain some reports.
How to add new clients:
| Anchor | ||||
|---|---|---|---|---|
|
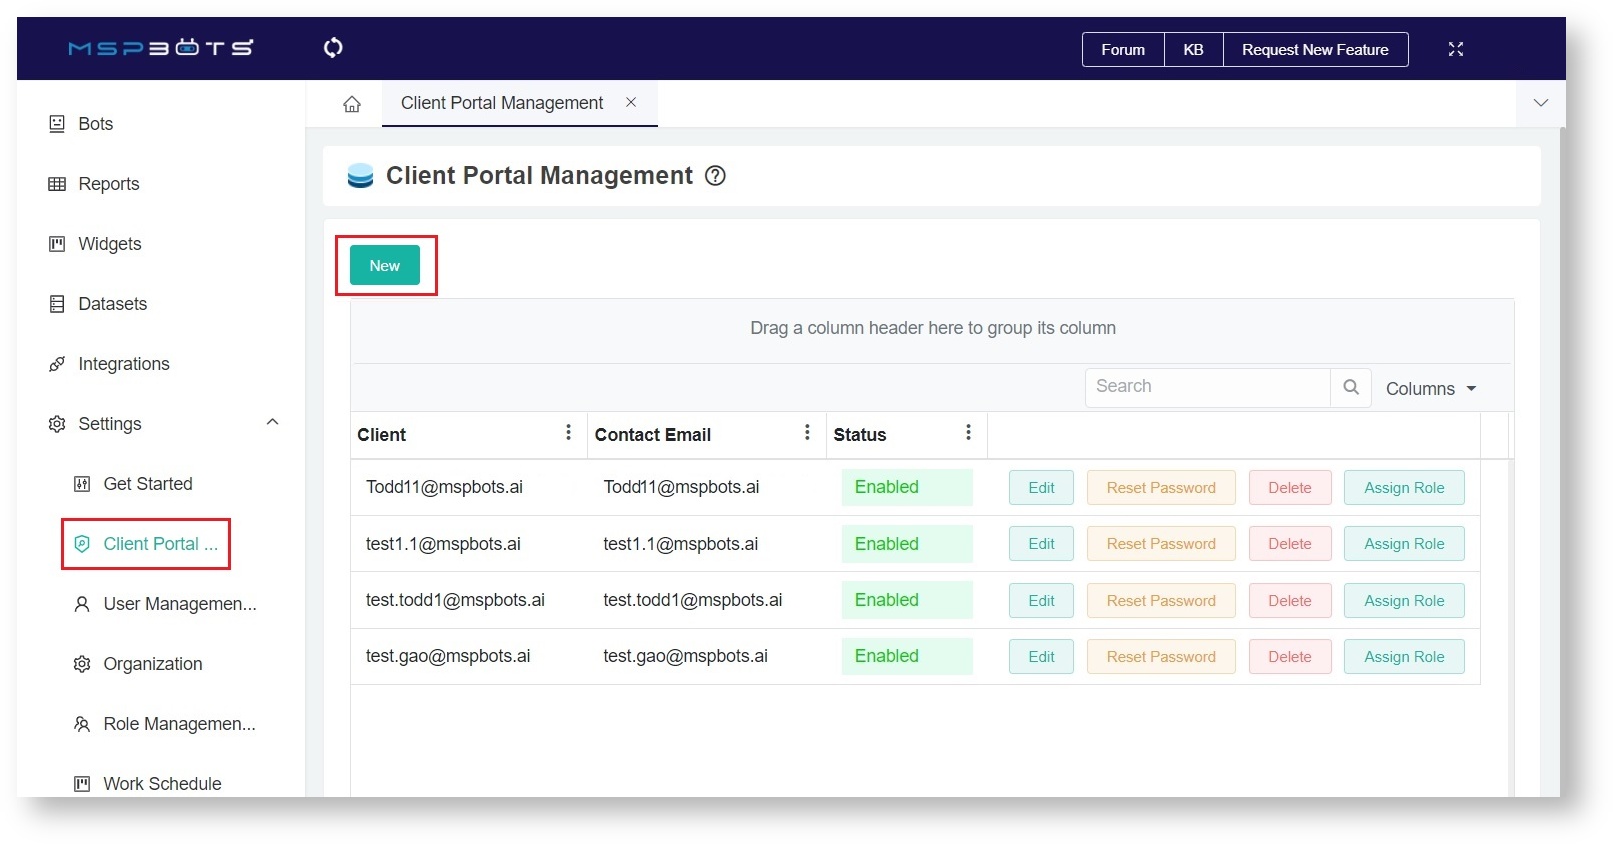
- Navigate to Settings > Client Portal.
- On the Client Management Portal, click New to display the New Client view.
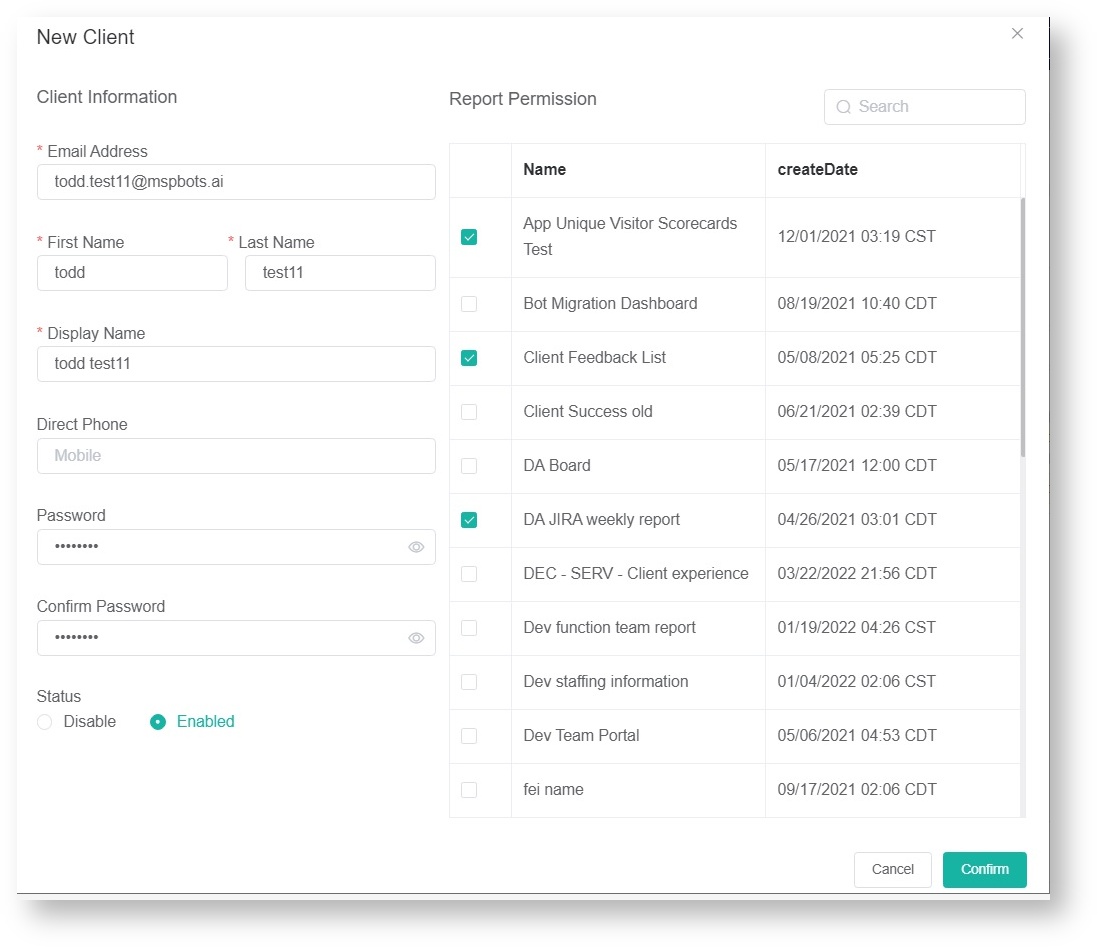
- Provide the client’s email address. This has to match the client’s email in the Connectwise/Autotask Contacts. The First Name, Last Name, and Display Name are filled automatically.
- Enter the Password and retype it to confirm.
- You have to be the Admin of the MSPbots
- Go to Settings | Client portal
- Click new
- Fill in the blanks
- The email address has to match the user's email address in Connectwise/Autotask Contacts. Select the reports that you want to share with the end-user. Note: CurrentlyFor now, there is no email that will be sent automatically to your client automaticallyTest . You can test the login with using an incognito browser first to make sure the reports look ok
- Send your client login information
- Login portal address: https://app.mspbots.ai/loginAsAccount
- Their email and password
...
- are good.
- Click Confirm to save the setting.
- Send the login portal address, email, and password to your client.
| Anchor | ||||
|---|---|---|---|---|
|
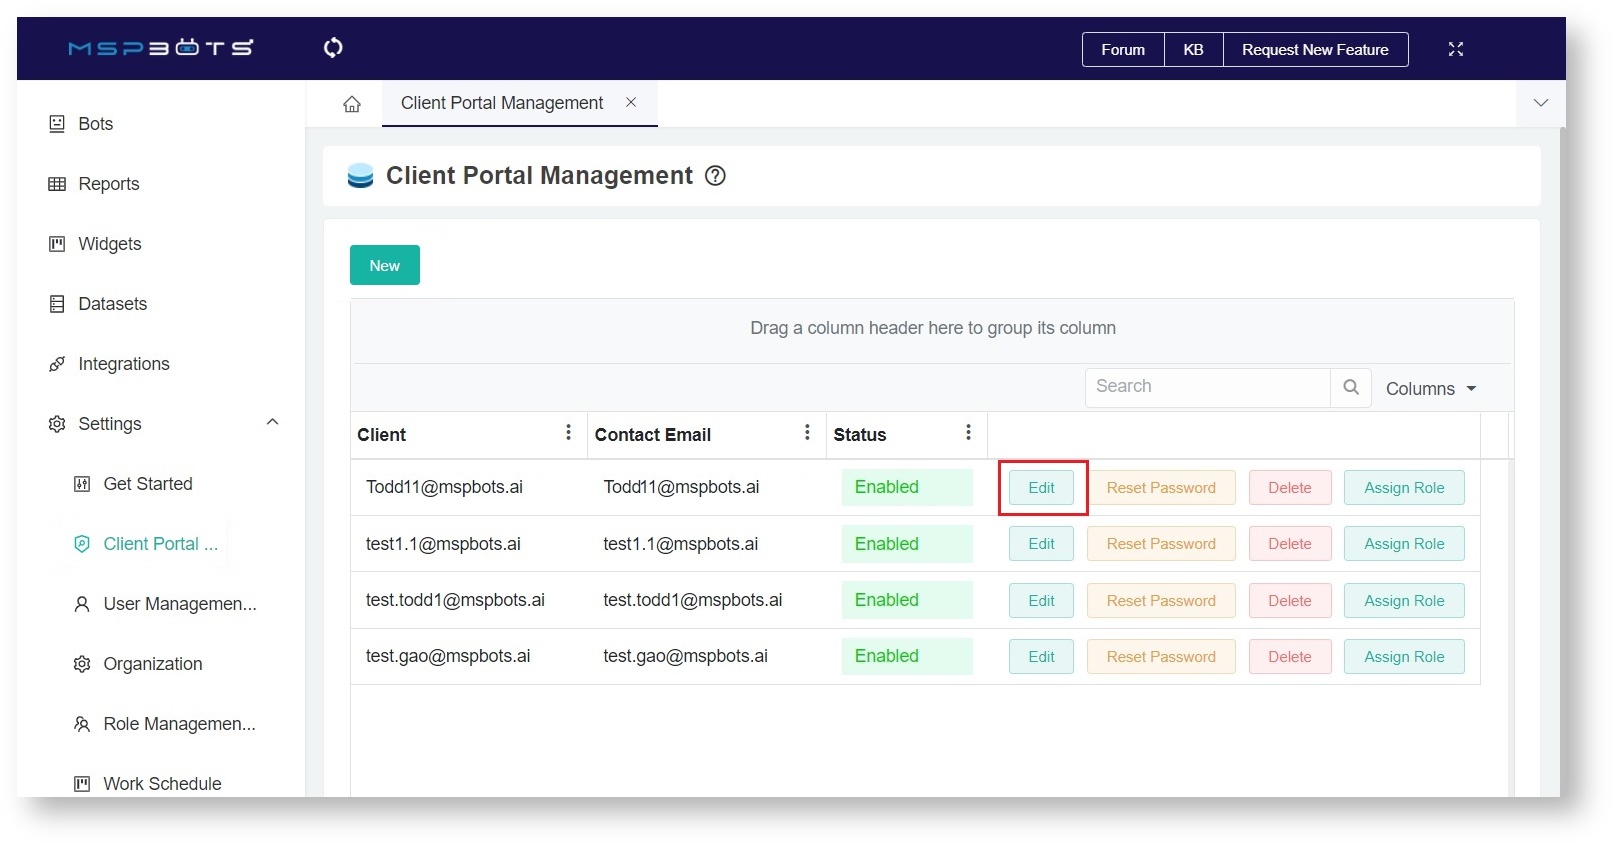
- Click Edit go to the Edit Client view.
- Modify the information that needs to be changed or updated.
- Save your modification.
| Anchor | ||||
|---|---|---|---|---|
|
- Click Edit go to the Edit Client view.
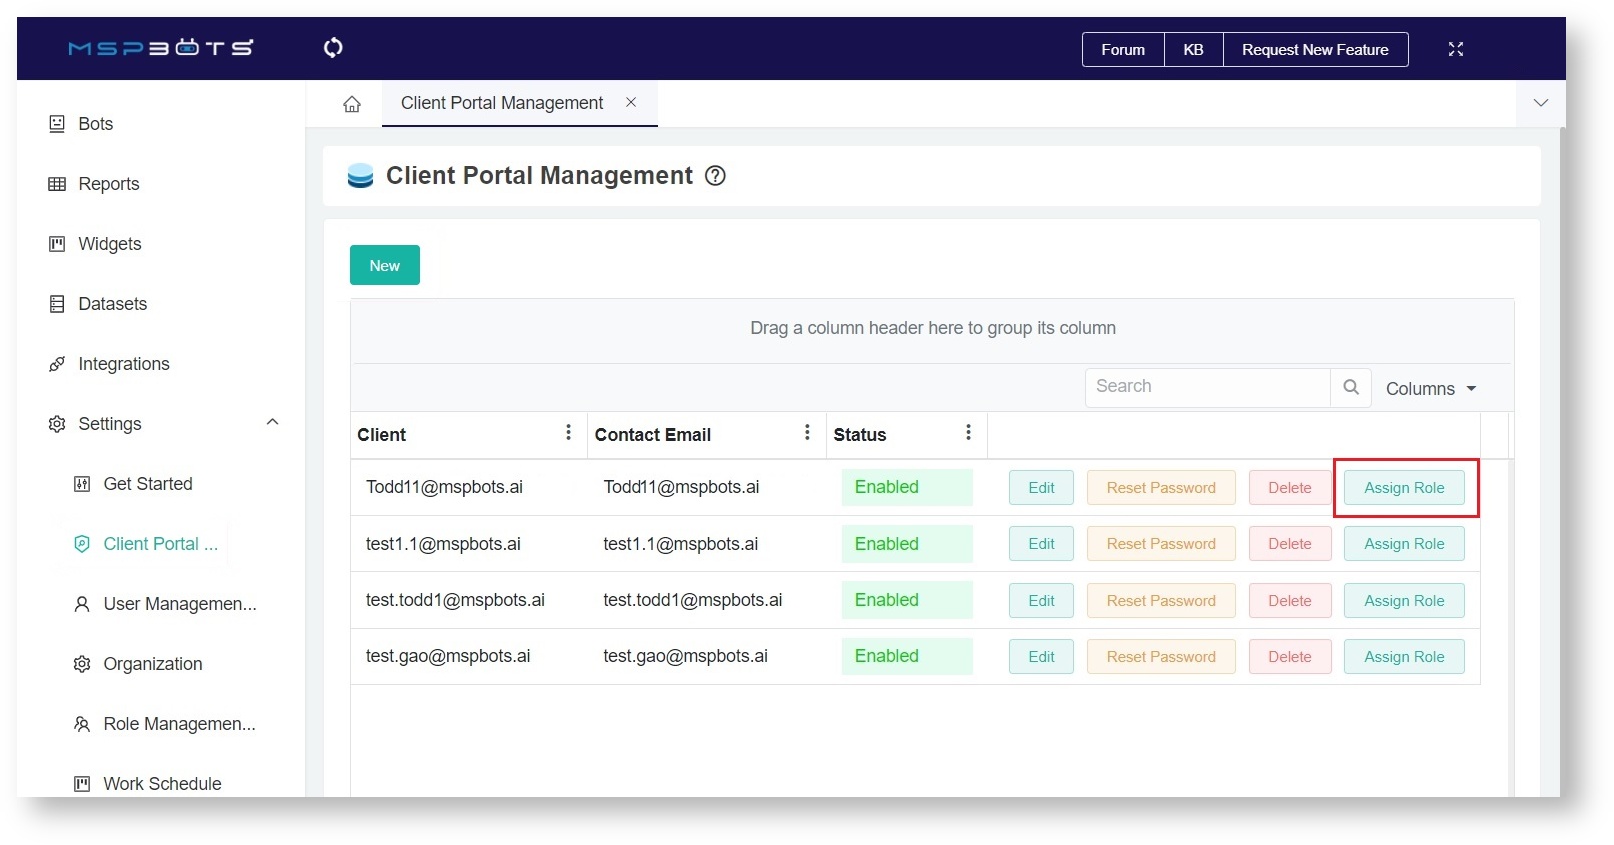
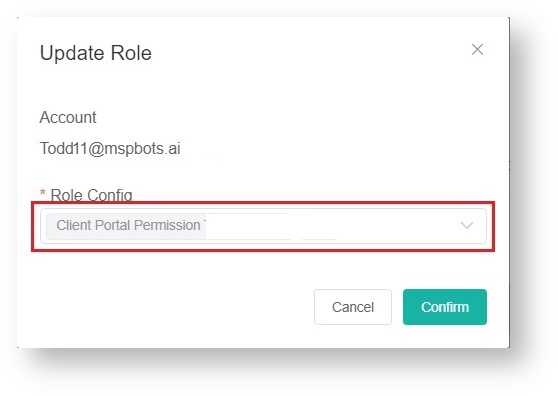
- Click the Assign Role button for the selected user.
- On the Update Role window that appears, select the role to be assigned from the Role Config dropdown list.
- Click Confirm to save.
| Anchor | ||||
|---|---|---|---|---|
|
...
You cannot add someone
...
who has an account with MSPbots already
...
. For this requirement, please send an email to support@mspbots.ai so we can add it manually.
| Content by Label | ||||||||||||
|---|---|---|---|---|---|---|---|---|---|---|---|---|
|
Overview
Content Tools
