 N O T I C E
MSPbots WIKI is moving to a new home at support.mspbots.ai![]() to give you the best experience in browsing our Knowledge Base resources and addressing your concerns. Click here
to give you the best experience in browsing our Knowledge Base resources and addressing your concerns. Click here![]() for more info!
for more info!
Page History
Not all of your company's reports can be shared with your clients. The Client Portal Management page is where you can publish reports that your clients can have access to. You can customize this portal to reflect your brand and grant access to clients who are allowed to view your data.
What's in this article:
| Table of Contents | ||
|---|---|---|
|
This information applies to ConnectWise and Autotask users.
A. How to add a client to Client Portal Management
...
- Open the MSPbots app and navigate to Settings > Client Portal Management.
- On the MSPbots AI page, hover over the Settings icon and select Client Portal Management.
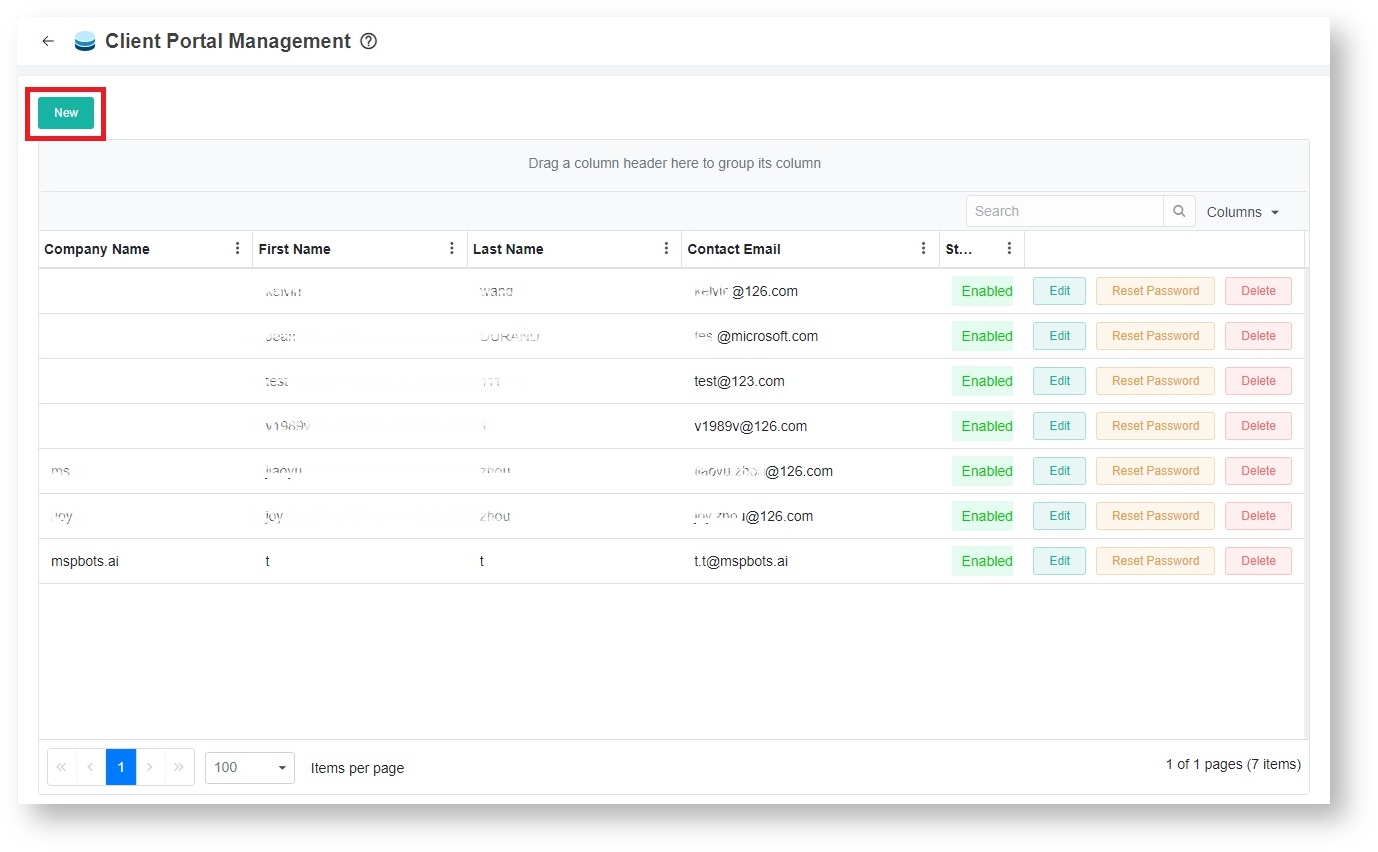
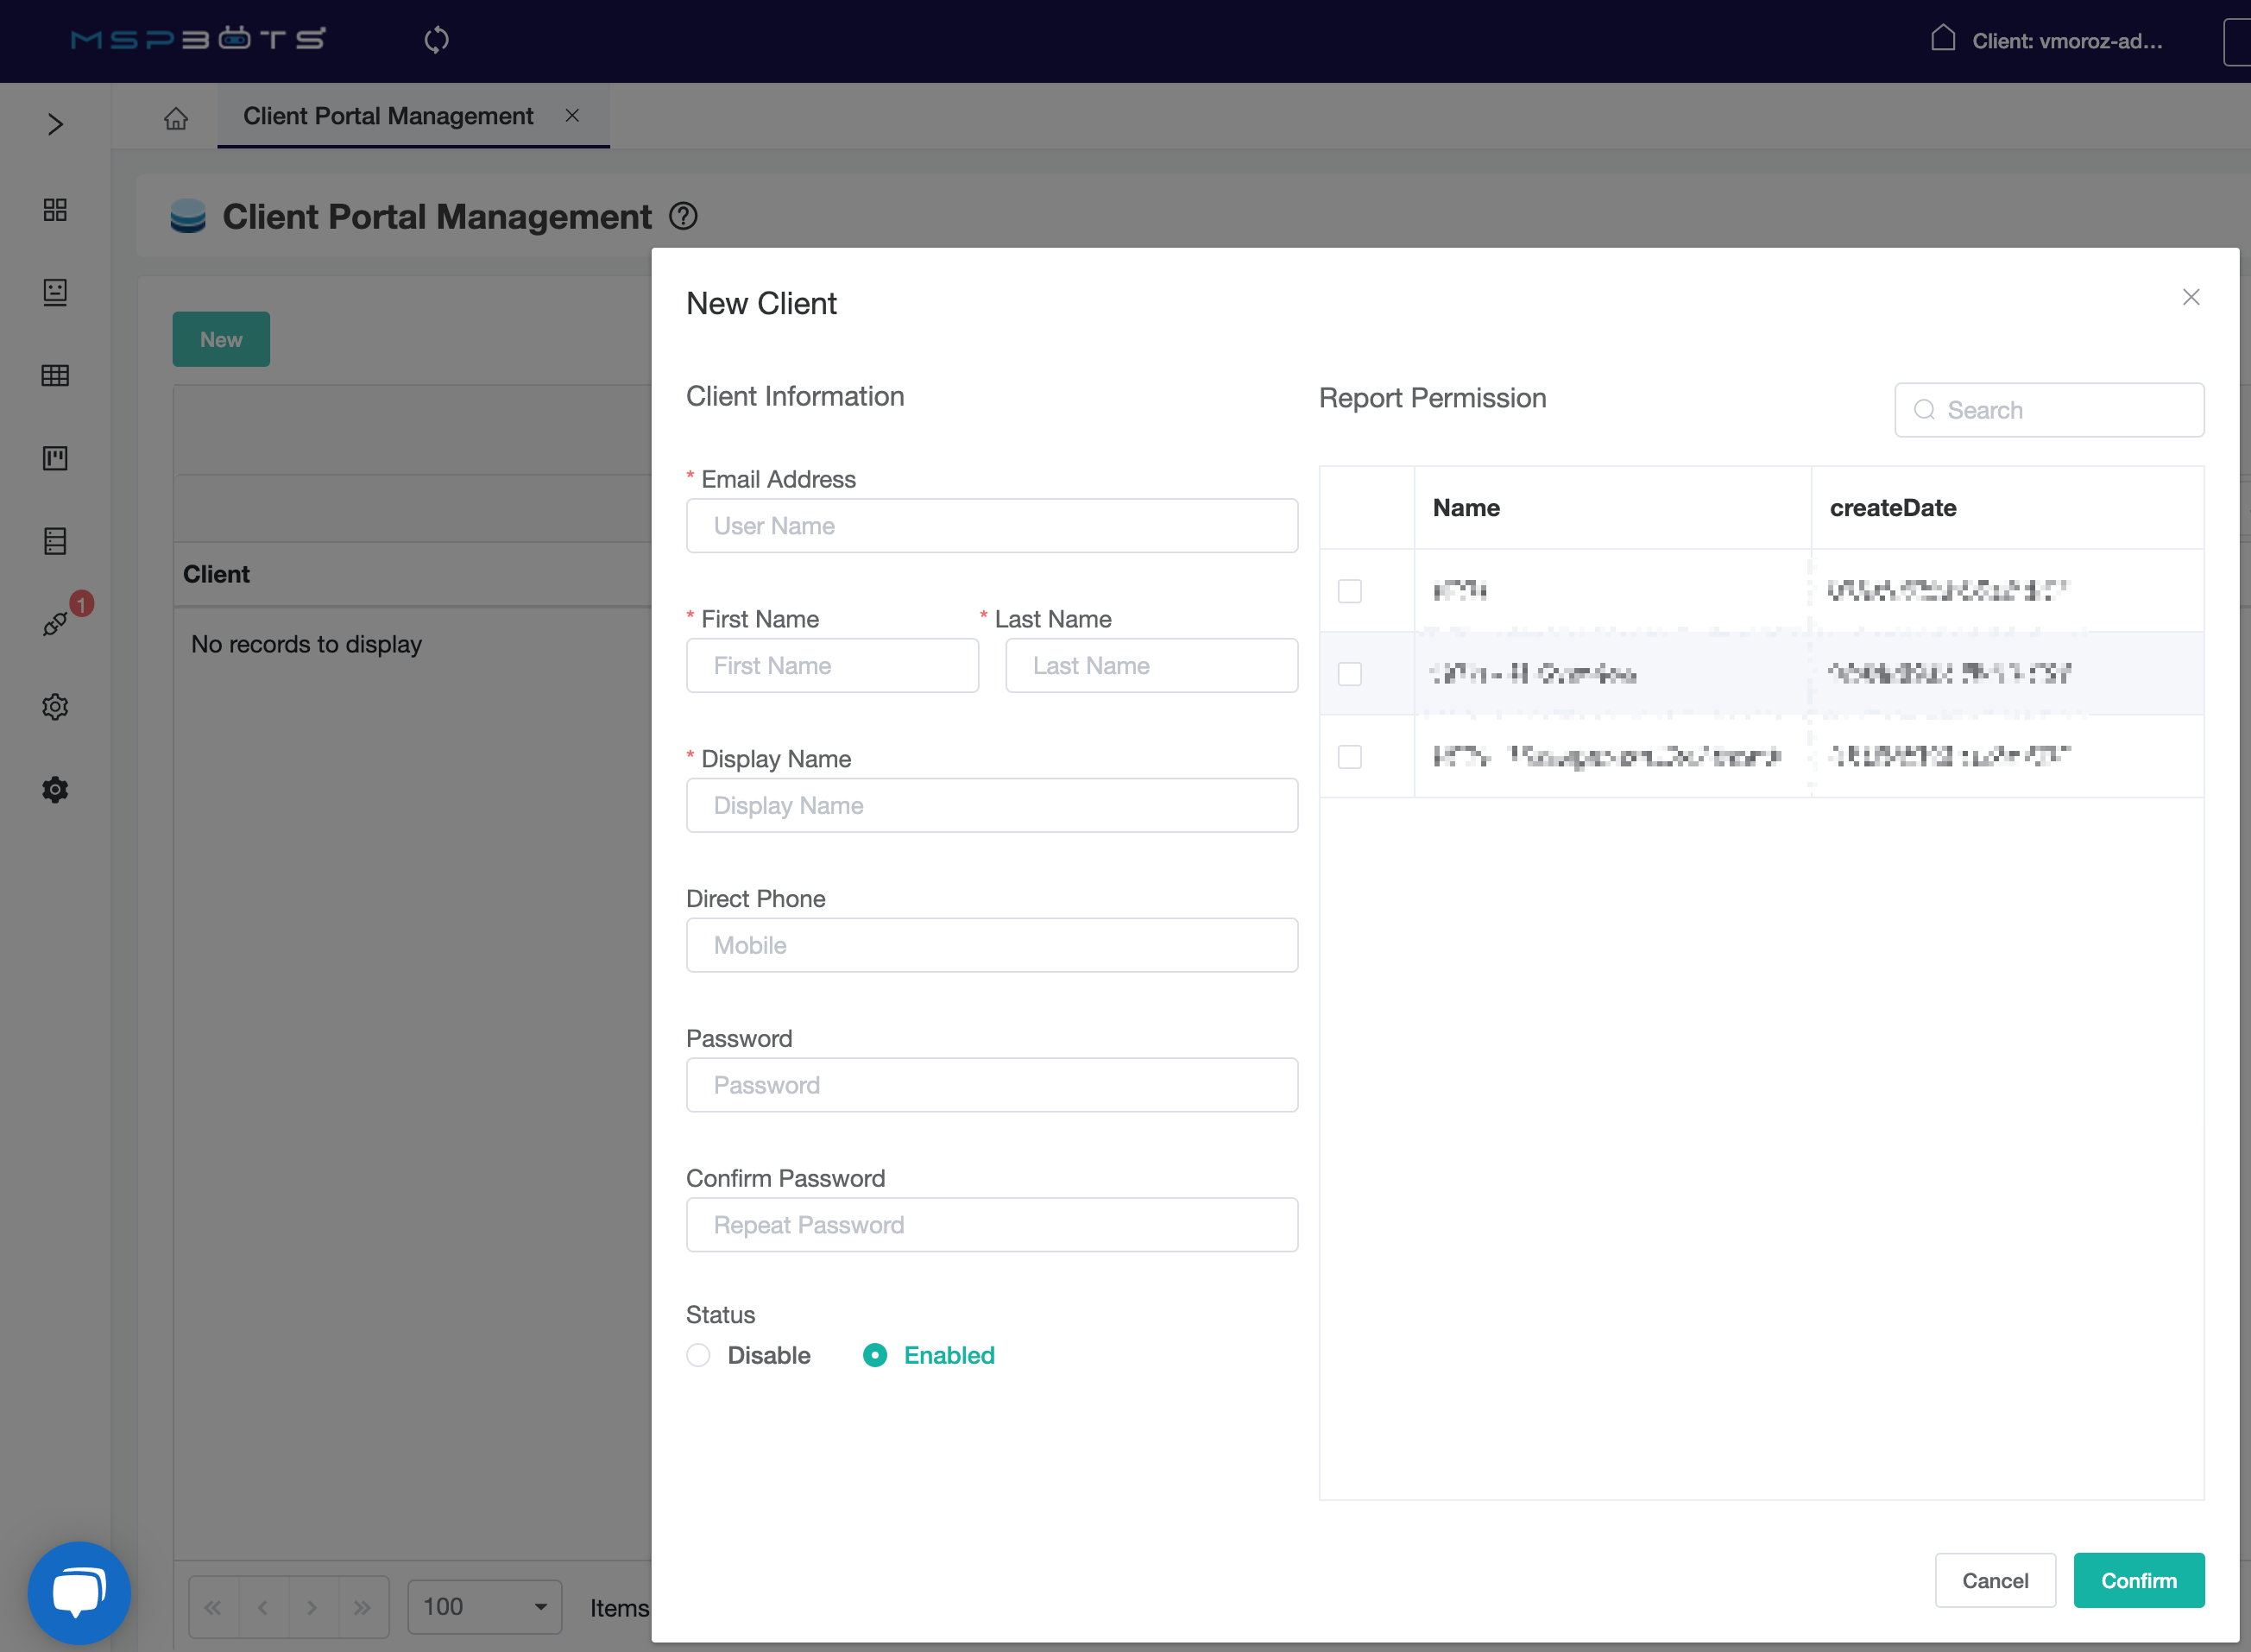
- When the Client Portal Management screen appears, click the New button to display the New Client window.
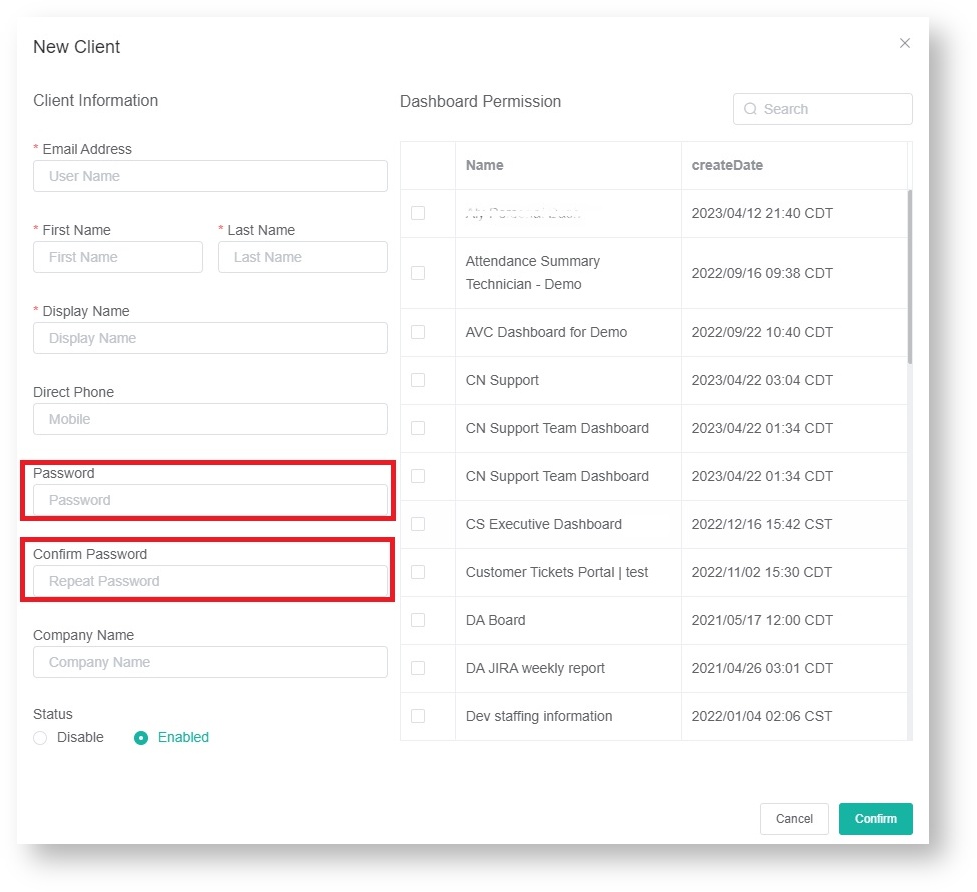
- On the New Client window, provide the client’s Email Address. This email has to match the client’s email address in the Connectwise or Autotask contacts. The First Name, Last Name, and Display Name fields are automatically populated.
- Next, enter the Password and retype it to confirm.
- Continue by selecting
| Table of Contents |
|---|
What is the client portal?
The client portal is used to give your client access to certain reports.
How to add new clients:
- You have to be the Admin of the MSPbots
- Go to Settings | Client portal
- Click new
- Fill in the blanks
- The email address has to match the user's email address in Connectwise/Autotask Contacts. Select the reports that you want to share with the end-user
- Note: Currently, there is no email that will be sent to your client automatically
- Test the login with an incognito browser first to make sure the reports look ok Send your client login informationLogin portal address: your clients.
- Click Confirm to save the setting. You can now send the login portal address, email, and password to your client.
| Tip |
|---|
For now, the app does not automatically send emails to clients. You can test the login from an incognito browser to ensure the reports are working properly. |
B. How to modify a client’s information
...
- On the MSPbots page, hover over the Settings icon and select Client Portal Management.
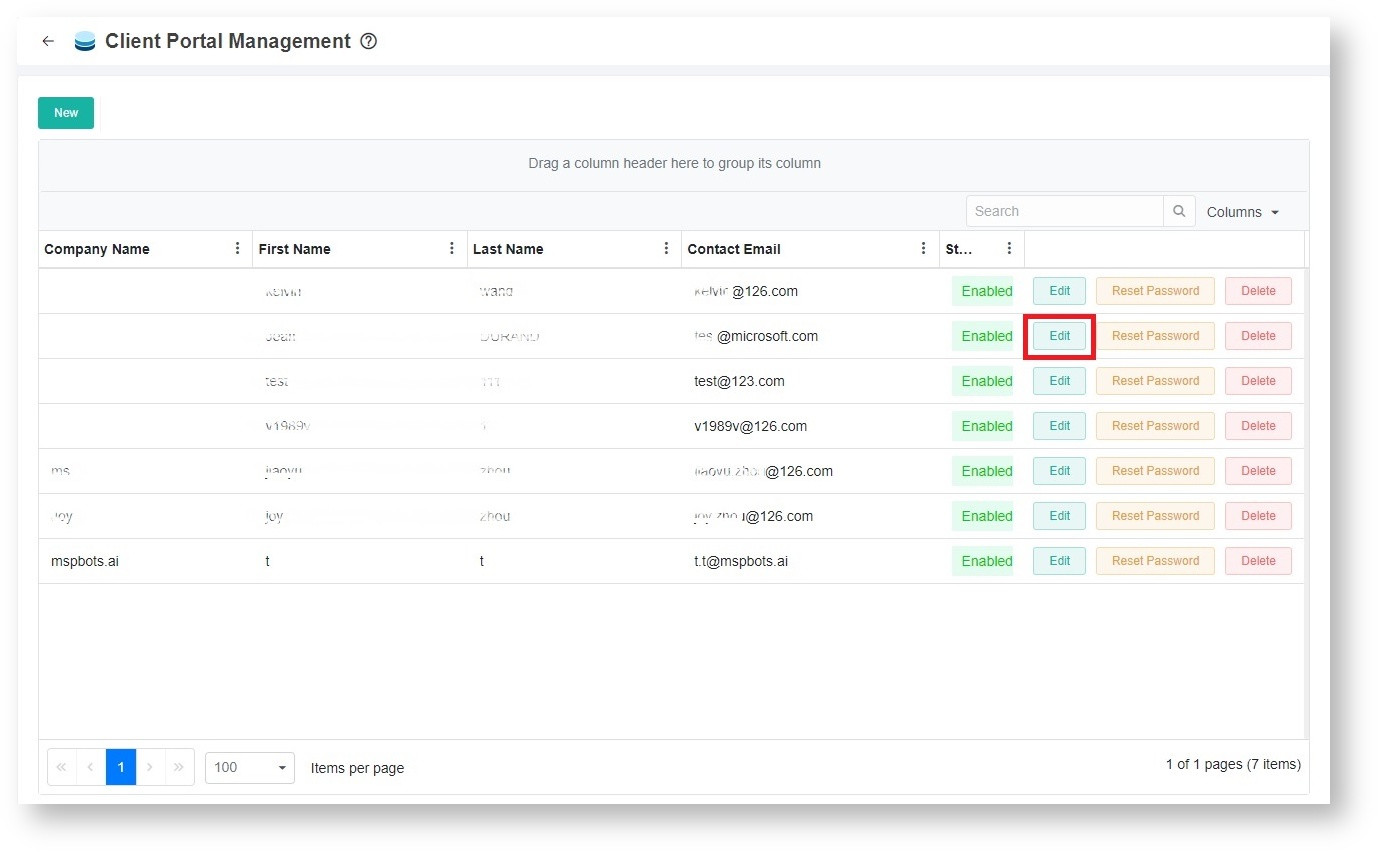
- When the Client Portal Management screen appears, click the Edit button corresponding to the client whose information needs to be modified.
- When the Edit Client window appears, modify the information that needs to be changed or updated.
- Click Confirm to save your modification.
Watch the video guide
| Widget Connector | ||
|---|---|---|
|
C. How to customize the Client Portal according to your brand
...
- On the Client Management Portal, click the Settings icon and select Customize Your Brand.
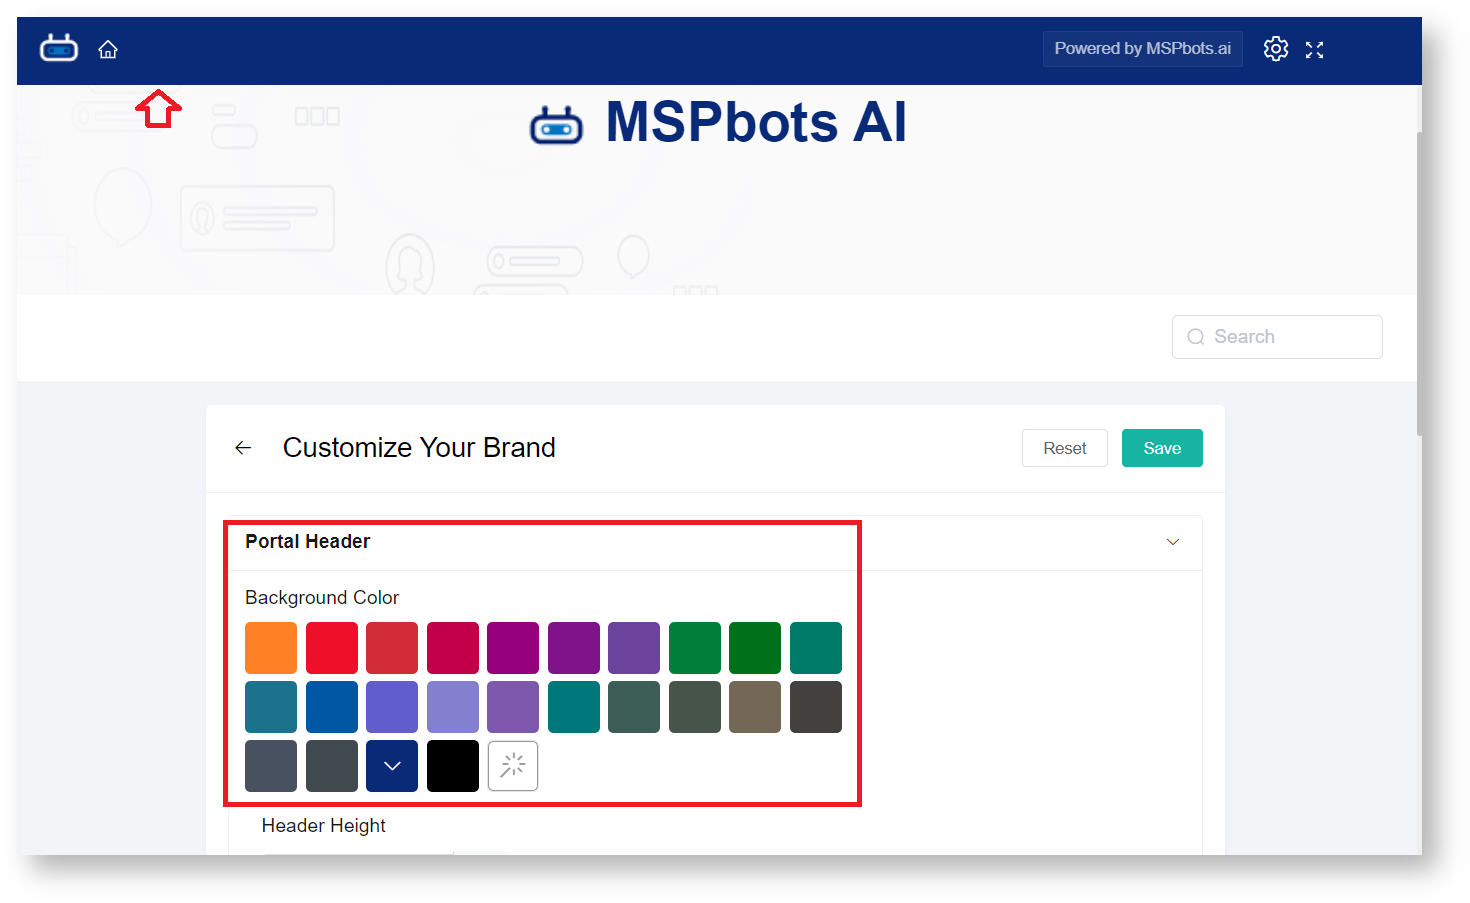
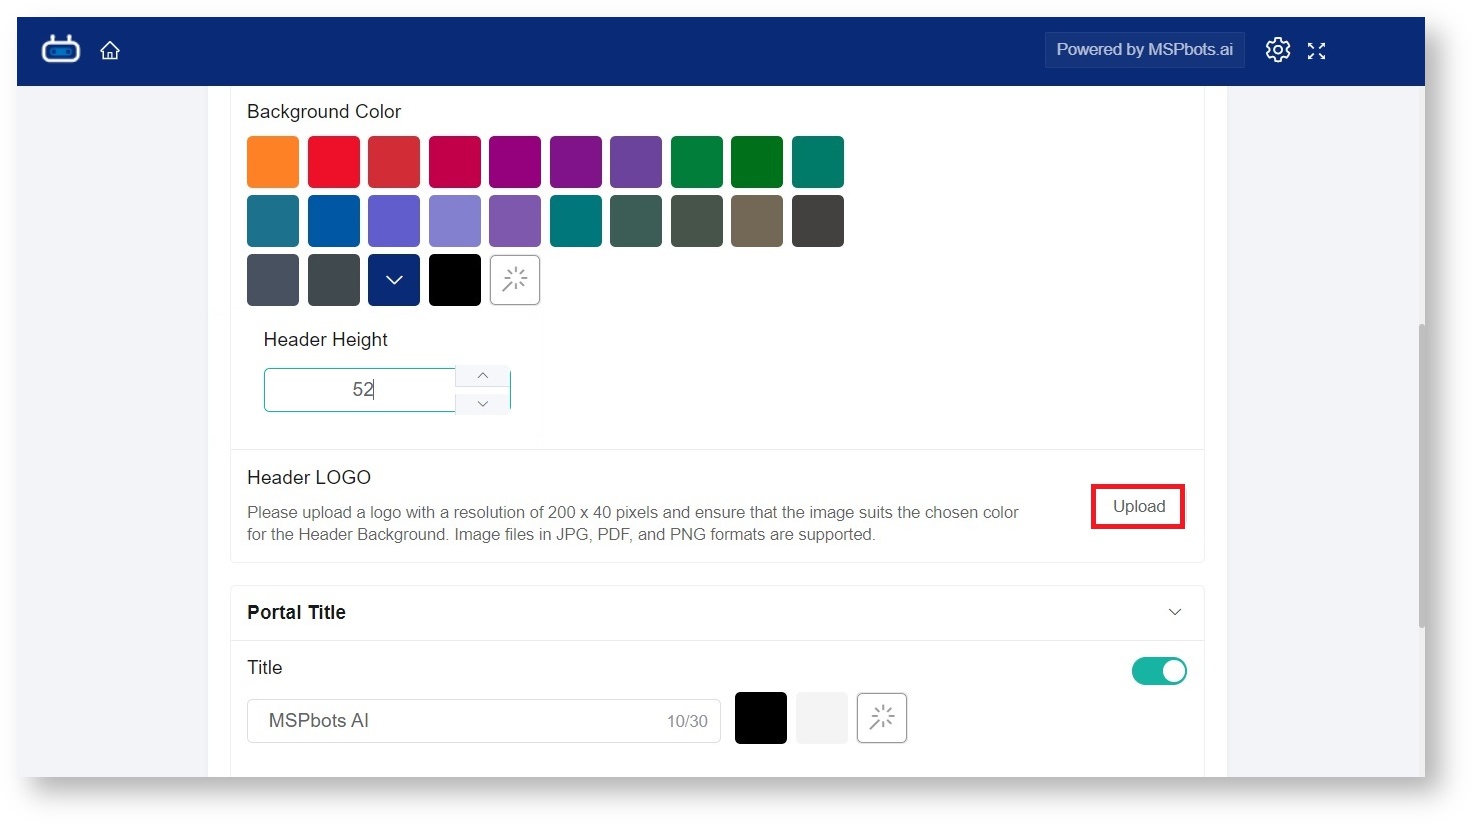
- Configure the Portal Header by setting the Background Color, Header Height, and Header Logo.
Tip The header automatically applies your modifications so you can readily preview your customizations.
- First, set the Background Color by selecting a color for the Portal Header. This step will modify the color of the bar on top of the page which is blue by default.
- Next is to modify the Header Height according to your preference. Use the or buttons to adjust the thickness of the portal header.
- Then customize the Header LOGO by clicking the Upload button to upload your logo to the portal header.
- First, set the Background Color by selecting a color for the Portal Header. This step will modify the color of the bar on top of the page which is blue by default.
- Next, scroll down on the page and configure the Portal Title by setting the Title, Brand Logo, Layout, and Brand Image.
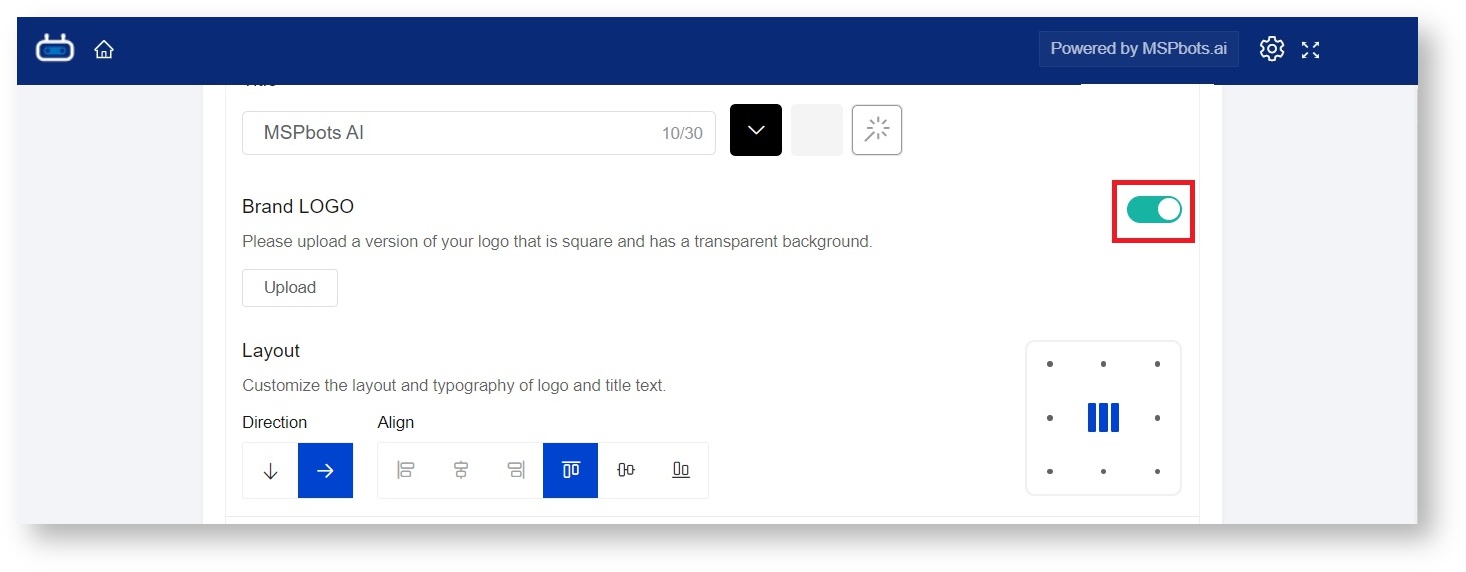
- Start with the Title. Click the switchto enable setting the Title.
- Enter a name for the Title and set its font color by clicking the button with a wand.
- Select a color and click OK.
- Next, upload your Brand LOGO.
- Click the switch to enable setting the Brand LOGO.
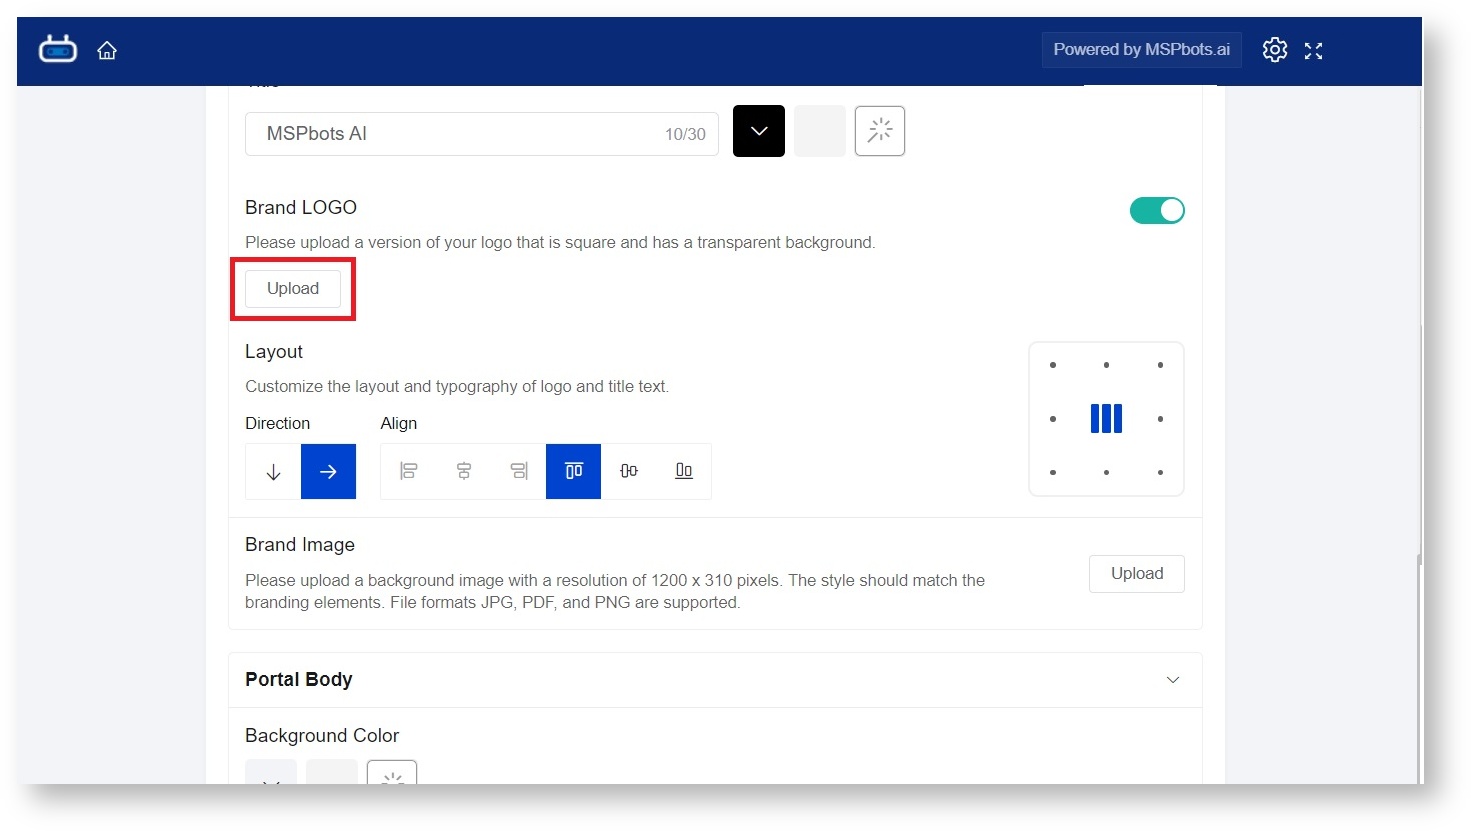
- Click the Upload button to upload your company logo. Use an image that is square and has a transparent background.
- Click the switch to enable setting the Brand LOGO.
- Then customize the Layout of the Portal Title.
Do this by selecting the Direction and Align (Alignment) for your Portal Title.
You can also adjust the placement of the Portal Title by selecting a location represented by the dots. - The last modification for Portal Title is to set the Portal Brand Image.
To customize the Portal Brand Image, click the Upload button and upload a background image with a resolution of 1200 x 310 pixels. File formats JPG, PDF, and PNG are supported.
- Start with the Title. Click the switchto enable setting the Title.
- Next, configure the Portal Body by selecting a Background Color.
- Click the button with a wand to show the available colors.
- Choose a color and click OK.
- Click the button with a wand to show the available colors.
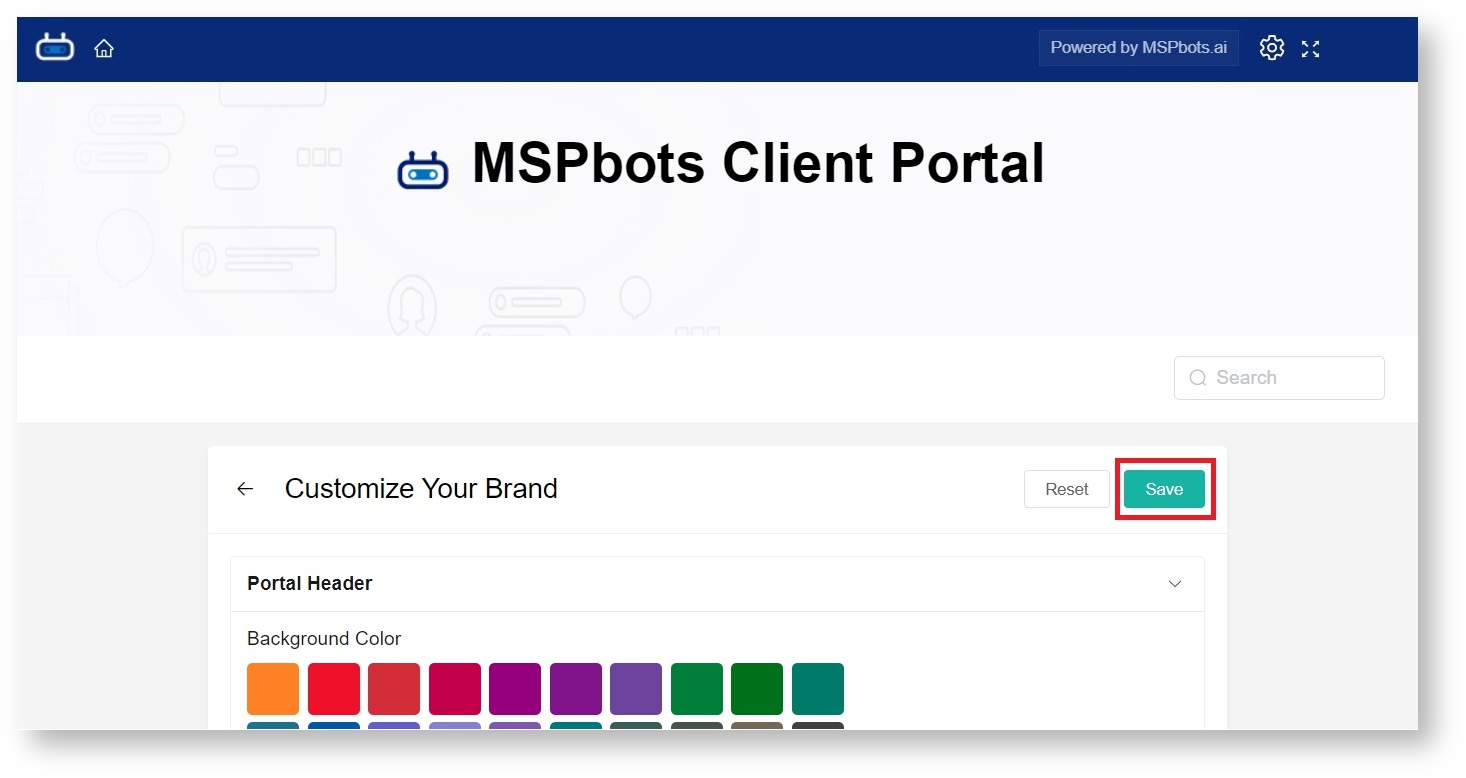
- When you're done customizing, scroll up the page and click Save.
Click Reset if you want to change or undo your modifications.
D. Sending login information to your client
...
Use the template below to get in touch with your client.
Dear [client's first name],
Here is the information you need when logging in to your client dashboard:
- Login portal address: https://app.mspbots.ai/loginAsAccount
...
- Your email and password
E. Known Issues and Future
...
Improvement
...
You cannot add a client who has an account with MSPbots already
...
. For this requirement, please send an email to support@mspbots.ai so we can add it manually.
| Content by Label | ||||||||||||
|---|---|---|---|---|---|---|---|---|---|---|---|---|
|


