 N O T I C E
MSPbots WIKI is moving to a new home at support.mspbots.ai![]() to give you the best experience in browsing our Knowledge Base resources and addressing your concerns. Click here
to give you the best experience in browsing our Knowledge Base resources and addressing your concerns. Click here![]() for more info!
for more info!
Page History
...
- Go to Bots in the MSPbots app and open the ConnectWise Manage Attached Agreement Prompter (Company Name) bot.
- Click the Design tab and select the configuration that you want to edit: Real-time Data, DataFilter, Alert, or Escalation.

- To edit Real-time Data:
- Hover over the ellipsis ... icon and click Edit.

- Select an option for Data Source from the drop-down menu and click Next. This action continues to the editing of the DataFilter.

- Hover over the ellipsis ... icon and click Edit.
- To edit Data Filter:
- Go to DataFilter, hover over the ellipsis ... icon, and select Edit.

- Edit the default settings by clicking the
 button. This action allows you to add a new group and/or conditions.
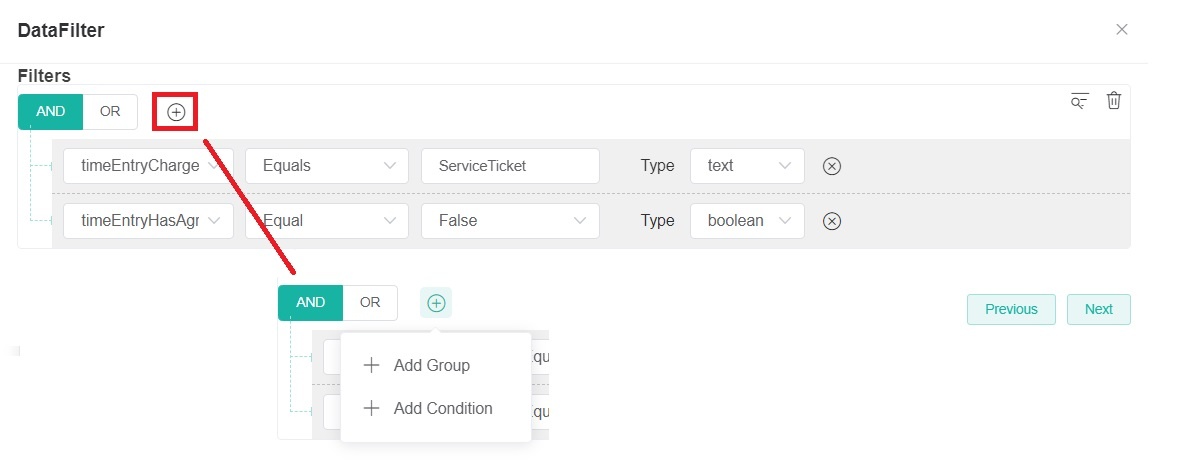
- Click Next when done and ready to edit the Alert script. If you want to skip editing the Alert script message modal, click Next on the Alert window.
- Go to DataFilter, hover over the ellipsis ... icon, and select Edit.
- To edit the Alert script:
- Go to Alert, hover over the ellipsis ... icon, and select Edit.

- Select an option for sending the alert messages and switch the toggle button ON to activate the bot.
- Update the To field with the recipient's email.
- Customize your alert message.
- Click Next to save and proceed to Escalation script setup.

- Go to Alert, hover over the ellipsis ... icon, and select Edit.
- To edit Escalation:
- Go to Escalation, hover over the ellipsis ... icon, and select Edit.

- Select Day, Week, or Month as cycle for escalation Time Frame.


- Define the Steps, Threshold, and Messages per escalation level.
- Click Finish when done.
- Go to Escalation, hover over the ellipsis ... icon, and select Edit.
...
Related Integration
- Active ConnectWise Manage
- Active Microsoft Teams
Overview
Content Tools