 N O T I C E
MSPbots WIKI is moving to a new home at support.mspbots.ai![]() to give you the best experience in browsing our Knowledge Base resources and addressing your concerns. Click here
to give you the best experience in browsing our Knowledge Base resources and addressing your concerns. Click here![]() for more info!
for more info!
Page History
...
| Table of Contents | ||
|---|---|---|
|
Set up the name and email of the technician who will receive the bot alert.
a. Navigate to Widgets on the MSPbots app menu.
...
h. Click the Copy Share Link icon to copy the link to this widget and save it for later.
i. Close the widget.
Select the widget for bot creation.
a. Go to the Dashboard where the widget is located.
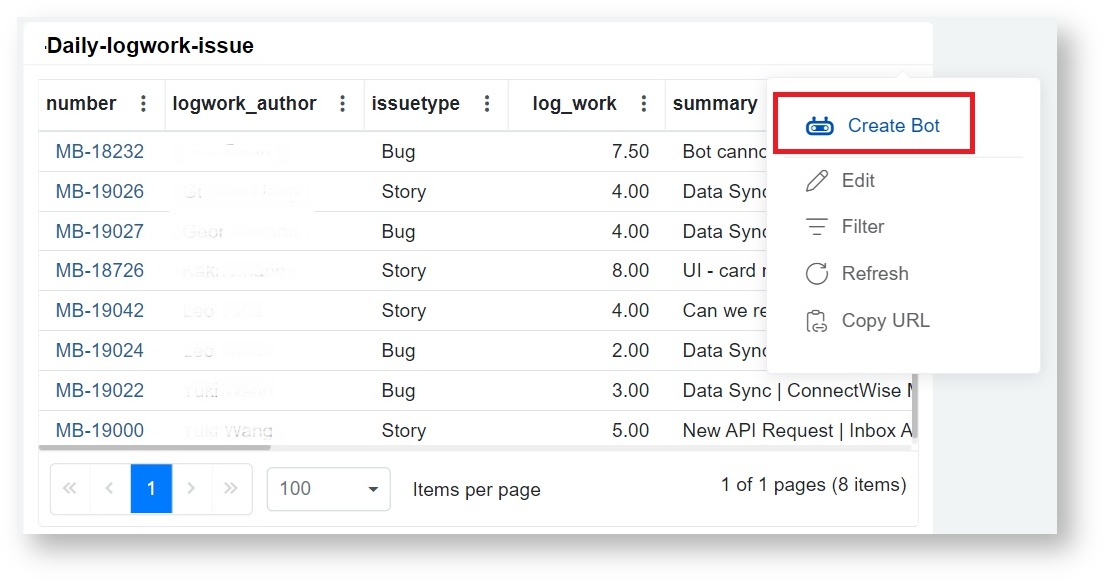
b. Find the widget. Hover over the ellipsis ... button, then select Create Bot.
Create the bot.
a. When the Create a new bot window opens, enter a name in the Bot Name field.
...
Note: The Trigger screen or form is also accessible from the Design tab.
Set up the bot trigger.
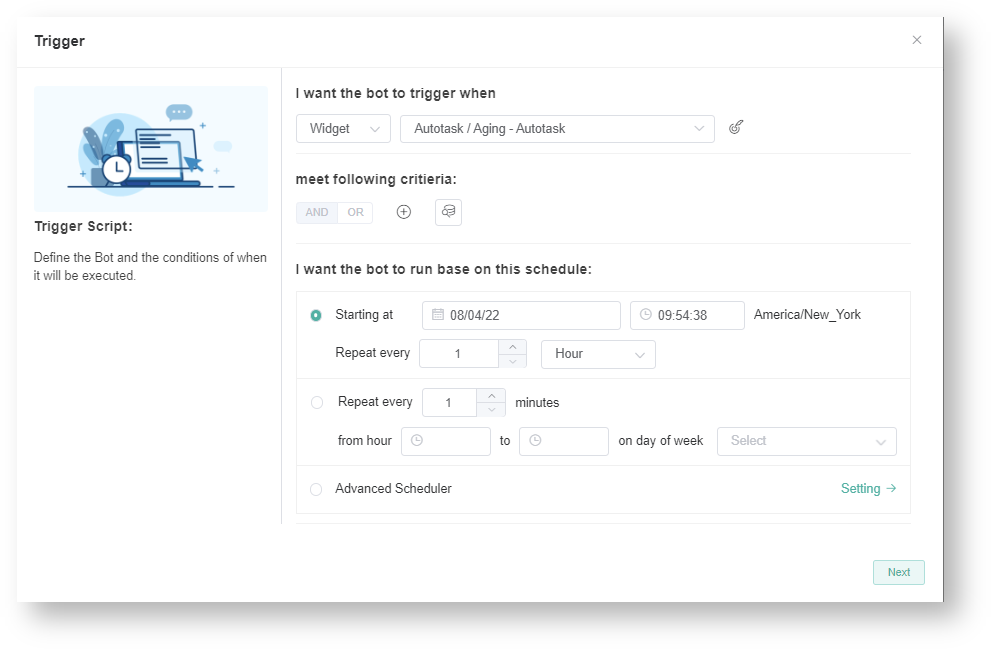
a. Proceed by setting the Trigger script. The widget field inherits the name of the widget selected in Step 2b.
...
c. Go to the I want the bot to run based on this schedule section and set the time and frequency for running the bot.
Set up Advanced Scheduling (Optional)
a. To set up advanced scheduling, scroll down to the Advanced Scheduler section on the Trigger screen.
...
d. Click the Next button to continue to the steps for defining the bot alert script.
Define the bot alert script.
a. Start by activating the channel where the bot will send the alert message. Click the slide button for any of the following to switch it ON:
...
c. Click Next when done. This action takes you to the escalation script setup.
Set the escalation script.
The escalation recipient can be a manager and/or a next-level manager, depending on your requirement. You can also set several escalation steps as needed.
...
d. Click the Finish button when done.
Activate the bot.
To start sending alerts, activate the bot by going to the Detail tab and turning the following switches ON:
...


