 N O T I C E
MSPbots WIKI is moving to a new home at support.mspbots.ai![]() to give you the best experience in browsing our Knowledge Base resources and addressing your concerns. Click here
to give you the best experience in browsing our Knowledge Base resources and addressing your concerns. Click here![]() for more info!
for more info!
Page History
Setting up a NinjaOne integration with MSPbots is done by authorizing
...
NinjaOne in MSPbots and configuring the data source.
...
To set up and connect NinjaOne:
...
Enter the Client ID, and Client Secret.
...
What's in this article:
| Table of Contents | ||
|---|---|---|
|
Set up and connect NinjaOne
...
- Generate the Client ID and Client Secret for NinjaOne.
- Log in to your NinjaOne instance with a system user that has access to generate API Credentials.
- Log in to your NinjaOne instance with a system user that has access to generate API Credentials.
...
- Once logged in, navigate to Configurations on the left-hand side of your instance.
...
- Then, navigate to Integrations under the Configurations options.
...
- Once you are on the Integrations screen, you should see a list of your current API Keys and other integration settings. You will want to select Generate API Key in the top right-hand corner of the page. If you desire, include a description for the API Key.
...
- Then, note down the Access Key ID and Secret Access Key for your Inspector setup. Close the window once you take note of the credentials.
...

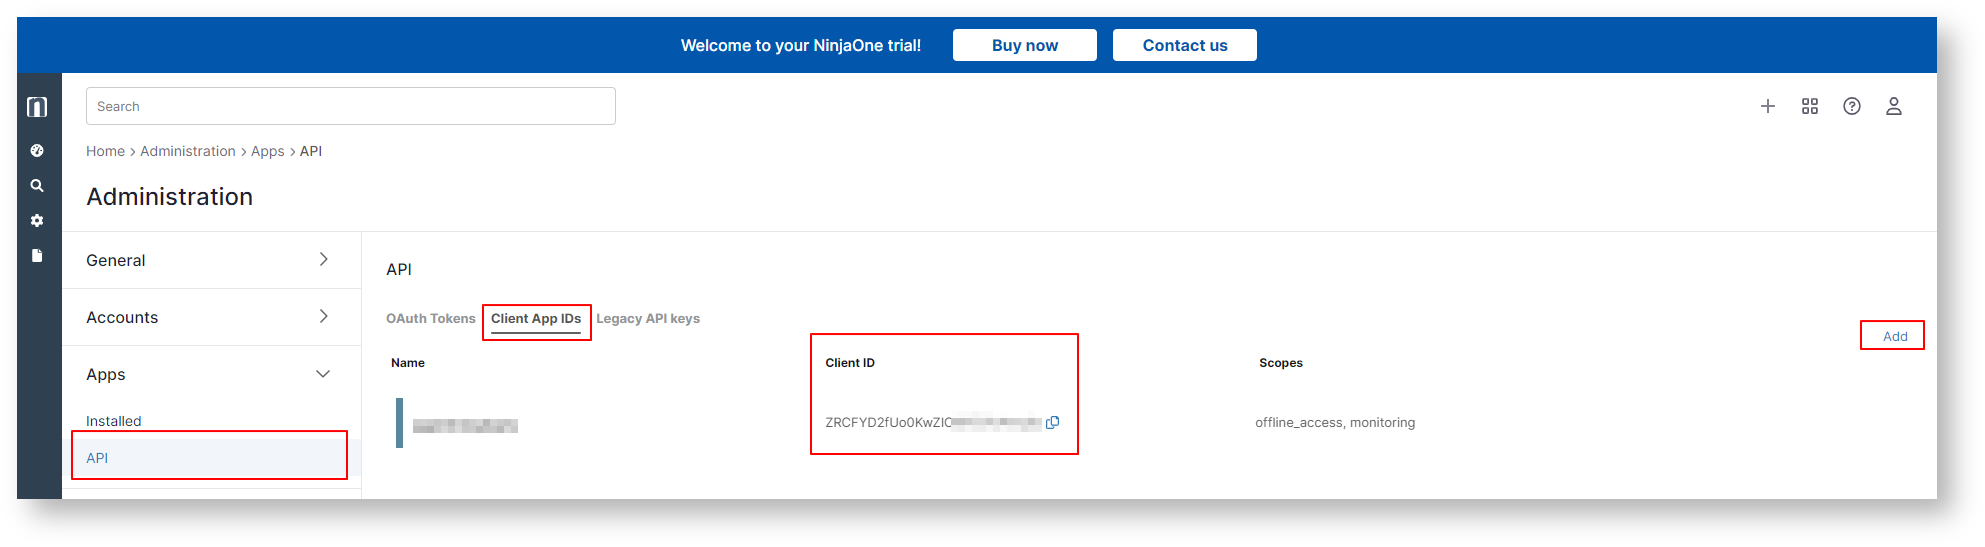
- Navigate to Configuration > Apps > API > Client App IDs and click the Add button.
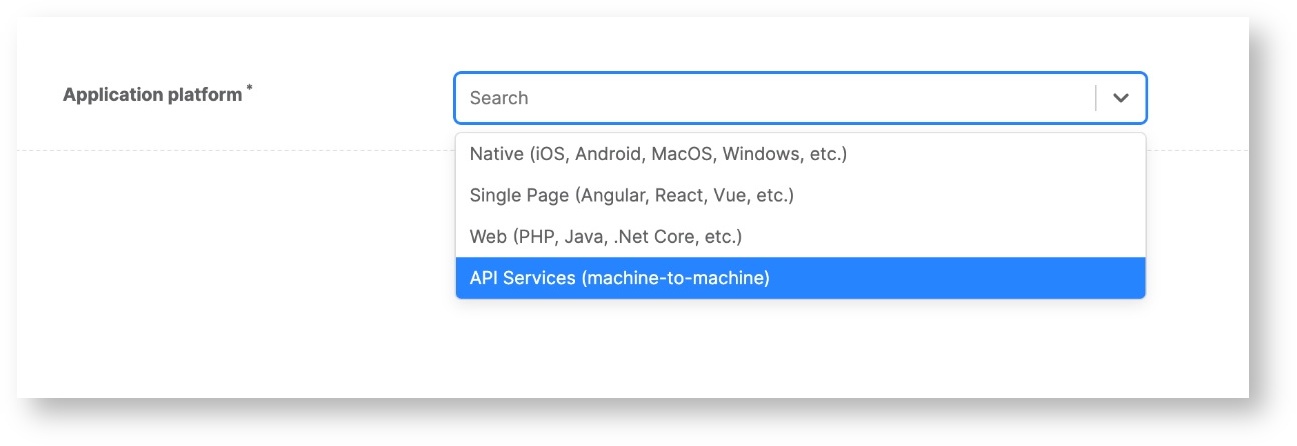
- Select API Services (machine-to-machine) from the drop-down list.
- Enter the needed information in the application settings.
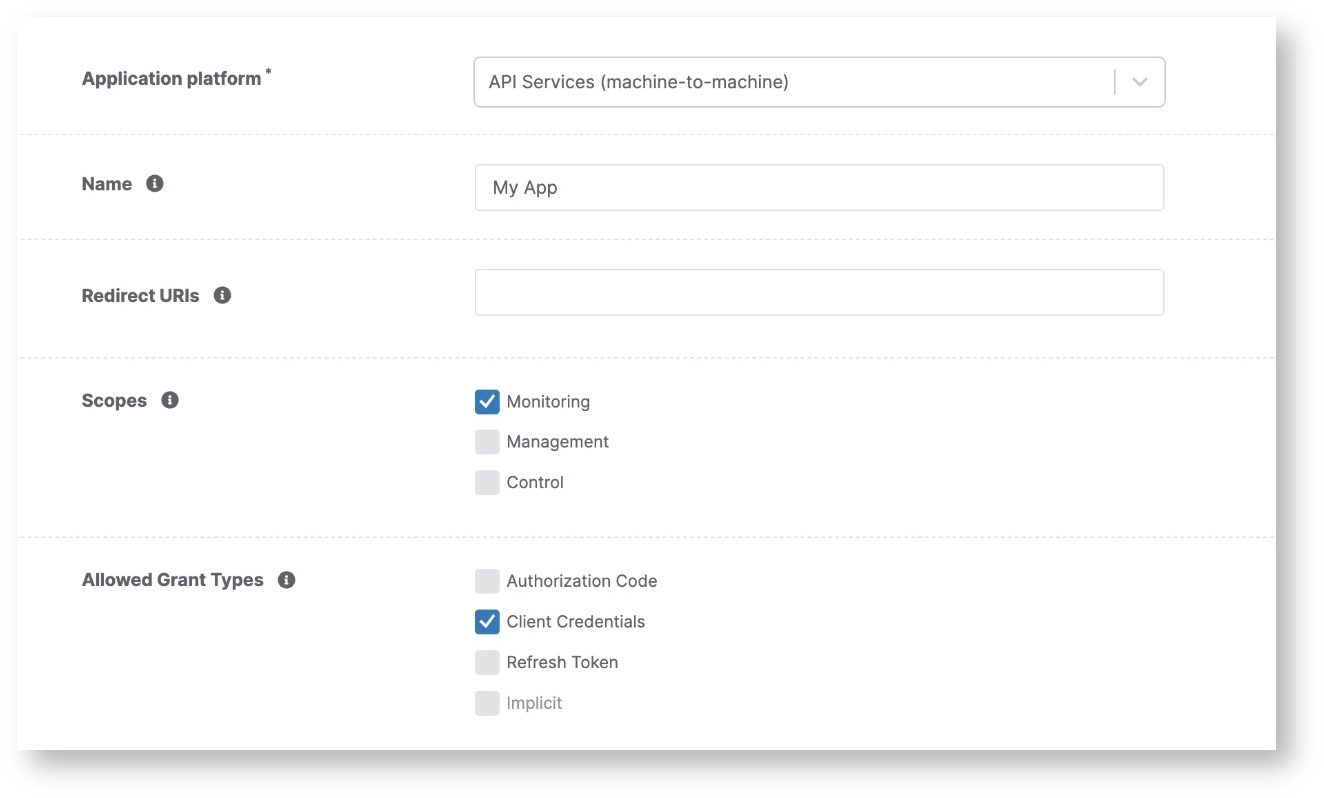
Note: For a detailed description of each setting, please refer to https://app.ninjarmm.com/apidocs-beta/authorization/create-applications/machine-to-machine-apps.
- Log in to the MSPbots app as an administrator.
- Go to Integrations and search for NinjaOne.
- Enter the Client ID and Client Secret.

- Click Save and Sync. Data sync will start immediately.
NinjaOne API doc
Overview
Content Tools