 N O T I C E
MSPbots WIKI is moving to a new home at support.mspbots.ai![]() to give you the best experience in browsing our Knowledge Base resources and addressing your concerns. Click here
to give you the best experience in browsing our Knowledge Base resources and addressing your concerns. Click here![]() for more info!
for more info!
Page History
The PeerGroup section in the MSPbots app lists the groups where you can share data with peers and understand how you compare with them. These groups, except private ones, are accessible to MSPbots clients and users. You can apply to join any of these groups or create one for your team or company. This KB article discusses the following about PeerGroup:
| Table of Contents |
|---|
How to
...
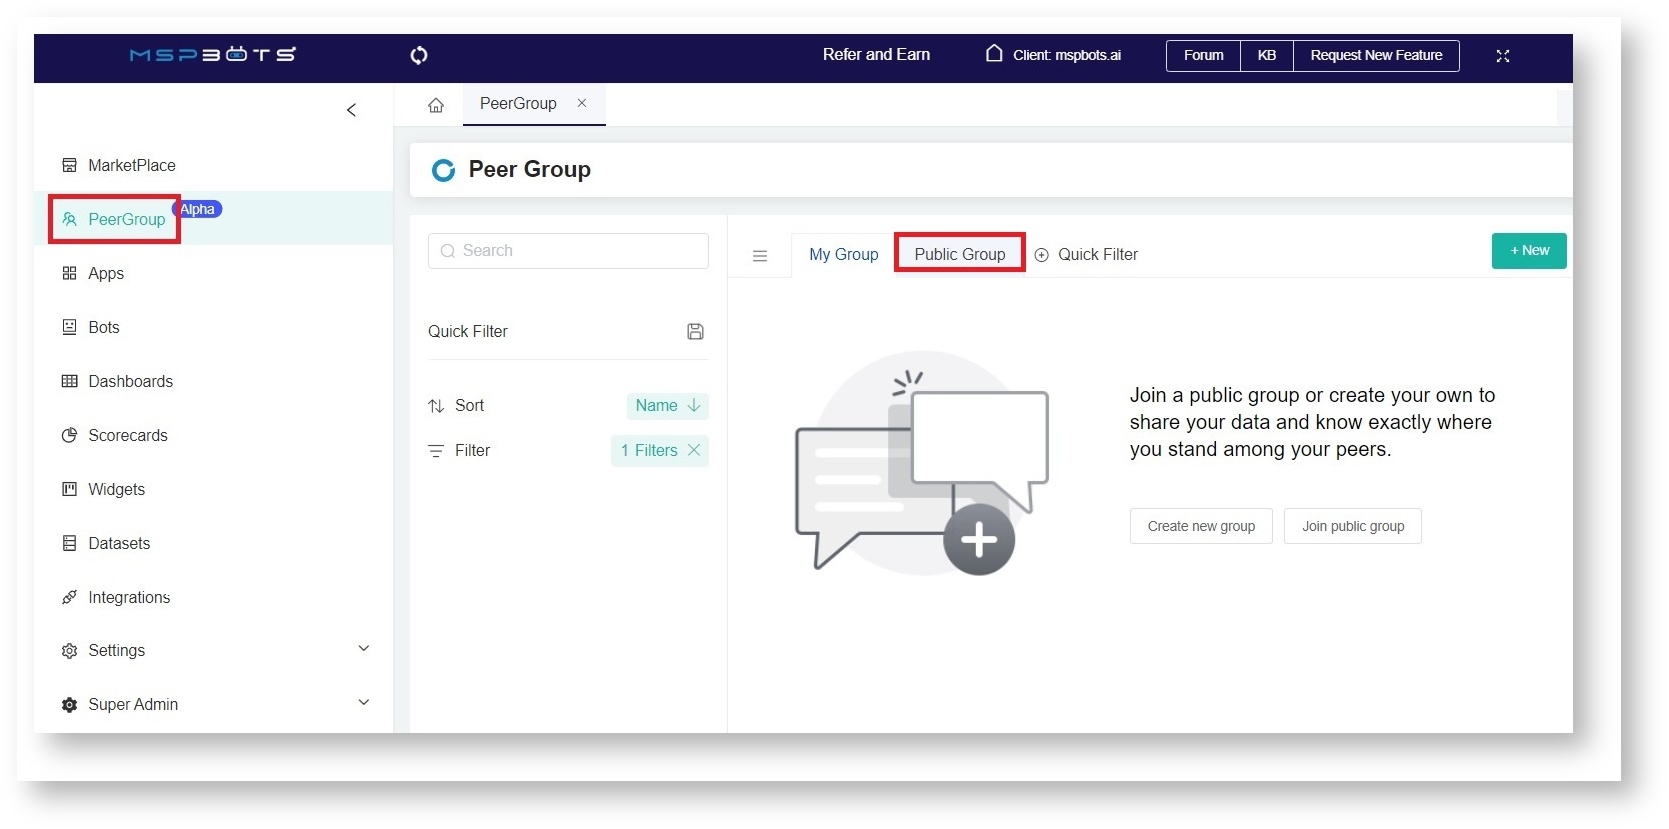
- Navigate to PeerGroup on the MSPbots and click the Public Group tab.
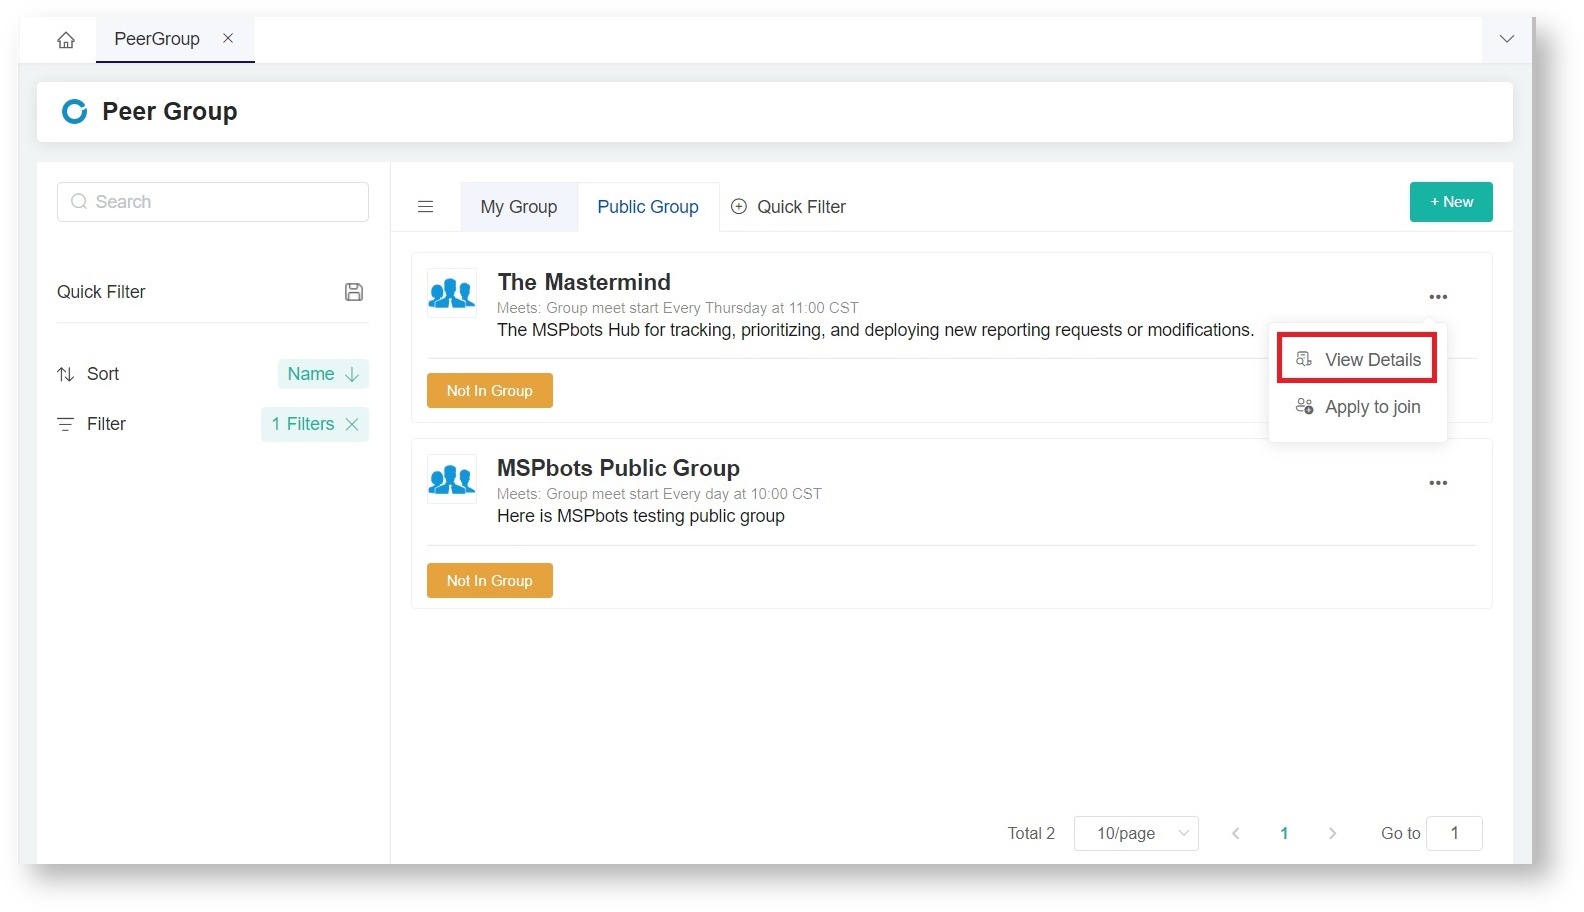
- Choose a group, click the ellipsis on the right, then select View Details.
- Read the details of the group.
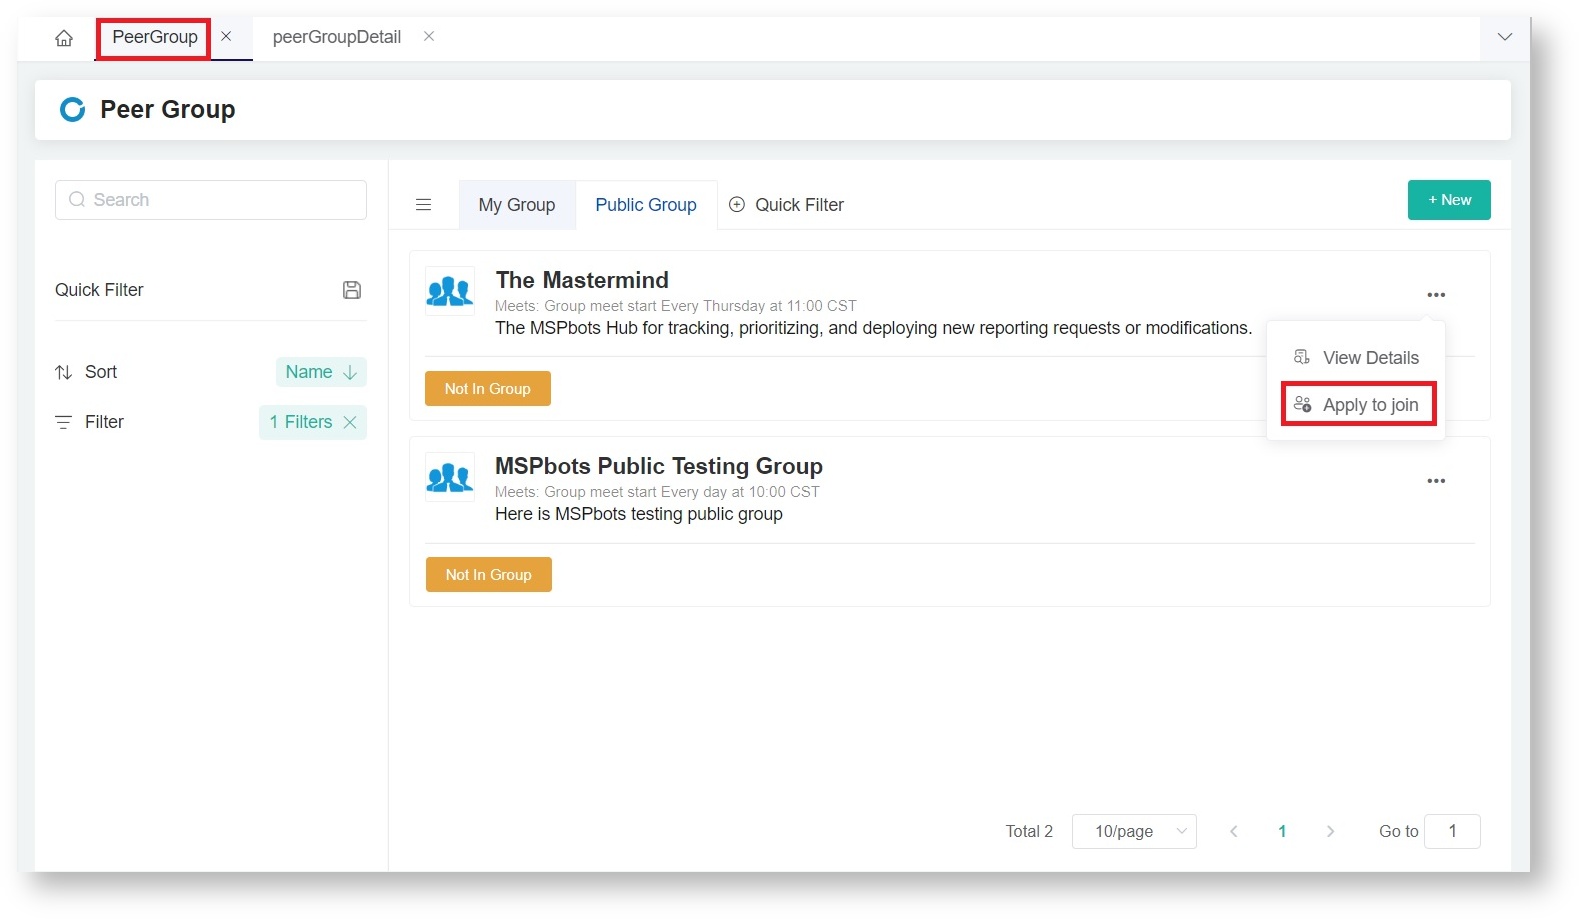
- If you are interested to join, go back to the Public Group tab, click the ellipsisbutton, and select Apply to join.
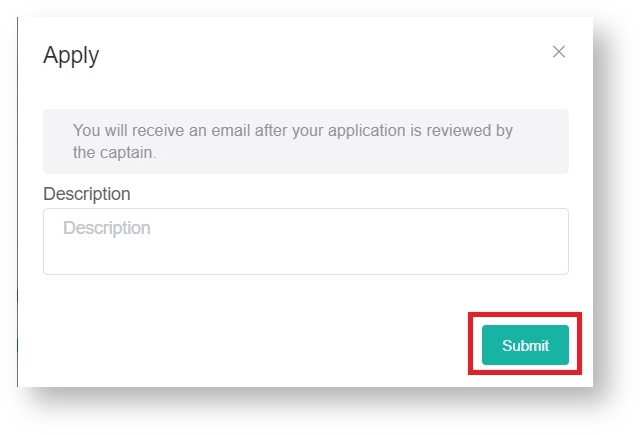
- When the Apply pop-up appears, click Submit to send your application.
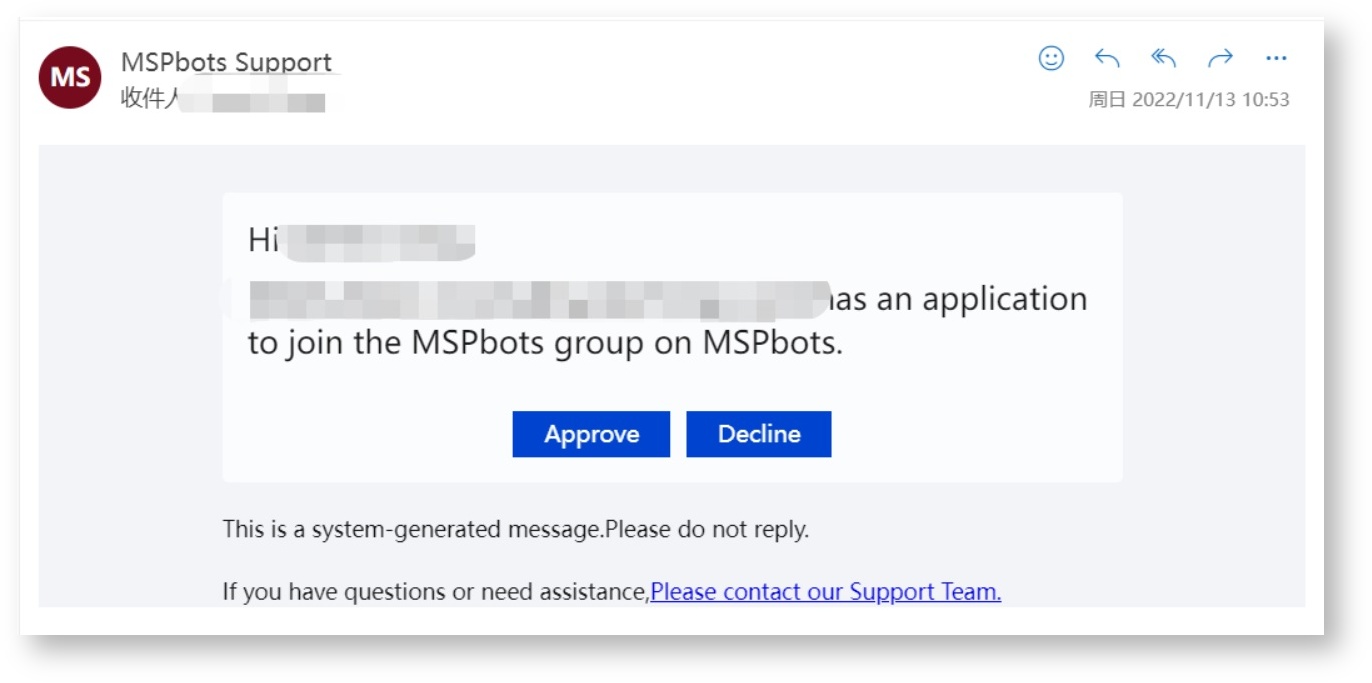
The group captain will receive a notification to approve or decline your application. Below is an example. - You will receive an email notification once your application is approved. Your group will also appear under the My Group tab.
How to create your own group
...
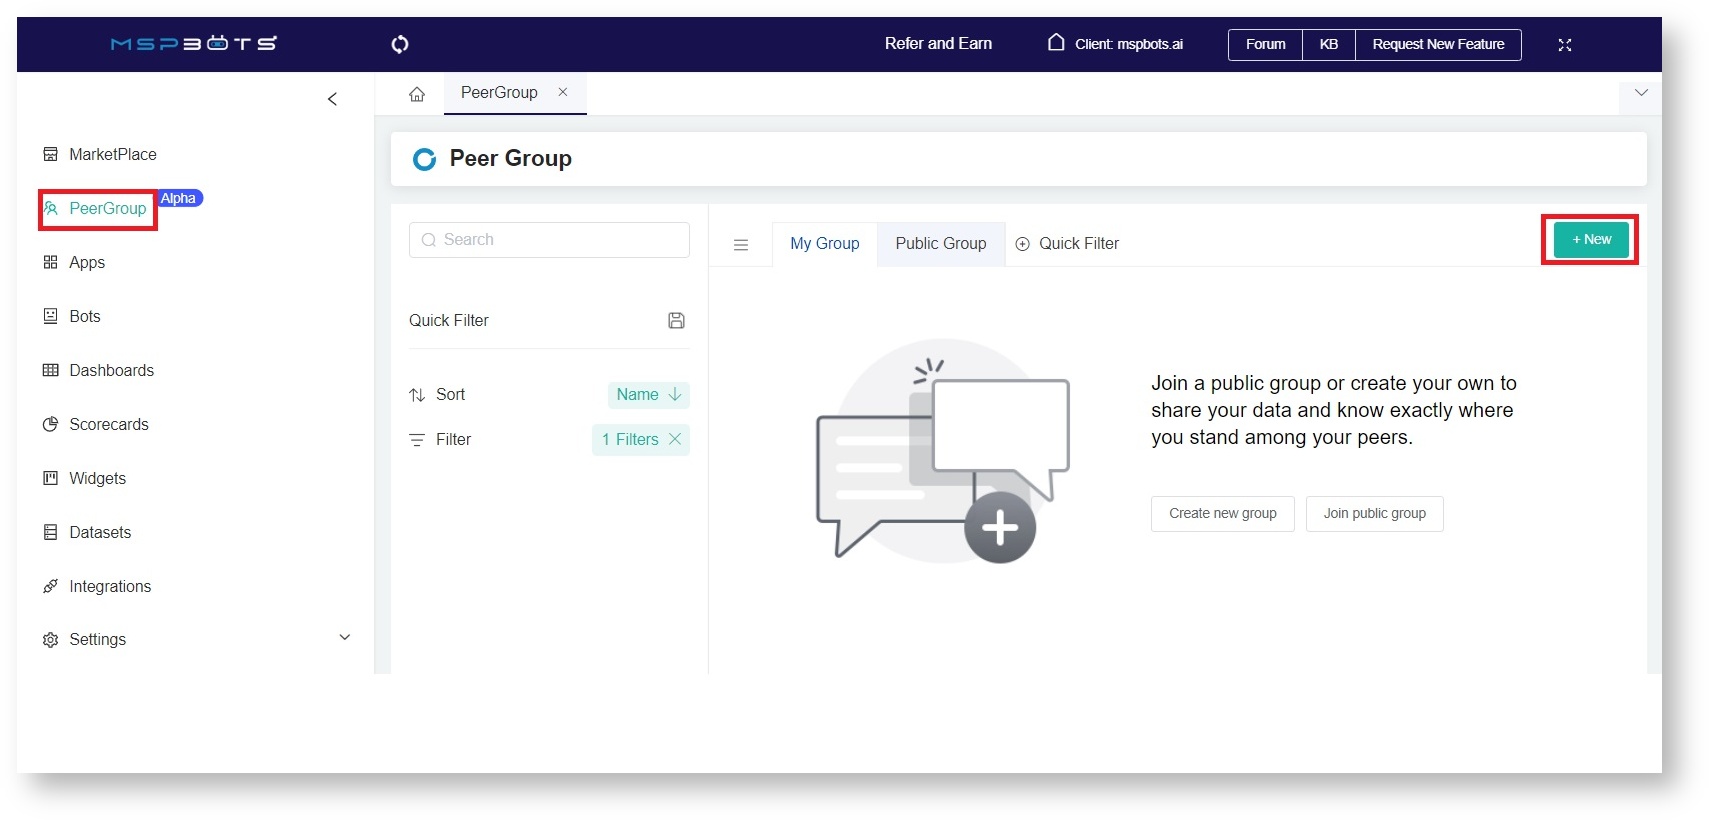
- Navigate to PeerGroup on the MSPbots. Click the New button.
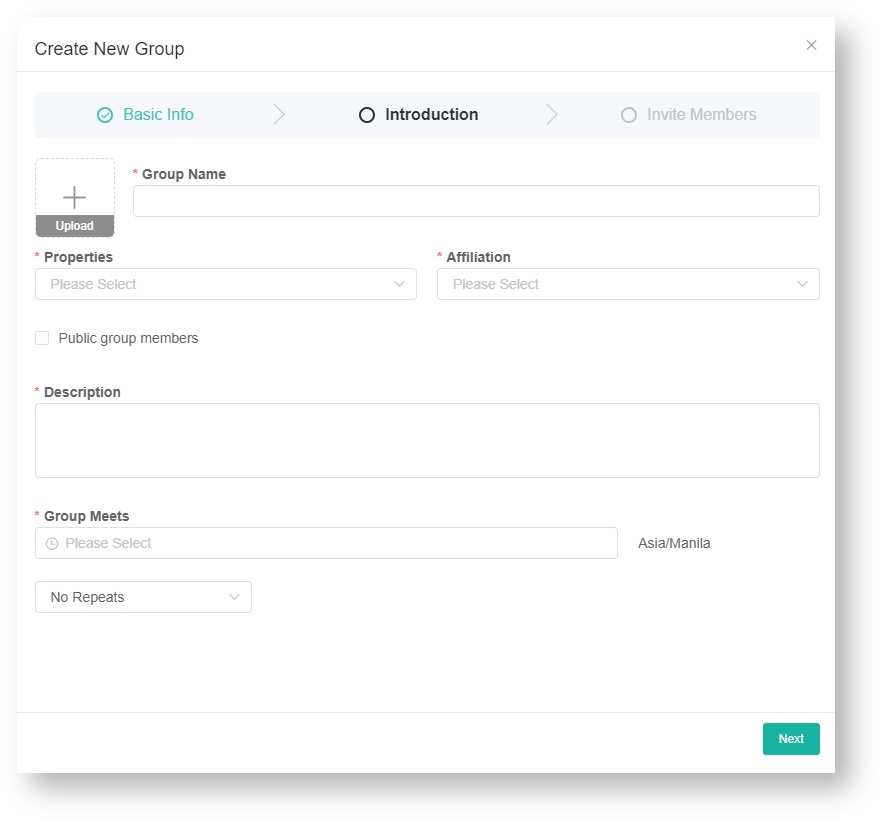
- On the Create New Group pop-up, provide the following under Basic Info then click Next.
- Group name
- Properties
- Private - A private peer group is viewable only by group members. The group captain can invite anyone to join the group, but others cannot apply to join because the group is not visible to non-members.
- Public - A public peer group is visible to all MSPbots users and clients., Anyone can apply to join a public group.
- Affiliation
- Description
- Group Meets - Create a schedule of meets and set recurring meets if needed.
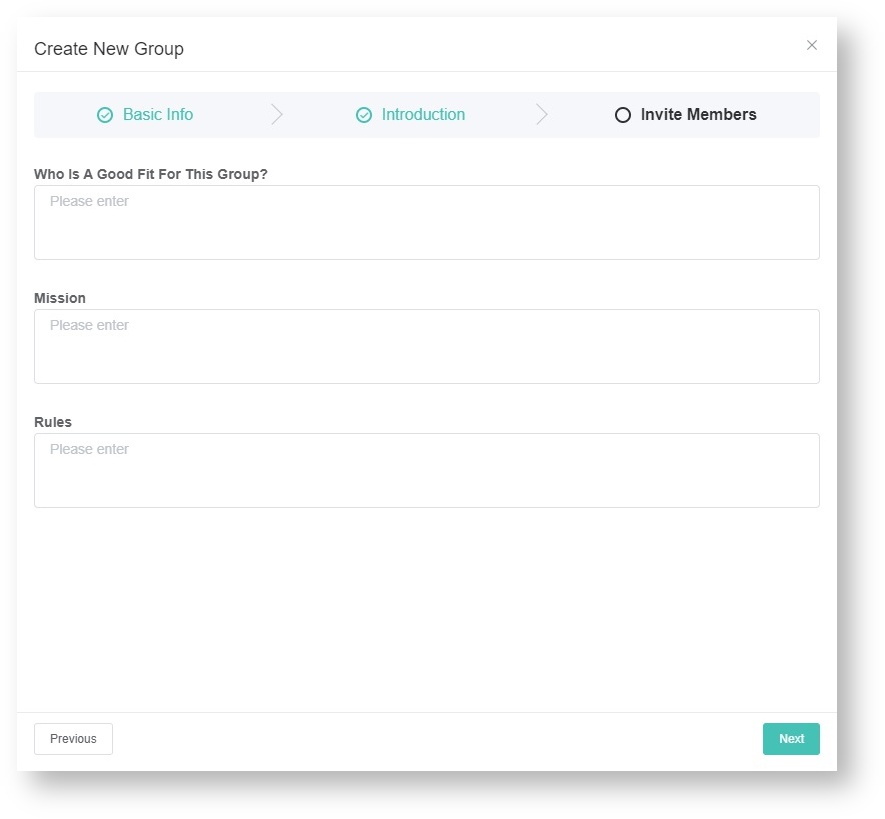
- Under Introduction, you have the option to give users an idea of your group by providing more information like Mission and Rules. Click Next when done.
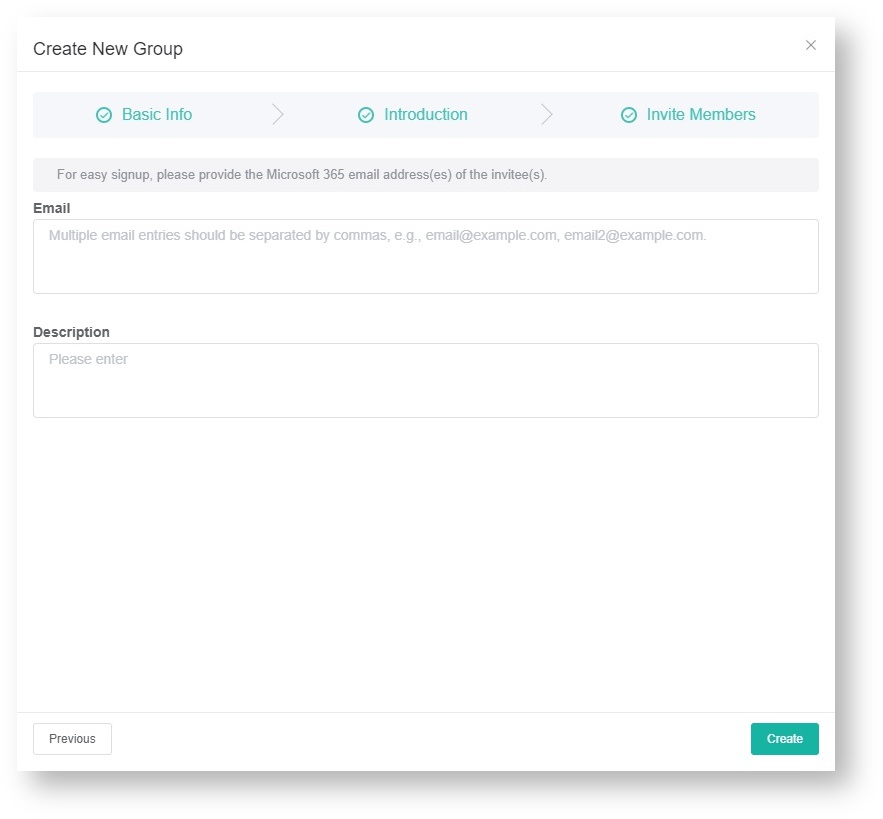
- In the last step, enter the Office 365 emails of the people you want to invite to the group.
- Click the Create button when done. The peer group you created should now appear under the My Group list. If it is a public group, it will also appear under the Public Group list.
...
- Navigate to PeerGroup, select your peer group, and go to the Members tab.
- Click the Add member icon.
- Enter the Office 365 emails of the people you are inviting. Click Send Email to send your invitations. Accepting the invitation will automatically add a person to the group.
How to join a peer group
...
- Navigate to PeerGroup on the MSPbots and click the Public Group tab.
- Choose a group, click the ellipsis on the right, then select View Details.
- Read the details of the group.
- If you are interested to join, go back to the Public Group tab, click the ellipsisbutton, and select Apply to join.
- When the Apply pop-up appears, click Submit to send your application.
The group captain will receive a notification to approve or decline your application. Below is an example. - You will receive an email notification once your application is approved. Your group will also appear under the My Group tab.
How to set roles in a group
...
Overview
Content Tools
