 N O T I C E
MSPbots WIKI is moving to a new home at support.mspbots.ai![]() to give you the best experience in browsing our Knowledge Base resources and addressing your concerns. Click here
to give you the best experience in browsing our Knowledge Base resources and addressing your concerns. Click here![]() for more info!
for more info!
Page History
...
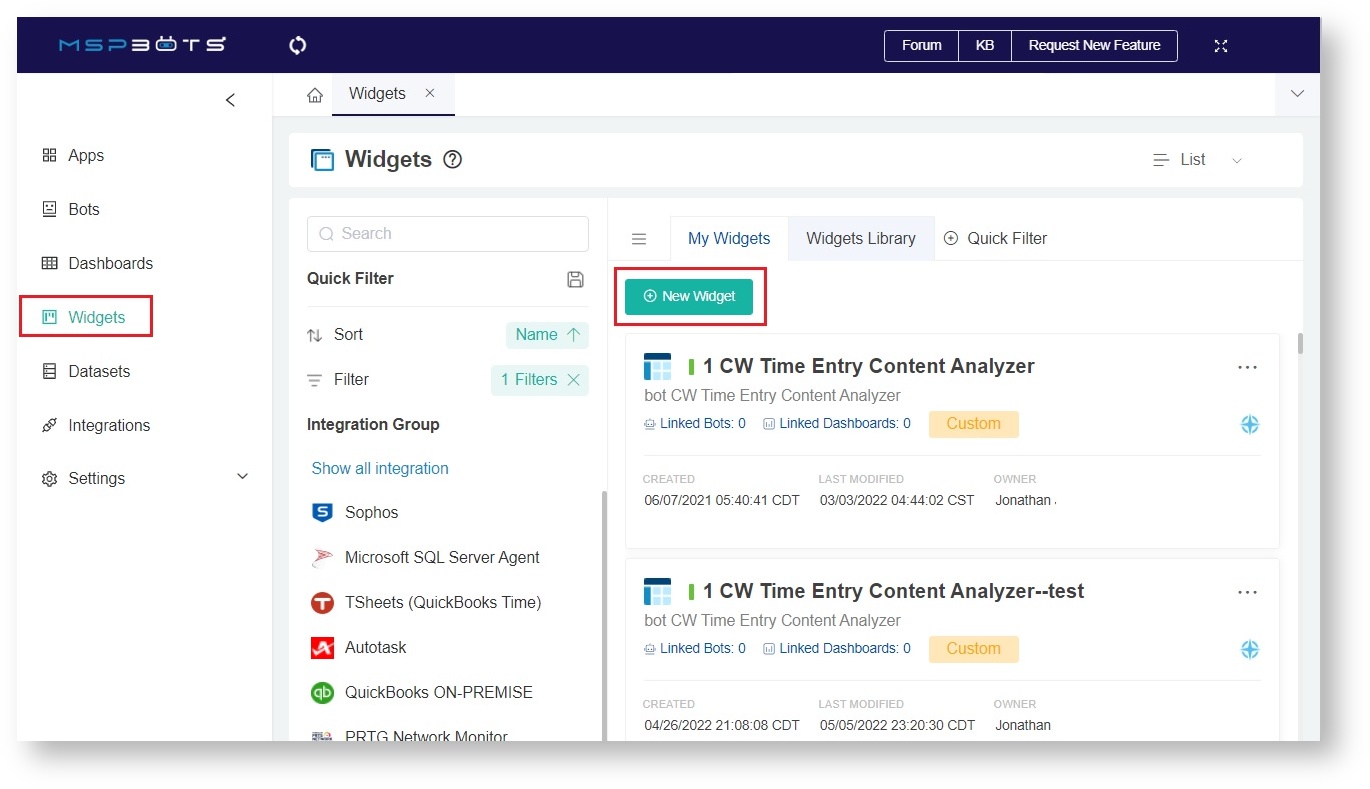
- On the MSPbots menu, navigate to Widgets.
- On the Widgets tab, click New Widget.
- When the New Widget window appears, select the Progress Tracker widget type.
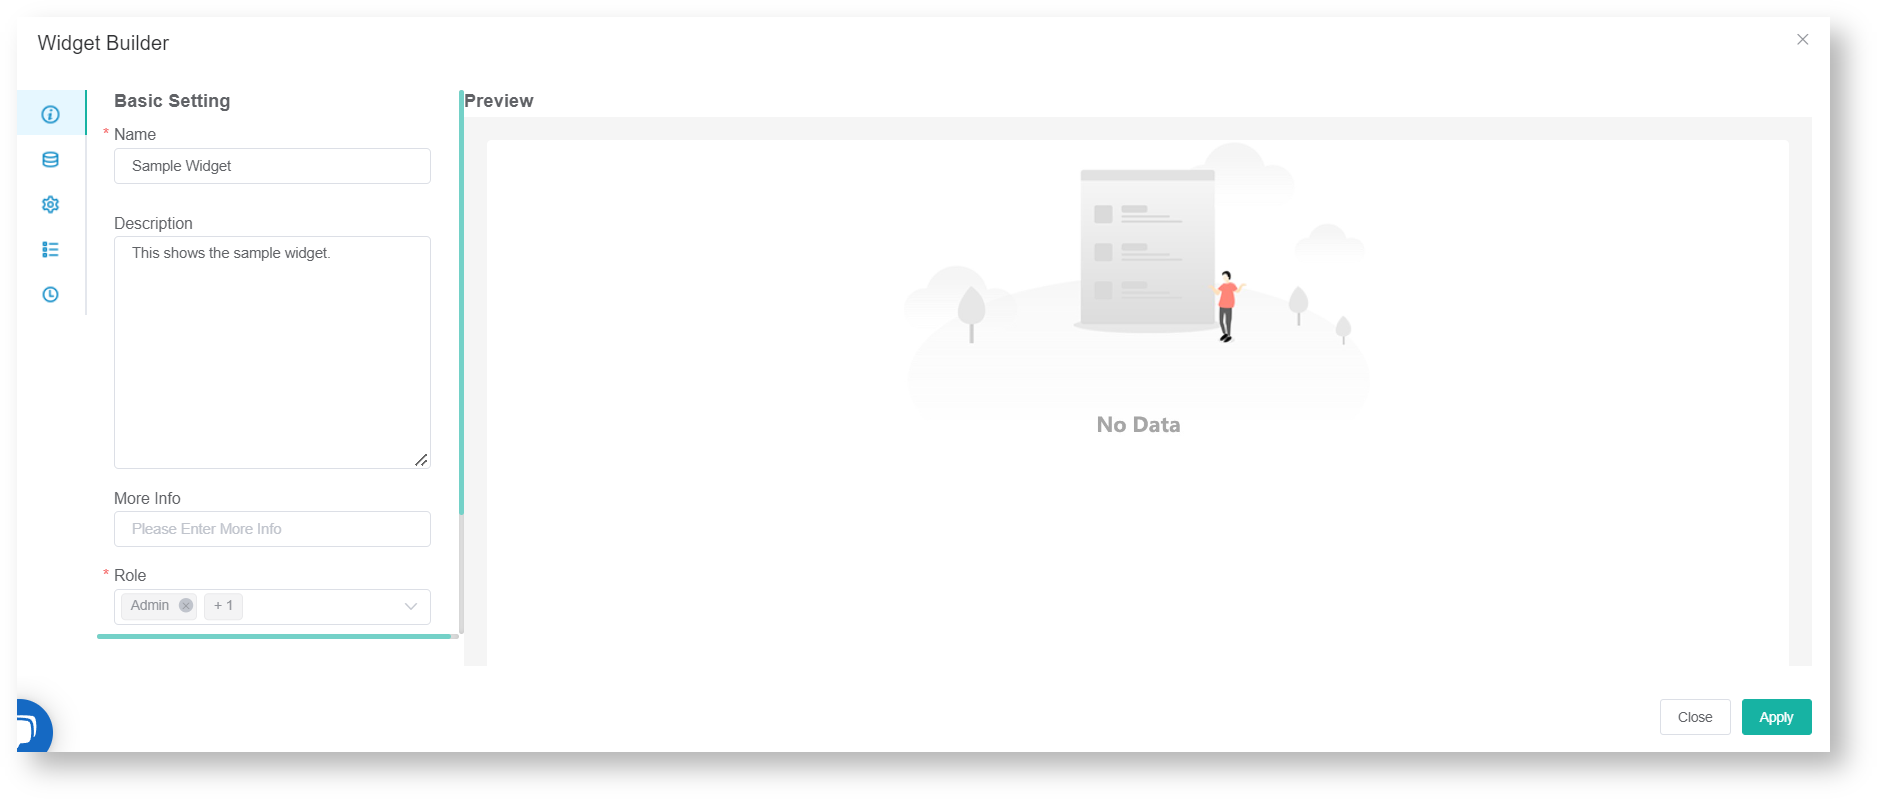
- When the Widget Builder window opens, provide the following:
- Name - Give the widget a name.
- Description - Provide a short description.
- Role - Select User or Admin.
- Click the Apply button.
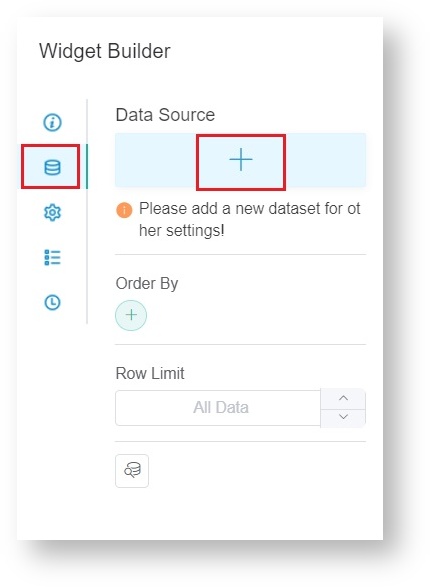
- Go to Dataset and click the + button. This will open the Add New Layer window.
- Click New Layer on the Add New Layer window. This step opens the Dataset window.
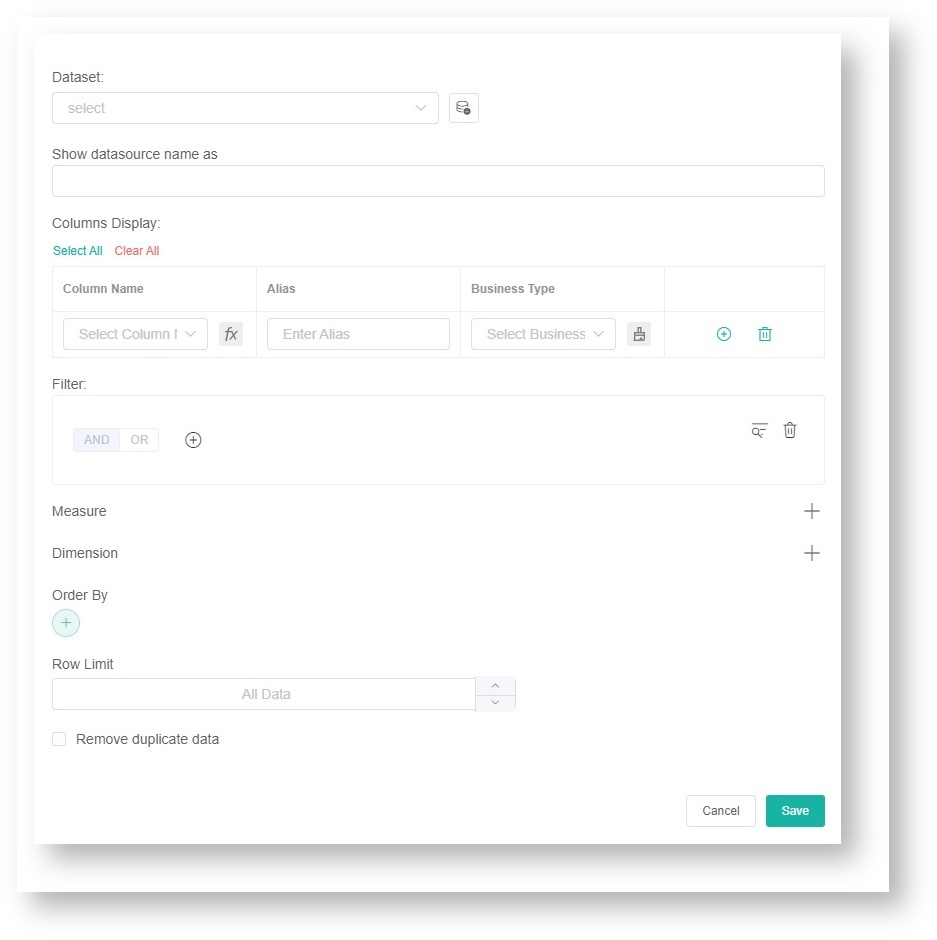
- Do the following on the Dataset window:
- Select a dataset to use.
- Add columns by selecting an option from the Column Name dropdown list and assigning an Alias and Business Type for each. Click the
icon to add more rows.
- Add filters and measurevalues for the Filter and Measure.
- Click the Save button.
- Click Apply to show a preview of the progress tracker widget that you created.
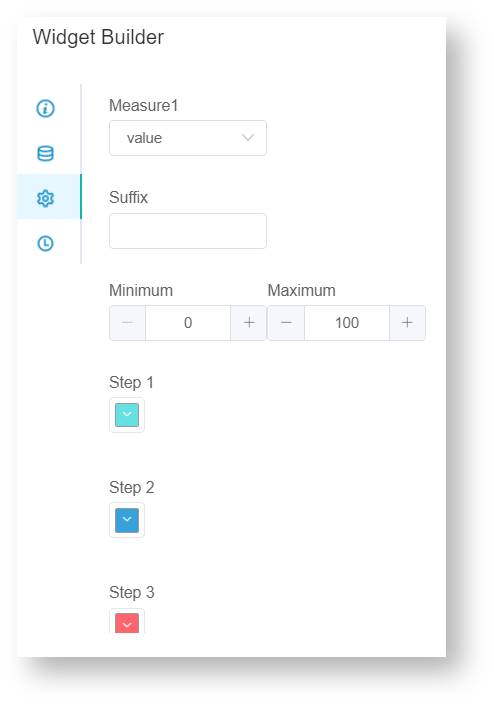
- Next, go to Config and provide data for the following fields:
- Measure1 - Select the measure that the progress tracker will show.
- Suffix - Input a corresponding label or footer title for the resulting data.
- Minimum - Set the minimum value of the tracker.
- Maximum - Set the minimum value of the tracker.
- Step 1 - Select the desired color for Step 1. This is the minimum range for the progress tracker.
- Step 2 -Select the desired color for Step 2. This is the middle range for the progress tracker.
- Step 3 - Select the desired color for Step 3. This is the maximum range for the progress tracker.
- Lastly, click Apply on the widget to show a preview.
...
Overview
Content Tools
