 N O T I C E
MSPbots WIKI is moving to a new home at support.mspbots.ai![]() to give you the best experience in browsing our Knowledge Base resources and addressing your concerns. Click here
to give you the best experience in browsing our Knowledge Base resources and addressing your concerns. Click here![]() for more info!
for more info!
Page History
...
- Open the Company QuickBooks file and keep it open. You You will not be able to link the Web Connector if the QuickBooks file is not open and if you are not logged in.
- Log in to MSPbots Integrations and locate QuickBooks On-Premise.
- Copy the password, update the path, then save it. The path of the platform comes from the file path of QuickBooks on the server. The path has to include the file name and .QBW extension.
- Download "Web Connector Installer" and "Web Connector File".
a. Quickbooks Web Connector Installer: QBWebConnector2_3R0-00036.zip
b. Install QuickBooks Web Connector if you don't have it already. - Download Quickbooks Desktop Web connector file: APP_QBFS.qwc.
- Then Double click the "Web Connector Files" QWC file, it should open the QuickBooks Web Connector Application.
If you haven't already, configure Web Connector to run when QuickBooks is closed:
- Sign in to QuickBooks as the Admin user.
- If QuickBooks is on Multi-user mode, go to the File menu, then select Switch to Single-user Mode.
- From the Edit menu, select Preferences.
- Select Integrated Applications, and and then select the Company Preferences tab.
- Select the third-party app.
- Select Properties.
- Check Allow this application to log in automatically.
- In the Authorization windowAuthorization window, select YESYes.
- Select User to log in, then OK.
- Start the QuickBooks Web Connector.
- Authorize access by clicking Add an Application and choosing the QWC file. Click OK.
- Enter the password.
- Synchronous Data. Click the Update Selected button and check the progress bar to 100%. If you encounter failure, please send us the log to us according . Refer to the ' Submit the log Log to help us in the troubleshooting stepHelp Us in Troubleshooting section below.
- Sync the data to MSPBots:
- Click the checkbox of the application added, and click Update Selected to do a manual sync.
- Check autorun and set the autorun interval at Every 720 Min.
It takes about 10-15 minutes to sync up the data. You can close the windows once the progress bar reaches 100%.
Submit the Log to Help Us in Troubleshooting
...
Open the synchronization view log file, scroll . Scroll to the end of the log , and view the error message , as shown in the figure, during the synchronization of data, please . The sample log is shown below. Please ensure that the QuickBooks program cannot be closed and runs normally.
...
If the synchronization does not move progress at a certain moment (for example: , at 30%), please check the log file to confirm whether for an error. If there is an error, please restart the QuickBooks program , and please initiate a new synchronization.
...
You might see this error when you connect an app to QuickBooks Desktop using Web Connector. This happens for varied reasons. But , but don’t worry, we’ll . We’ll help you fix it. Follow the Visit the link below and follow the applicable steps based on the specific error message you seeencountered.
Quickbooks On-Premise API documentation
If you can't find the need the data that we don't have in you need from our prebuilt datasets, please review the following documentation and find for the data that you needed and need, then send an email to support@mspbots.ai with the business use case for each dataset, our . Our development team will review it and let you know the ETA of the dataset delivery time.
https://developer.intuit.com/app/developer/qbdesktop/docs/api-reference/qbdesktop
How to Give Financial Access to Other Users
Important: Only the user who linked the Quickbooks API
...
has access
...
to datasets, widgets, and dashboards
...
related to Quickbooks. This user is also the only person who can give other users access
...
to Quickbooks-related assets.Even the admin
...
cannot see the financial data.
Do the following procedure to give other users access to financial data:
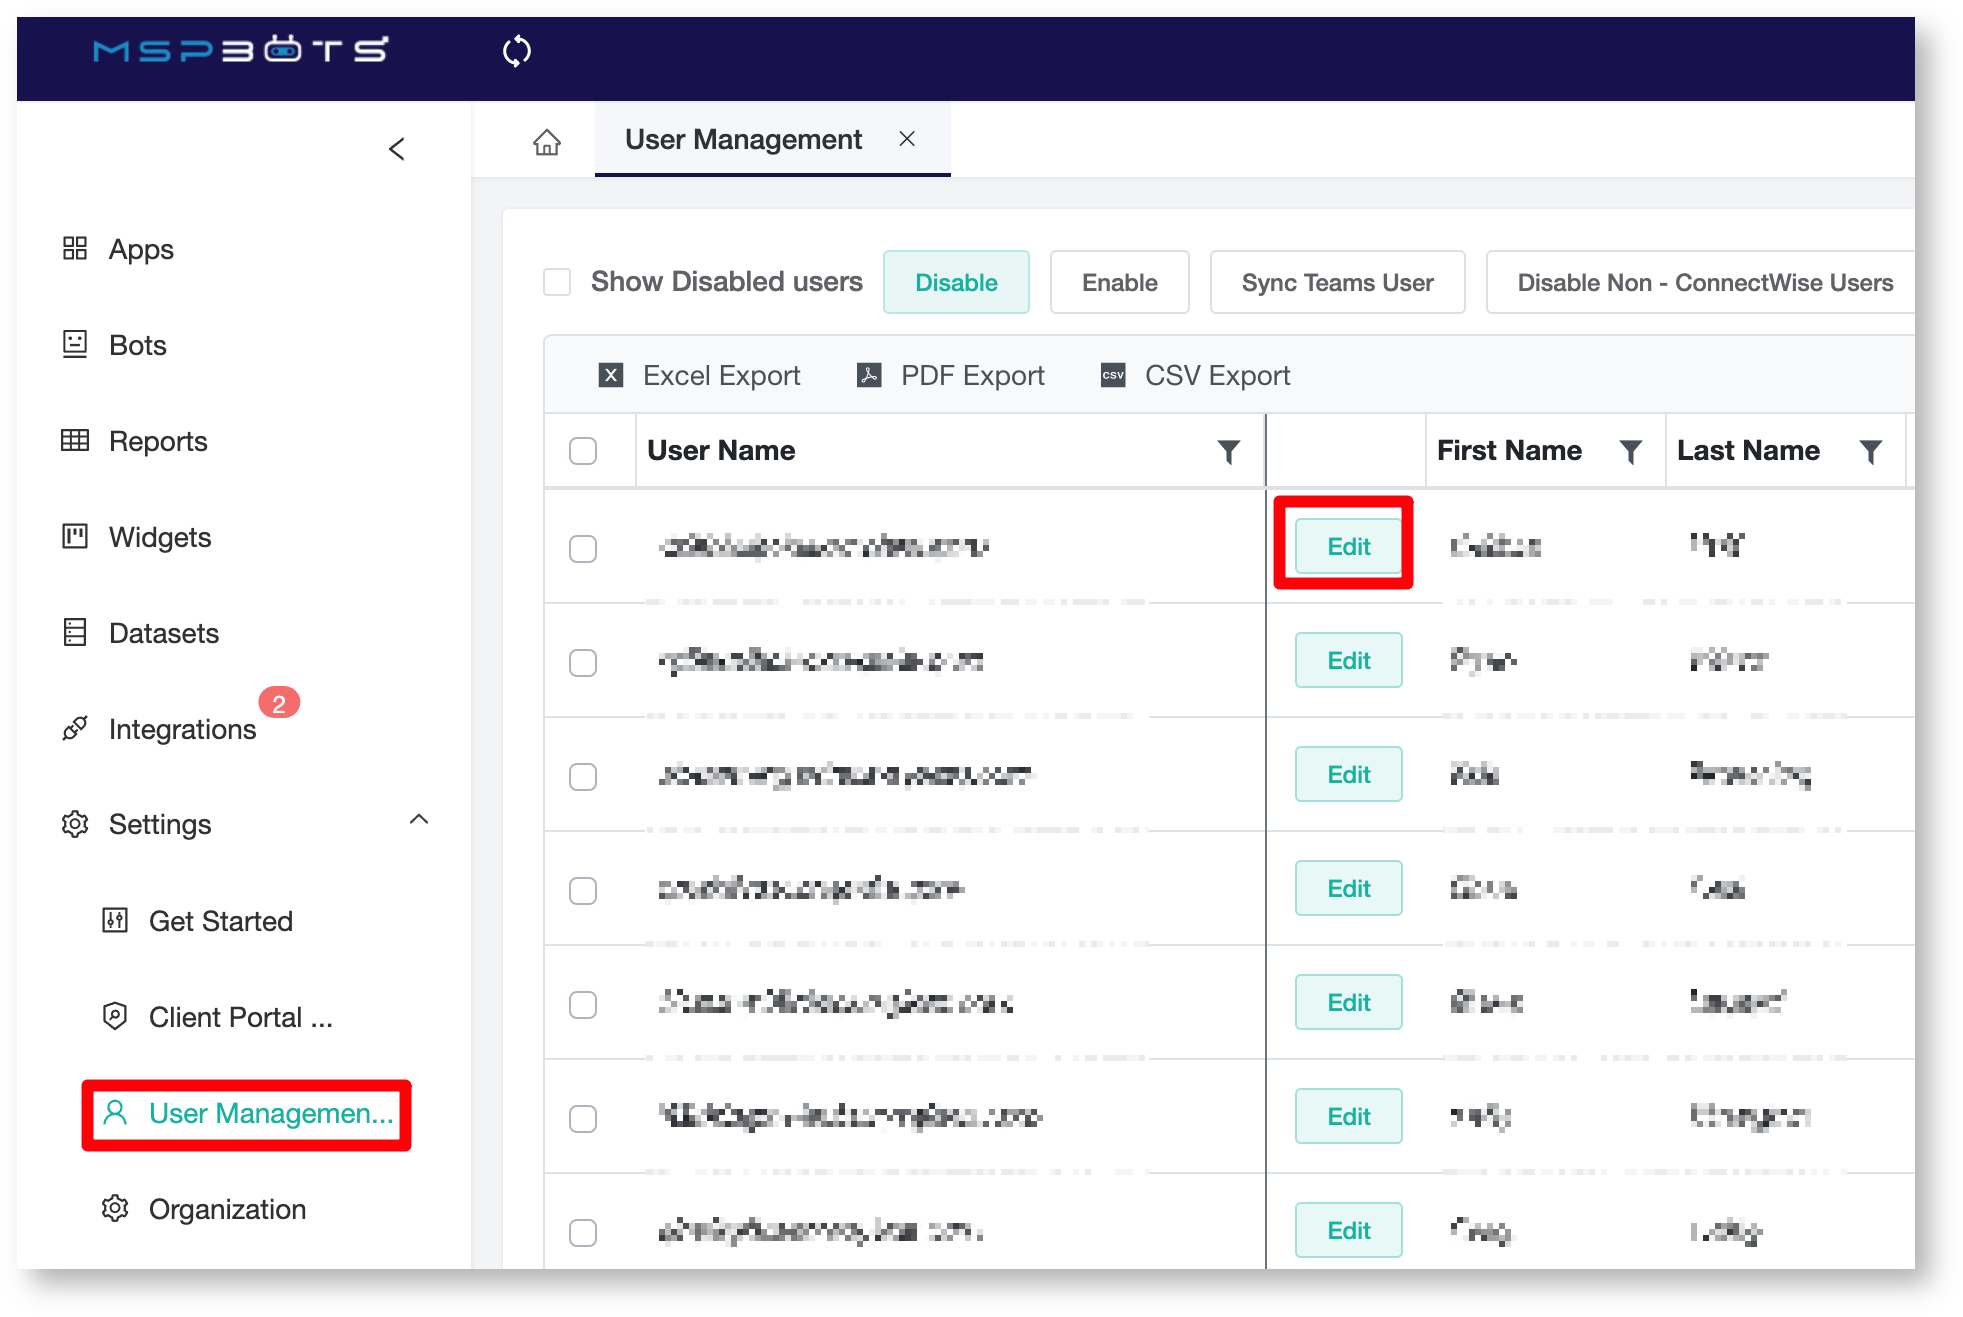
- Go to User Management (mspbots.ai), click edit, add financial to other users so they can have access to financial data. and search for the user to be given access to the data.
- Click the Edit button beside the user's name.
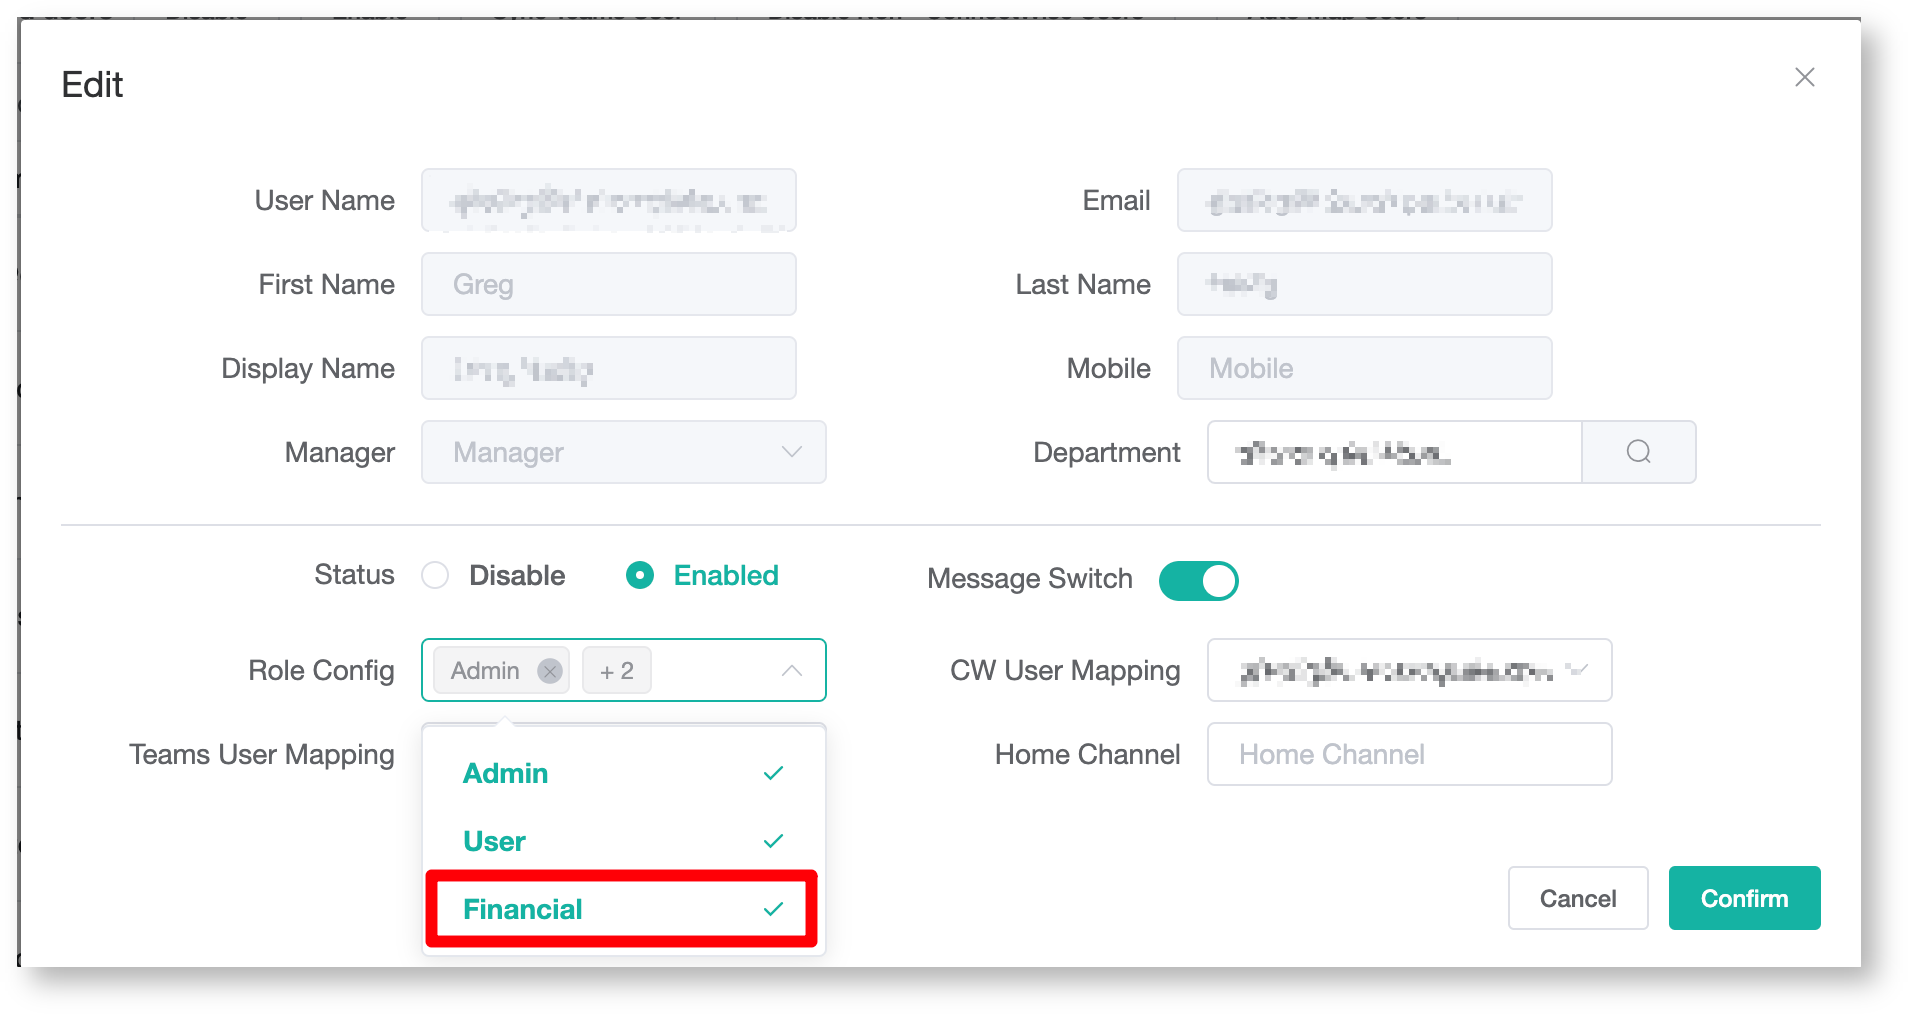
- Go to Teams User Mapping on the Edit window and select Financial.
- Click Confirm.
FAQ
I get QBWC1039 Error
Please
...
see the MSPbots Help article Error QBWC1039 when connecting the QuickBooks Web Connector to MSPbots for steps on how to resolve this error.
You may also view other resolutions here: https://quickbooks.intuit.com/learn-support/en-us/your-books-or-my-company/fix-error-qbwc1039/00/294400#


