 N O T I C E
MSPbots WIKI is moving to a new home at support.mspbots.ai![]() to give you the best experience in browsing our Knowledge Base resources and addressing your concerns. Click here
to give you the best experience in browsing our Knowledge Base resources and addressing your concerns. Click here![]() for more info!
for more info!
Page History
...
- Log in to the MSPbots app using your Office 365 account.
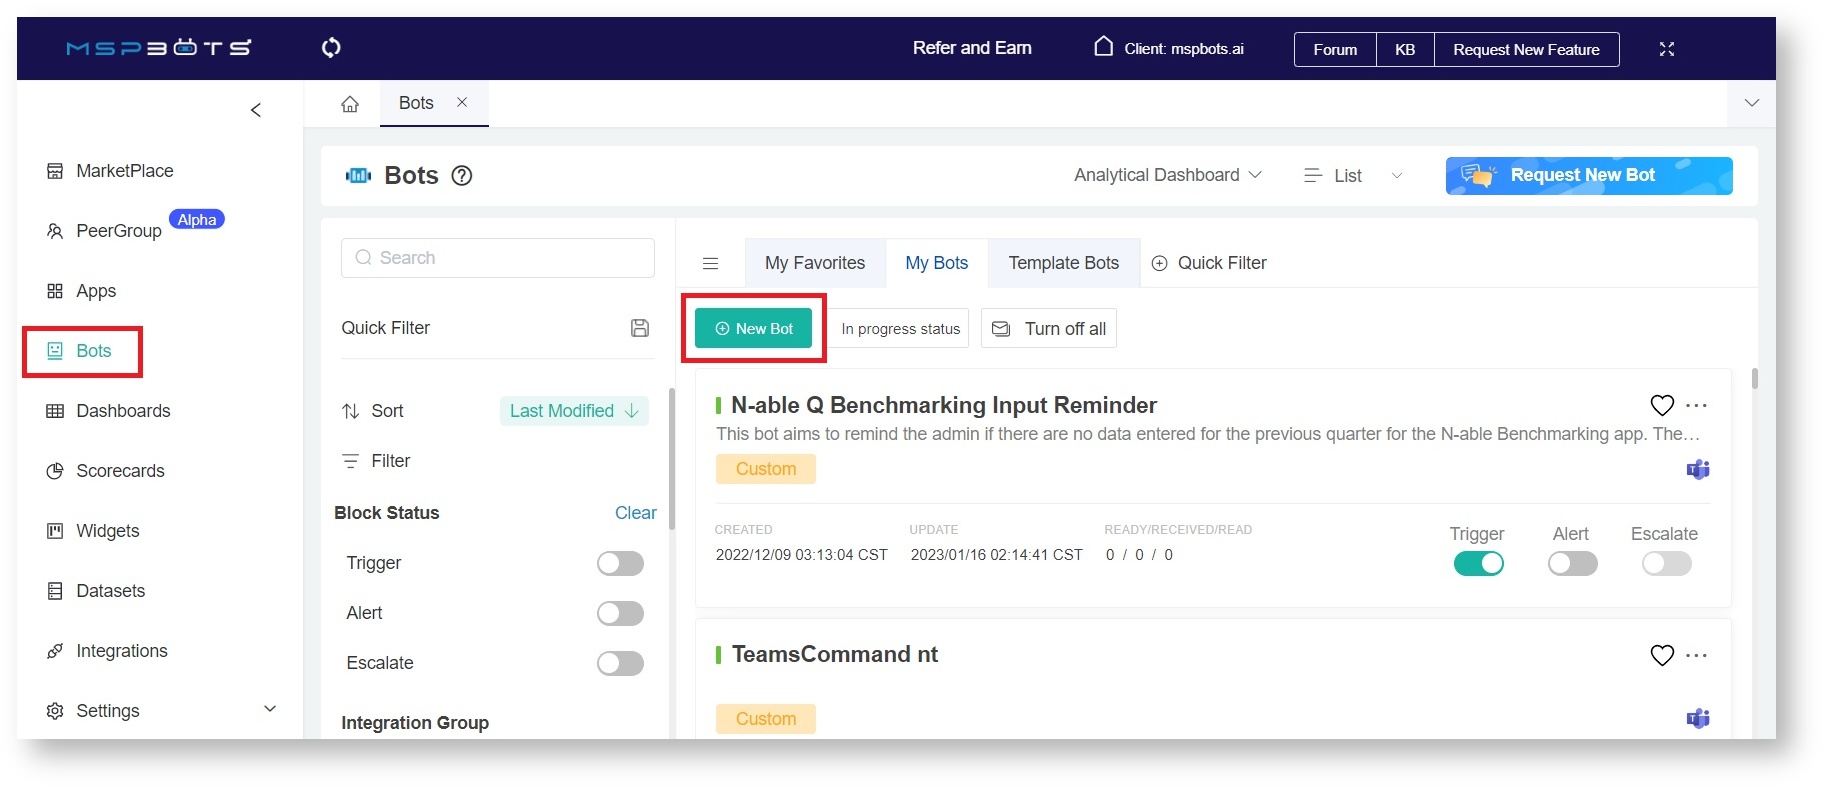
- Navigate to Bots on the left menu then click the New Bot button on the Bots screen.
You can also start creating a bot from a widget on your dashboard. Click the ellipsis button and select Create Bot.
- Choose how to start creating your bot. In the Create a new bot window, select Start From Blank or Start From Bot Template, then click on a bot type.
- Start From Blank - Select this option to create a new bot customized according to your needs.
New Integration Trigger - Select this bot type to create a bot triggered by integration events.
Trigger - Select this bot type to create a bot triggered by specific conditions in datasets or widgets.
Real-time Data - This bot type creates a bot triggered by user-selected data from a data synchronization source. For example, if the user sets up ConnectWise Manage-Ticket, a new ticket created in the ConnectWise Manage app and synchronized to MSPbots will trigger the bot.
Teams Command - Select this option if you want commands sent thru MS Teams to trigger the bot.
- Start From Bot Template - Select this option to customize a fully functional bot according to your needs. You can choose from the list of available templates for available to your PSA.
- Start From Blank - Select this option to create a new bot customized according to your needs.
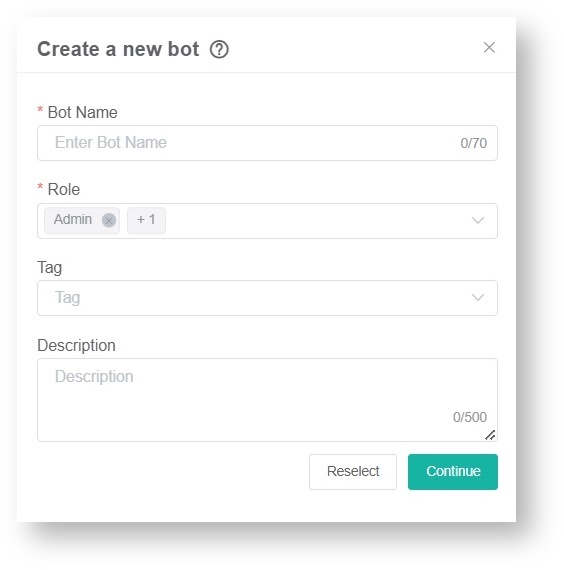
- Next, do the following steps in the Create a new bot window:
- Enter a name in the Bot Name field.
- Identify the Role that will have access to the bot.
- Select one or multiple Tags to label the new bot you create.
- Type a clear Description of the bot. (Recommended)
- Click the Continue button to open the tab with the details and settings for your new bot.
...
Overview
Content Tools


