 N O T I C E
MSPbots WIKI is moving to a new home at support.mspbots.ai![]() to give you the best experience in browsing our Knowledge Base resources and addressing your concerns. Click here
to give you the best experience in browsing our Knowledge Base resources and addressing your concerns. Click here![]() for more info!
for more info!
Page History
...
| Table of Contents | ||
|---|---|---|
|
Create a new bot.
...
- As an alternative, you
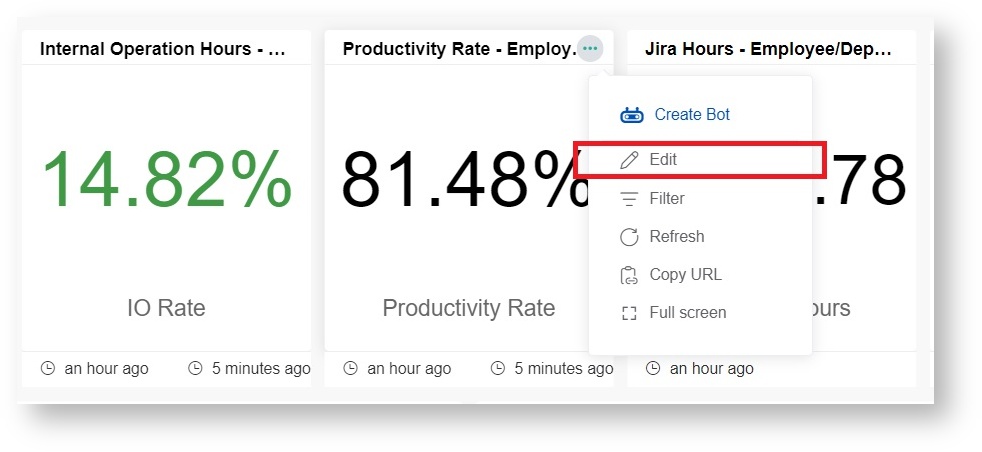
Tip You can also start creating a bot from a widget on your dashboard.
Click Hover over the ellipsis
button and select icon on the widget and select Create Bot.
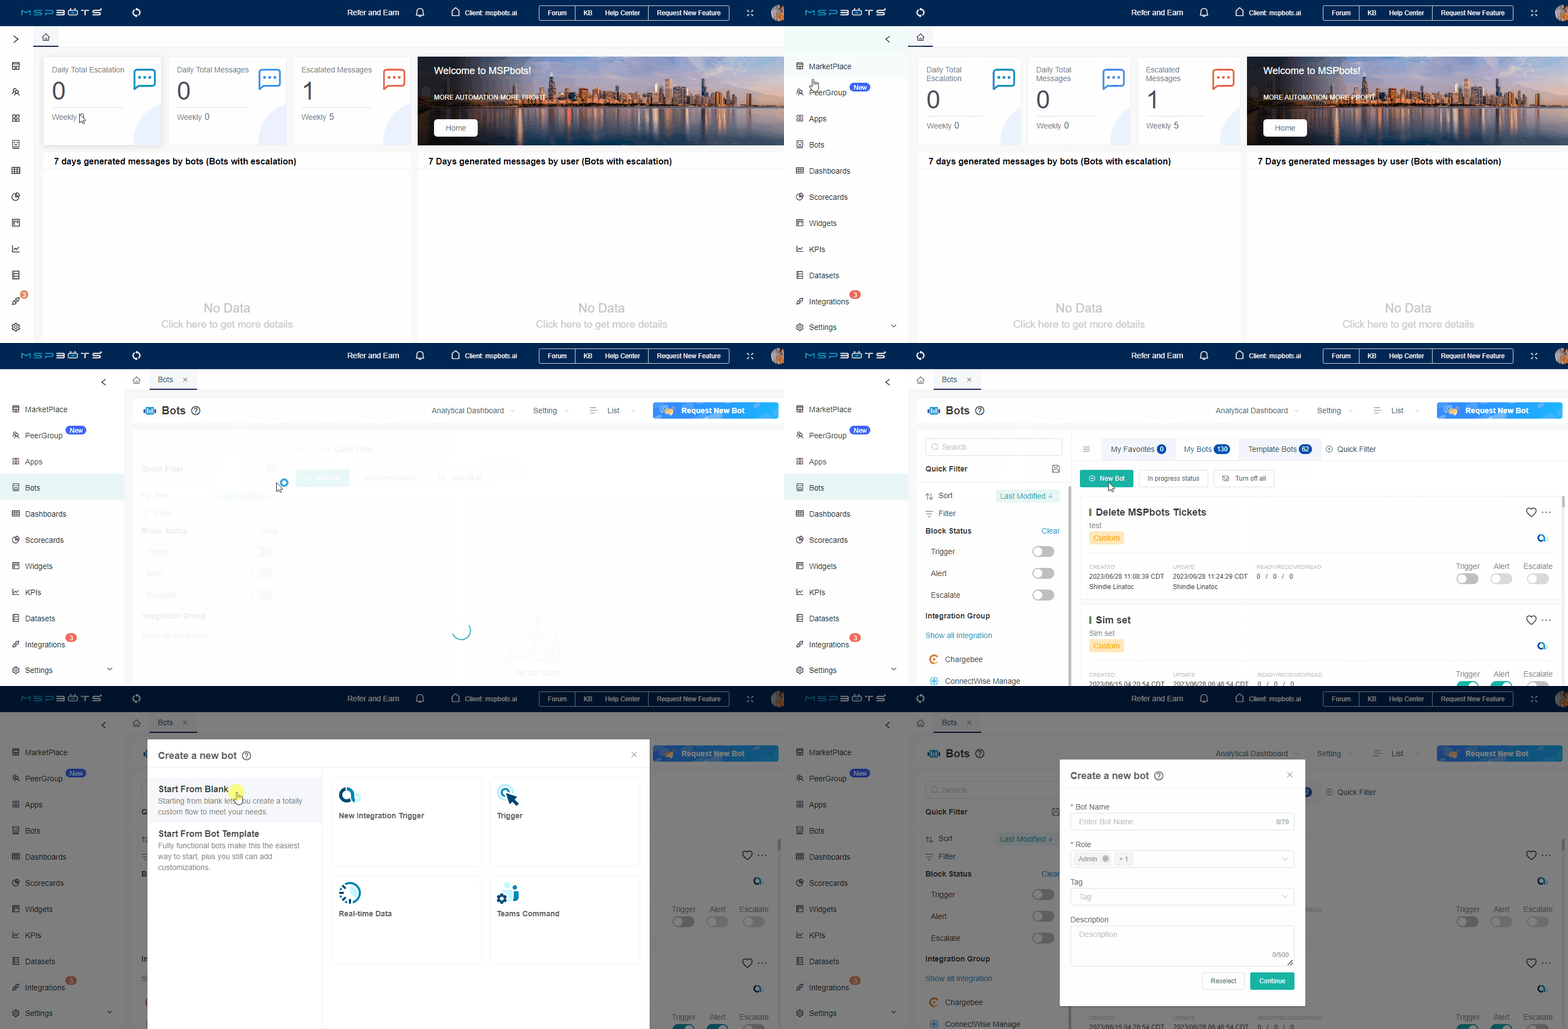
- hen the Create a new bot window appears, select Start From Blank > Trigger.
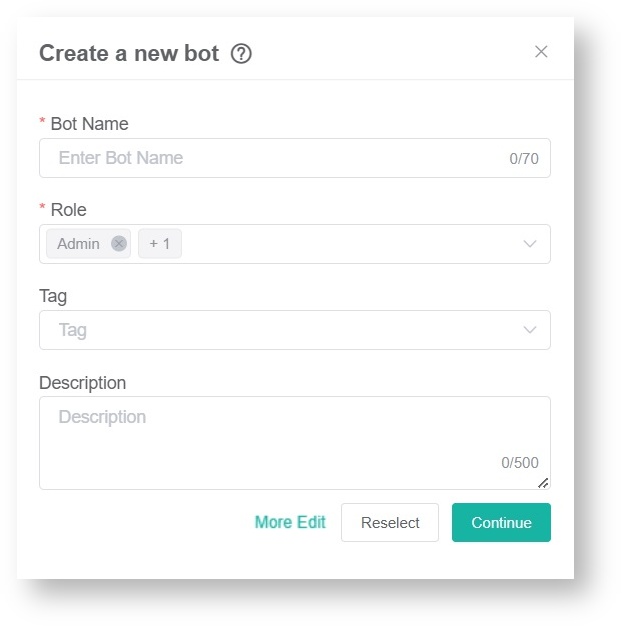
- Fill the fields in the
following fields- Create a new bot window.
- Enter a name in the Bot Name field.
- Identify the Role that will have access to the bot. You can select multiple roles.
- Add a clear Description of the bot. (Recommended)
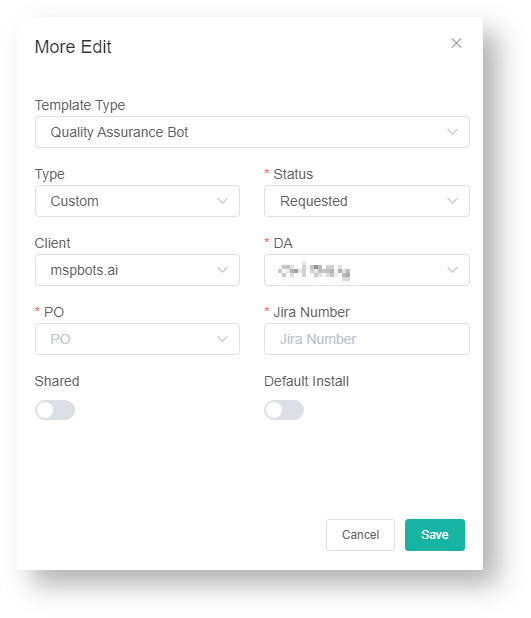
- Click More Edit and fill out the required fields.
- Create a new bot window.
- When done, click the Save button. This action opens the screen with the details and settings for your new bot.
Configure the trigger.
...
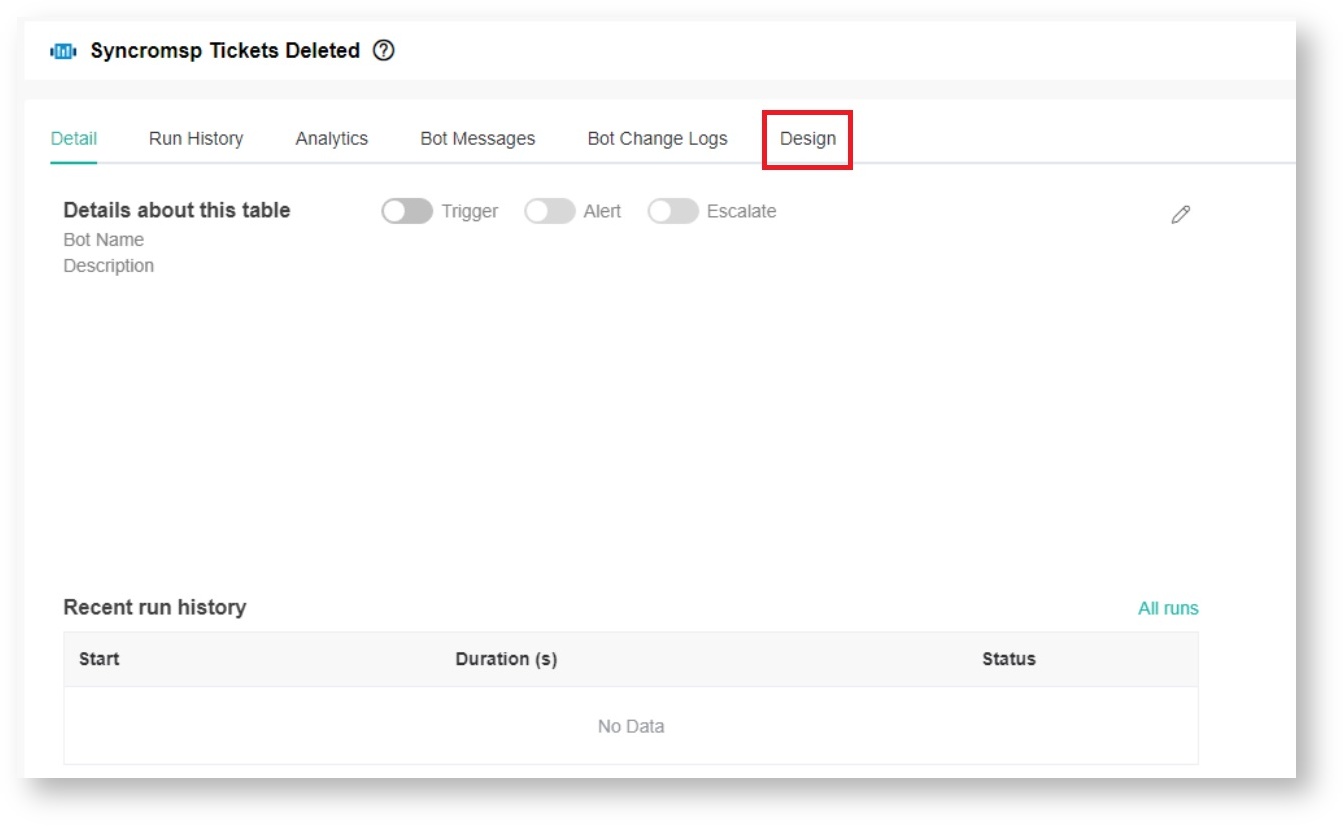
- On the screen with the bot details, click the Design tab to open the Trigger window.
- On the screen with the bot details, click the Design tab to open the Trigger window.
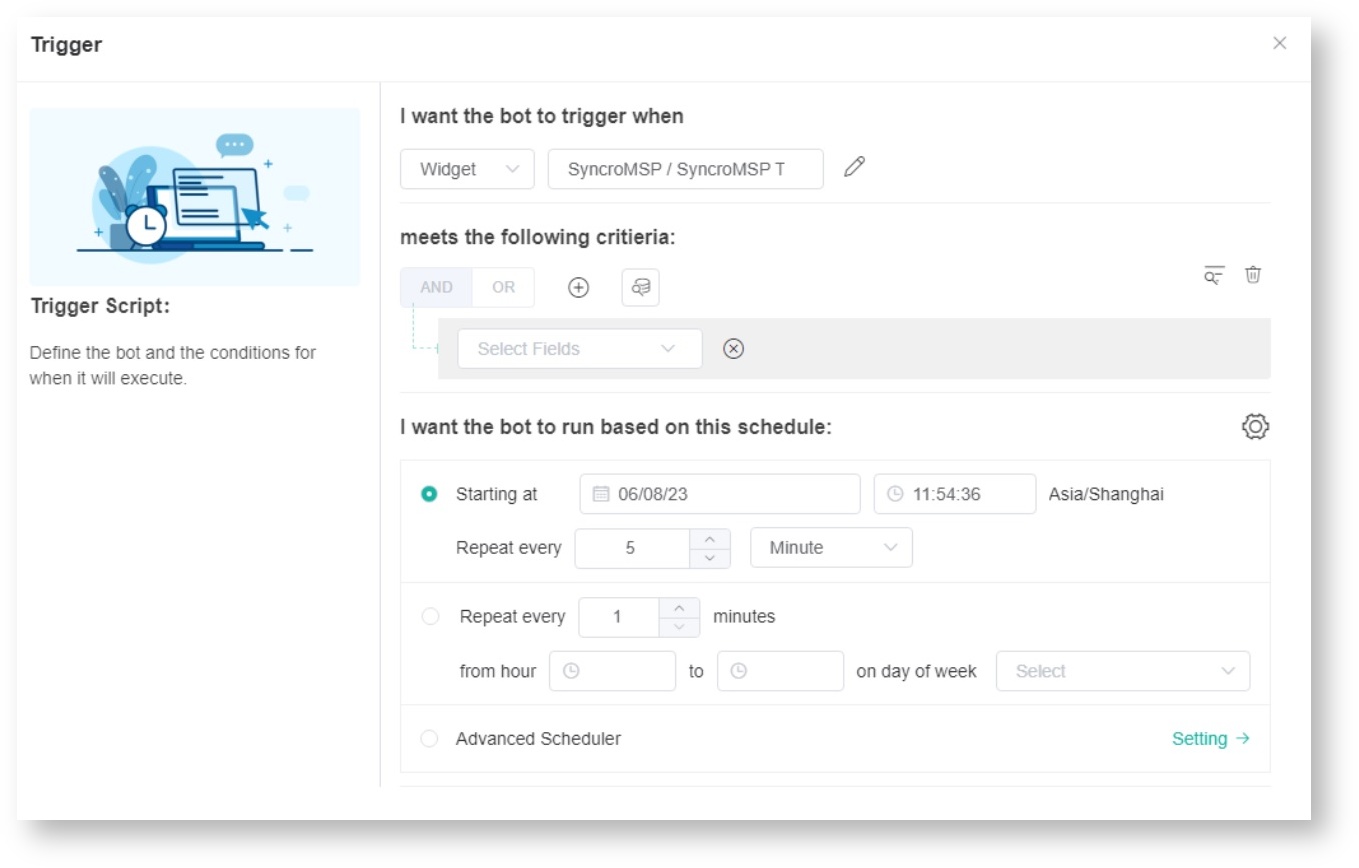
- Do the following in the Trigger window:
-
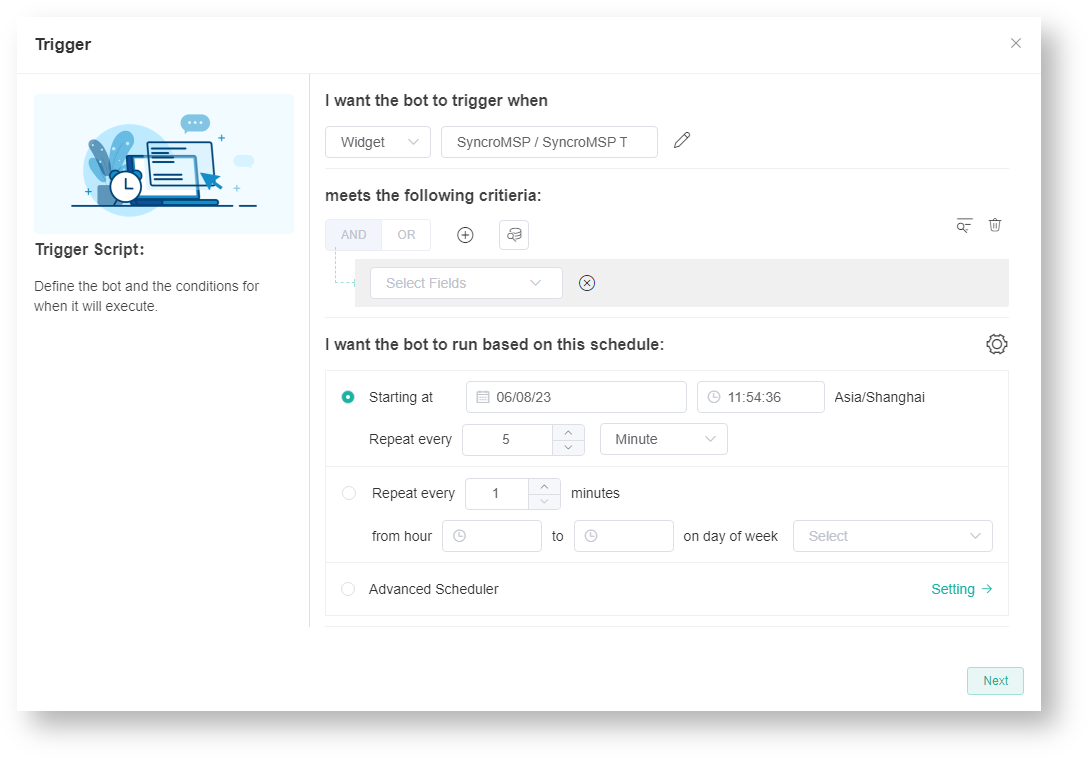
- Under the section I want the bot to trigger when, identify the bot trigger by selecting Widget and SyncroMSP / SyncroMSP Ticket Status is to be deleted. from the dropdown menus.
- Under the section I want the bot to trigger when, identify the bot trigger by selecting Widget and SyncroMSP / SyncroMSP Ticket Status is to be deleted. from the dropdown menus.
-
- Next, define the trigger criteria in the meets the following criteria section. Hover over the plus icon and select +Add Group or +Add Condition.
If you want to preview the data, click the Data Inspector icon.
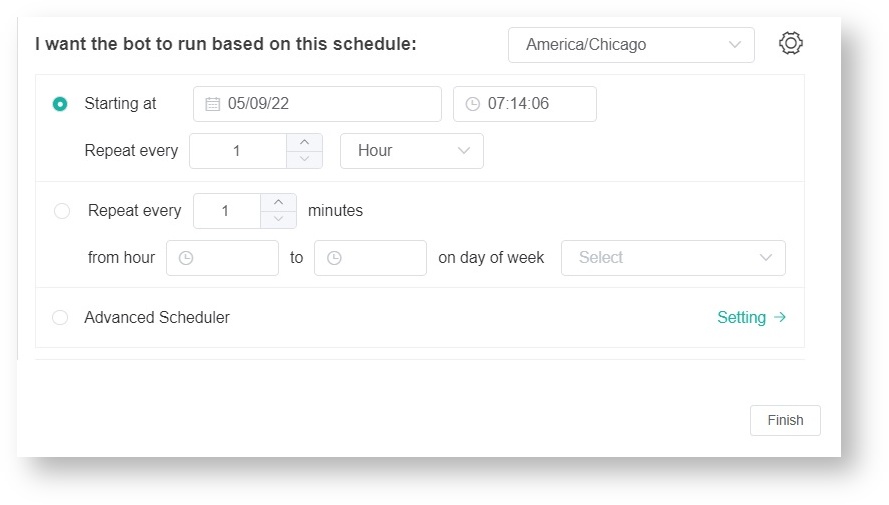
- Then go to the I want the bot to run based on this schedule section and set the time and frequency for running the bot.
- When done, click the Finish button. You will be back to the screen with the bot's details.
Add a REST API Call block.
...
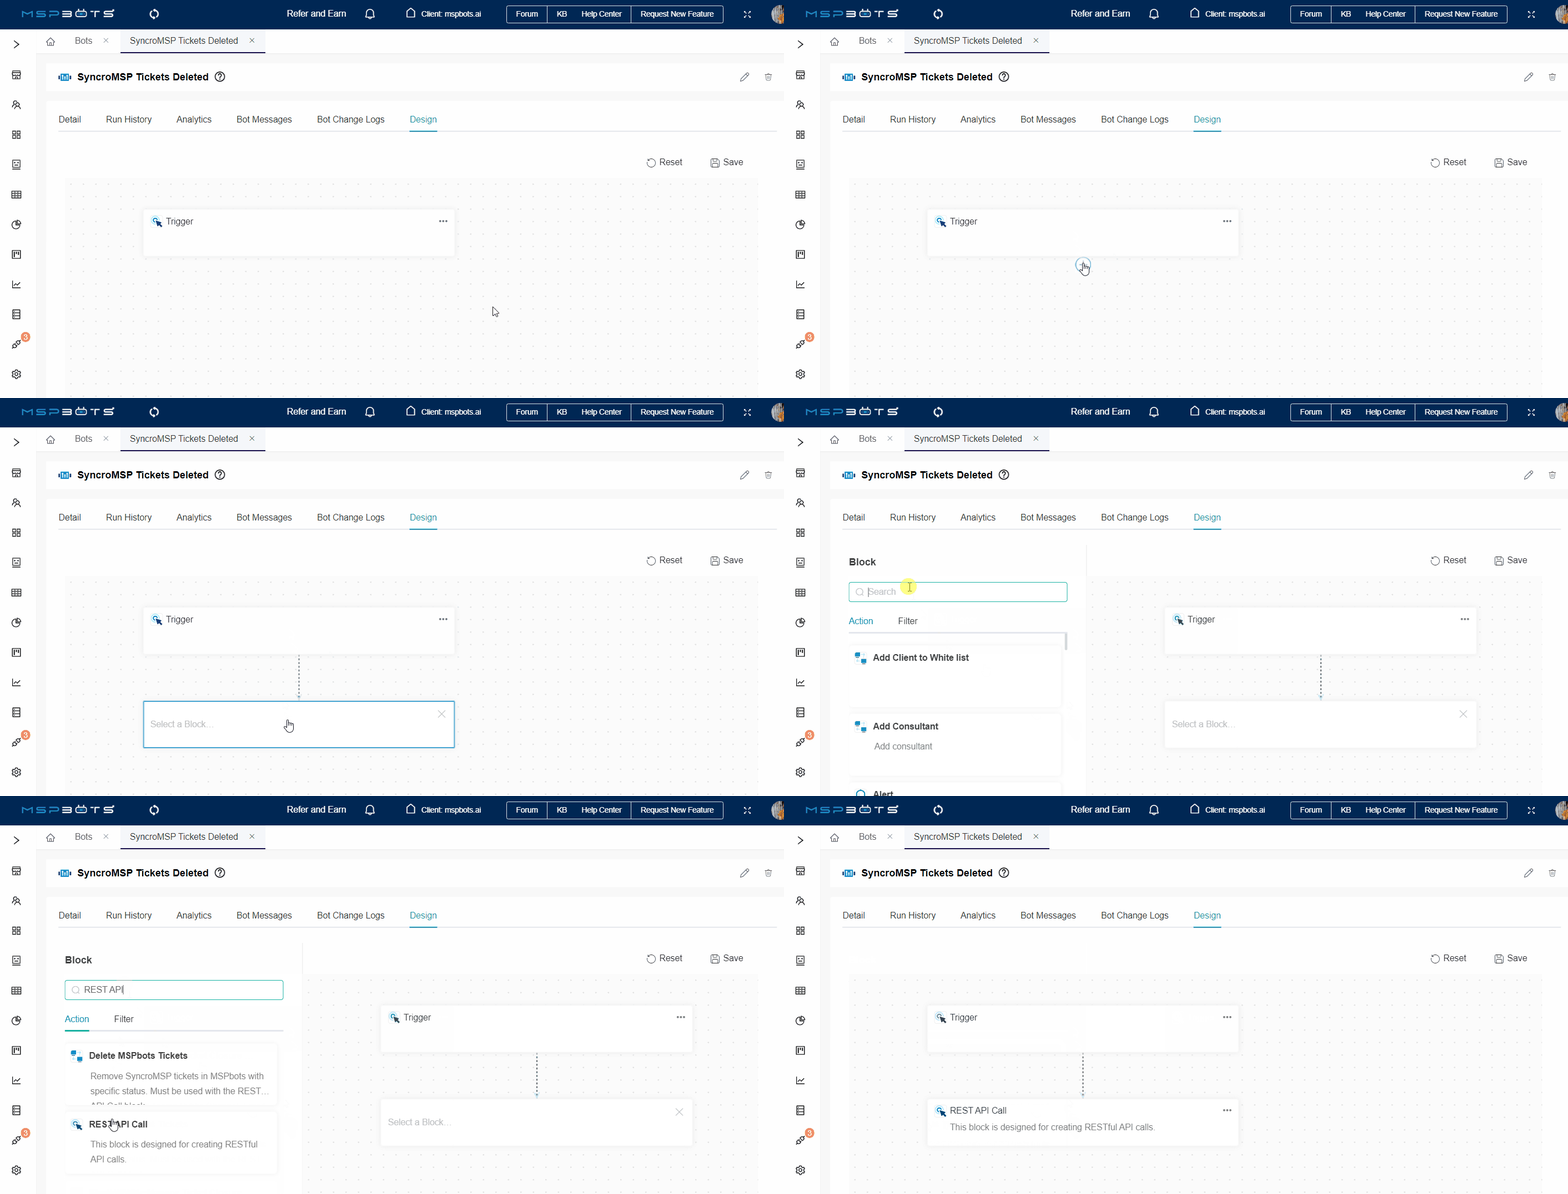
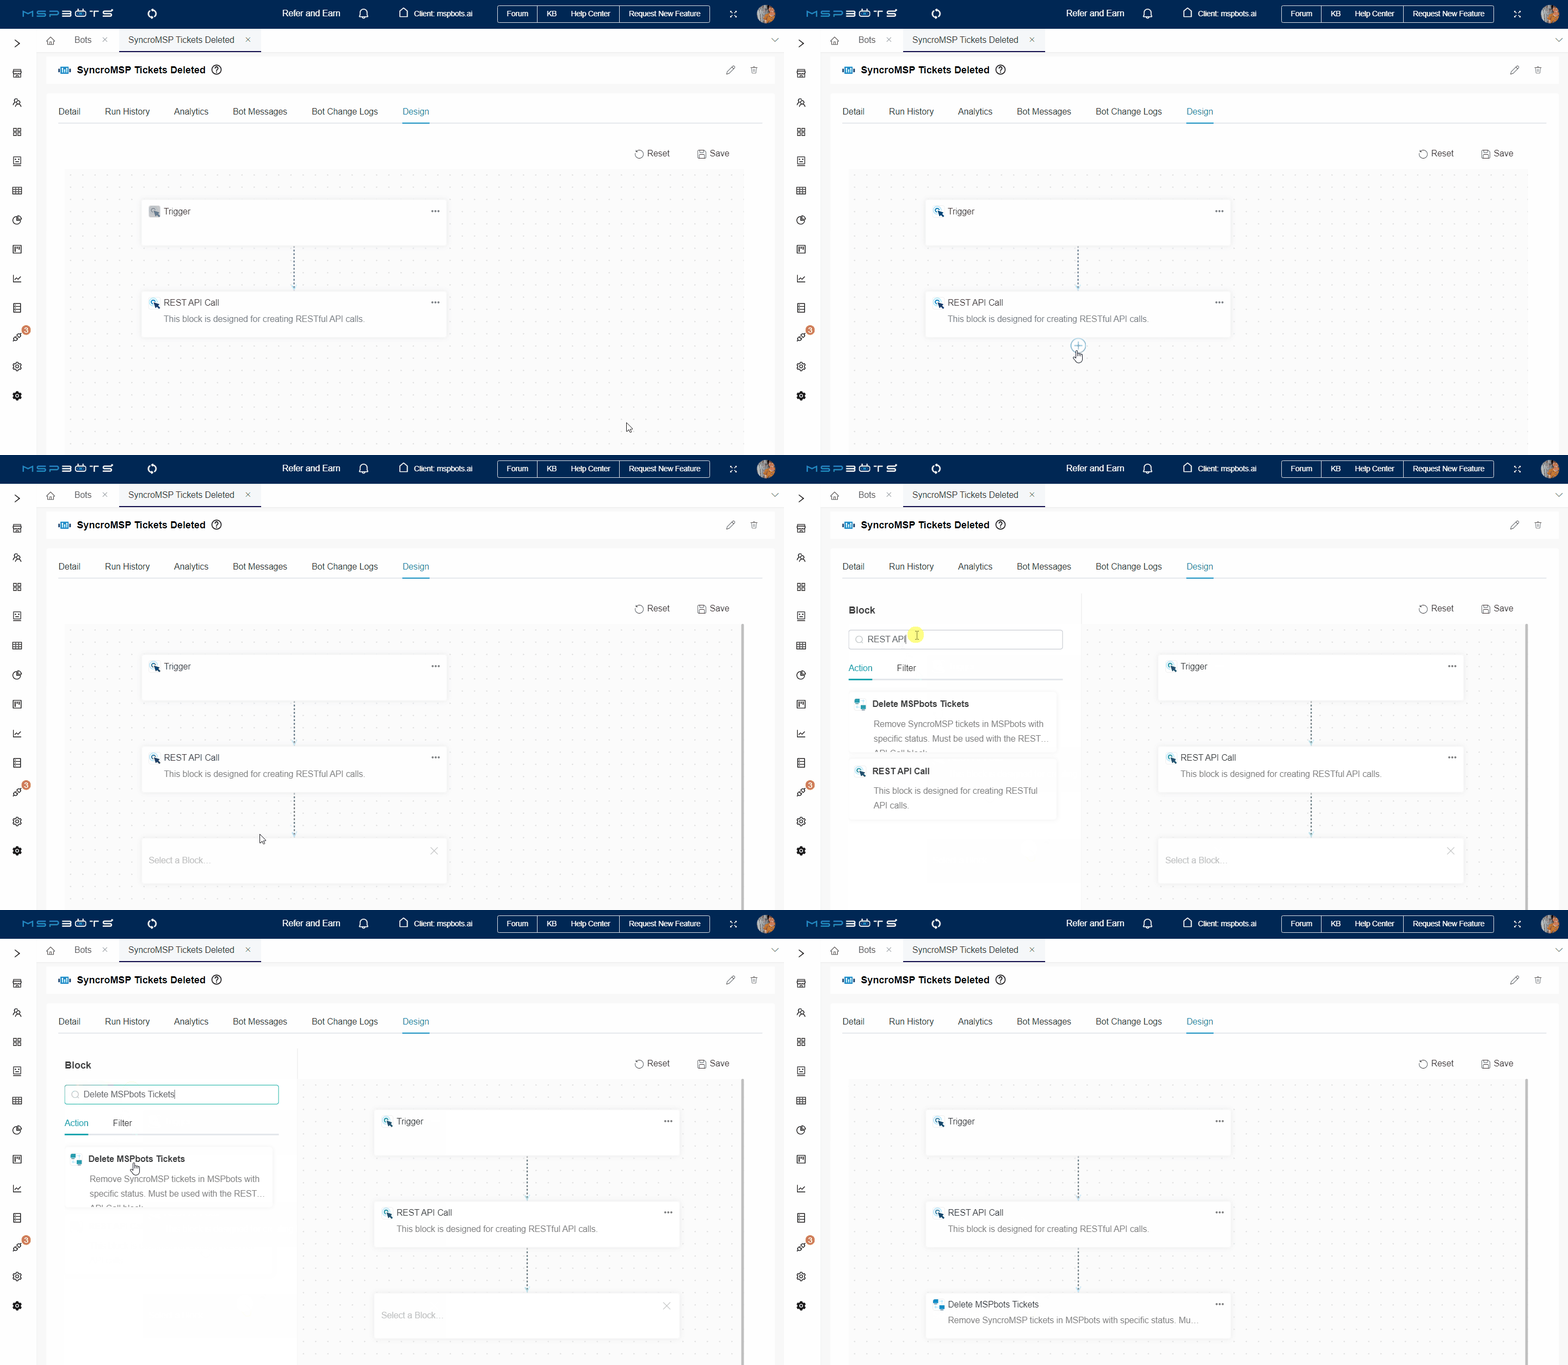
- Click on the Trigger block, then click on the plus icon, and select Add a Block.
- Select the new blank block.
- Enter REST API Call in the search bar, and click the action REST API Call to add the block.
Add a Delete MSPBots Tickets block.
...
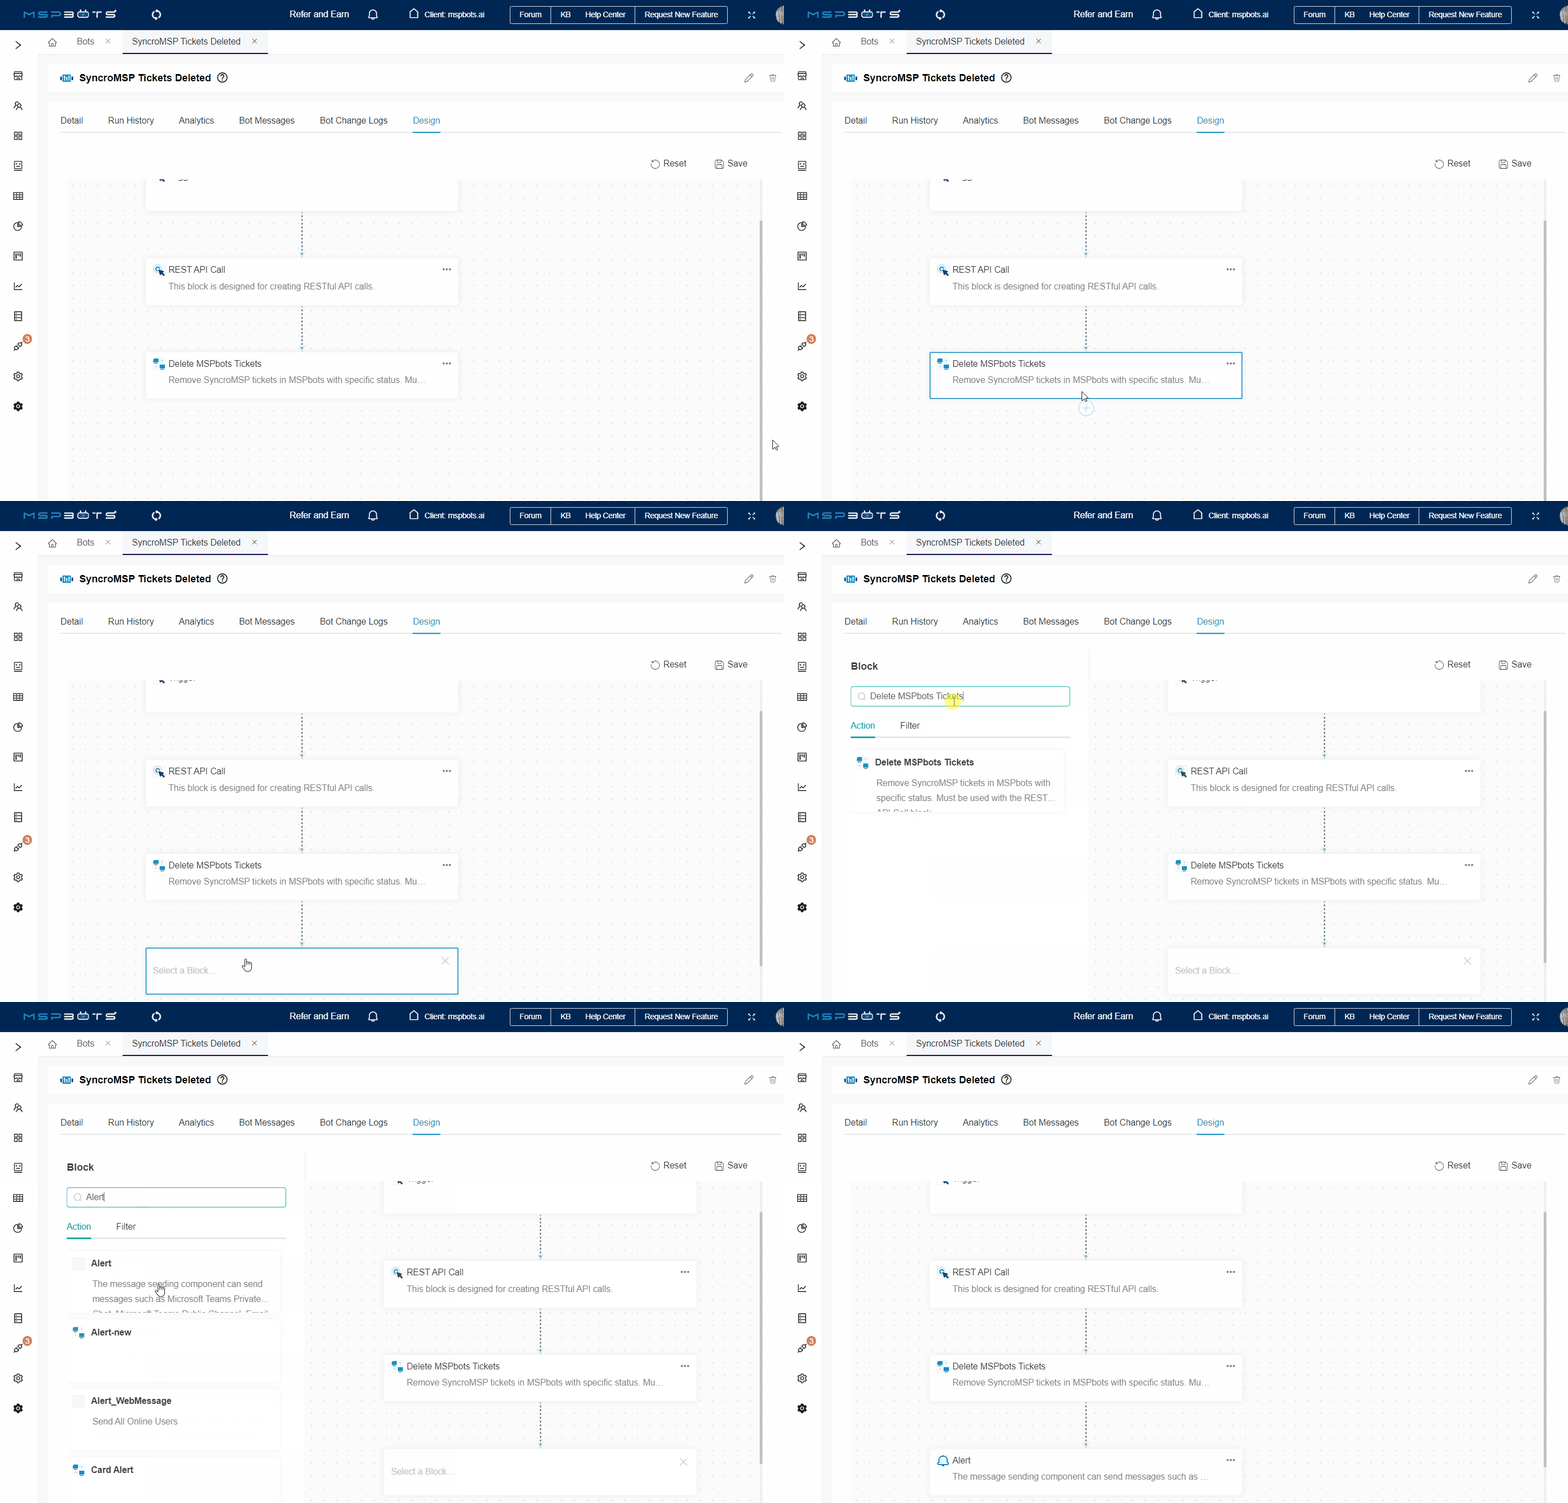
- Click on the REST API Call block, then click on the plus icon, and select Add a Block.
- Select the new blank block.
- Enter Delete MSPbots Tickets in the search bar, and click the action Delete MSPbots Tickets to add the block.
Create the
...
Alert block.
...
...
- Click on the Delete MSPbots Tickets block, then click on the plus icon, and select Add a Block.
- Select the new blank block. Enter
Enter - Alert in the search bar, and click the action Alert to add the block.
Review the trigger.
...
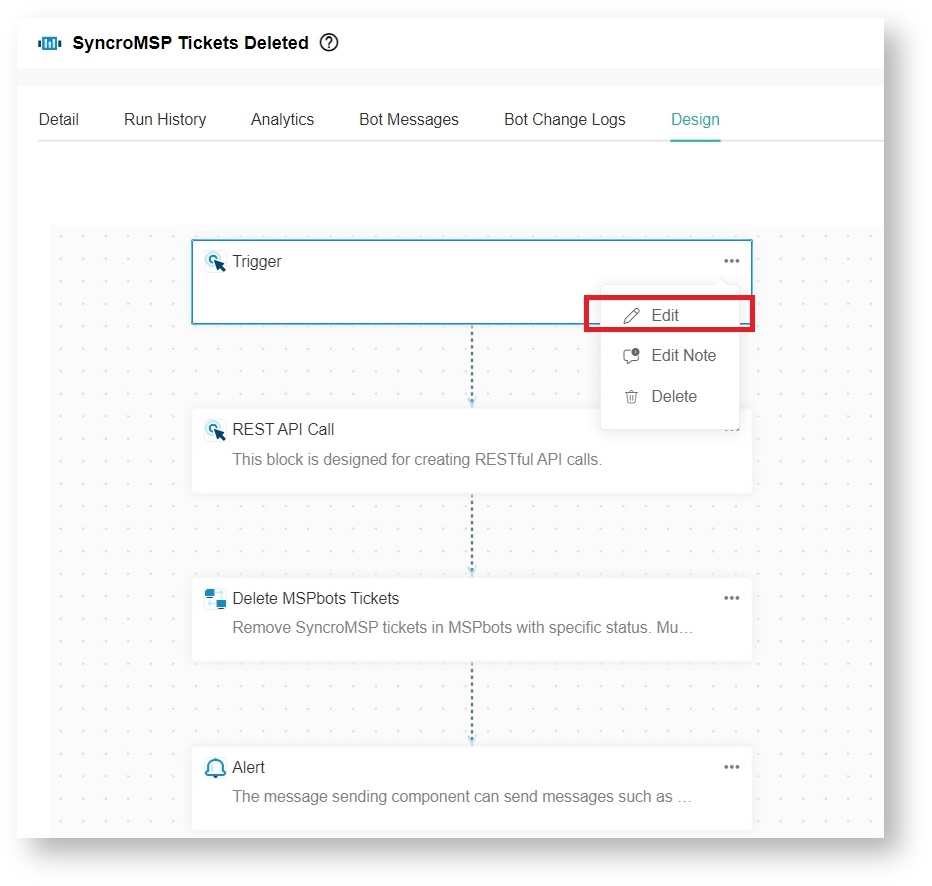
- Click the ellipsis iconin the upper-right corner of the Triggerblock and select Edit.
- Click the ellipsis iconin the upper-right corner of the Triggerblock and select Edit.
- Verify if the details in the Trigger
window - settings are correct.
- settings are correct.
- If the details are
confirmed - correct. click Next to proceed with configuring the REST API settings.
Configure the REST API Call settings.
...
...
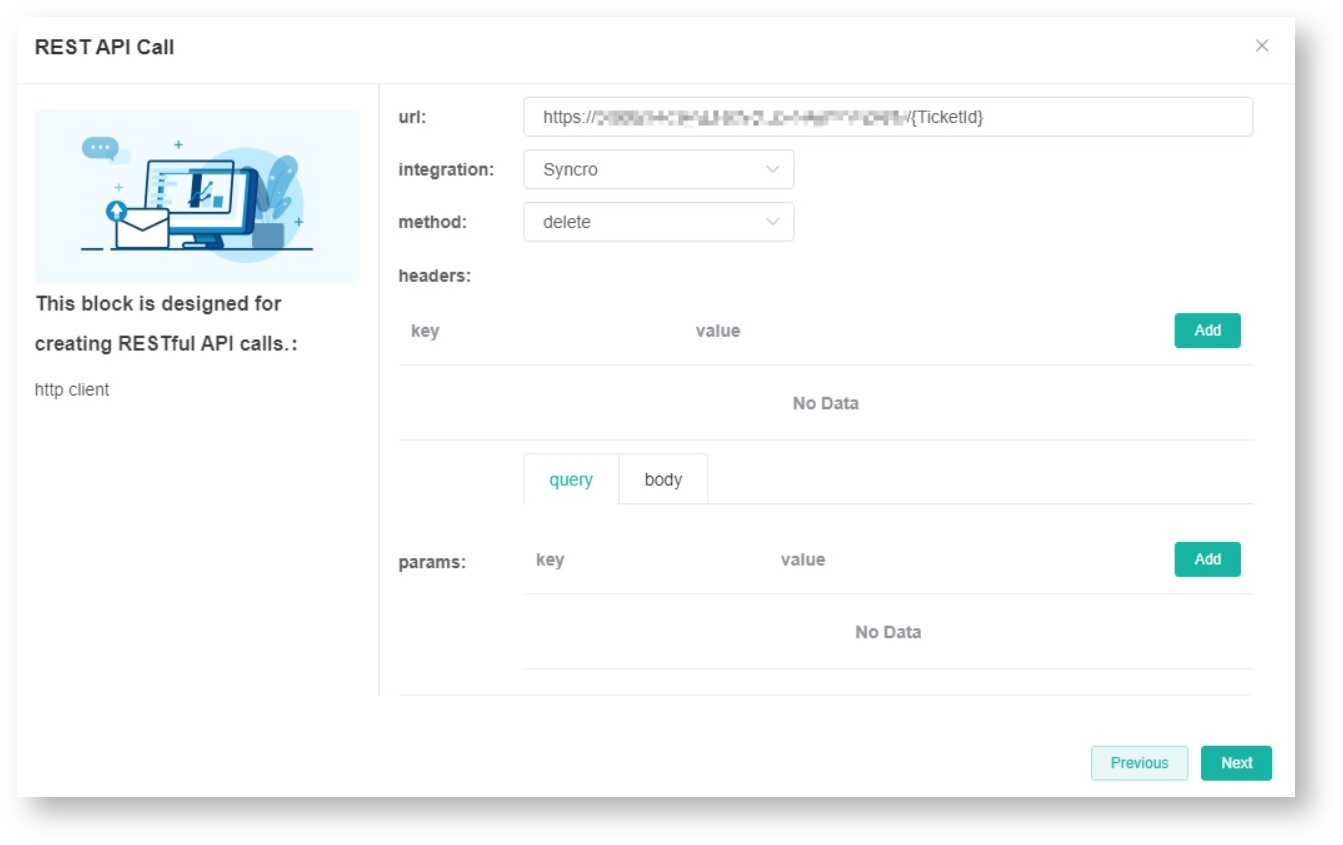
- Enter the following information in
Click Next to proceed to - the REST API Call configuration window
. - For url, please enter "your SyncroMSP HTTP url/{TicketId}".
- For integration. select Syncro.
- For method,select delete. For hesrders and params, please keep No Data.
- :
- URL - Enter your SyncroMSP URL. Example: https://yourdomain.syncromsp.com/(TicketId}.
- Integration - Select Syncro.
- Method - Select delete.
- Headers - No need to add data.
- Params - No need to add data.
- Click Next to proceed to the Delete MSPbots Tickets window.
- :
...
- Click Next
...
- in the Delete MSPbots Ticketswindow to open the Alert settings.
- in the Delete MSPbots Ticketswindow to open the Alert settings.
Configure the Alert settings.
...
To set up the bot alert, follow Step 4 in the article configuration window. Follow the prompts on the page to configure the Alert block according to your preferences.Please refer to: How to Create a Bot#4Bot.Definethebotalertscript.
Click Finish
Save your Settings.
...
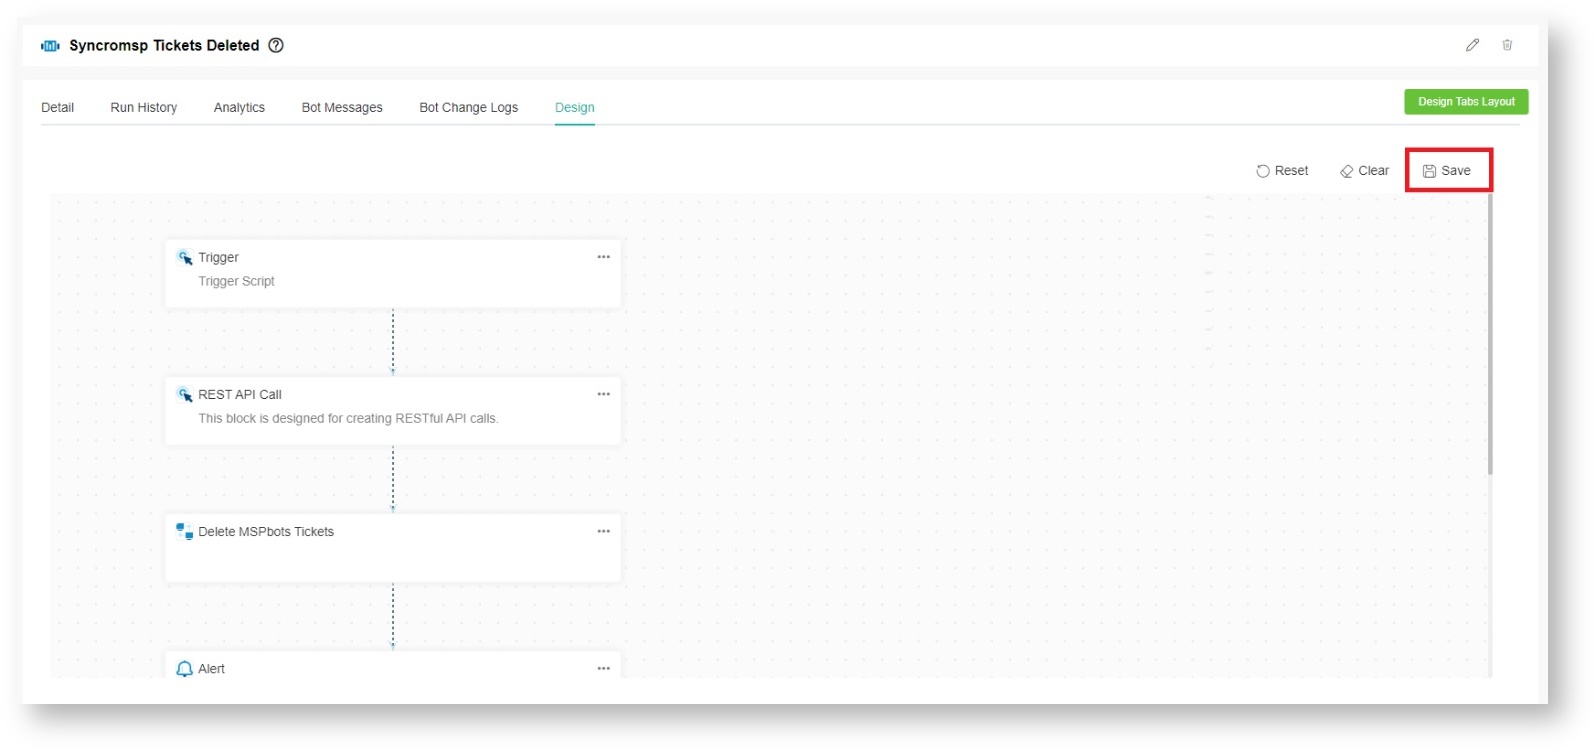
Click Save in the upper-right corner of the bot settings window to save your settings.
Overview
Content Tools
