 N O T I C E
MSPbots WIKI is moving to a new home at support.mspbots.ai![]() to give you the best experience in browsing our Knowledge Base resources and addressing your concerns. Click here
to give you the best experience in browsing our Knowledge Base resources and addressing your concerns. Click here![]() for more info!
for more info!
Page History
...
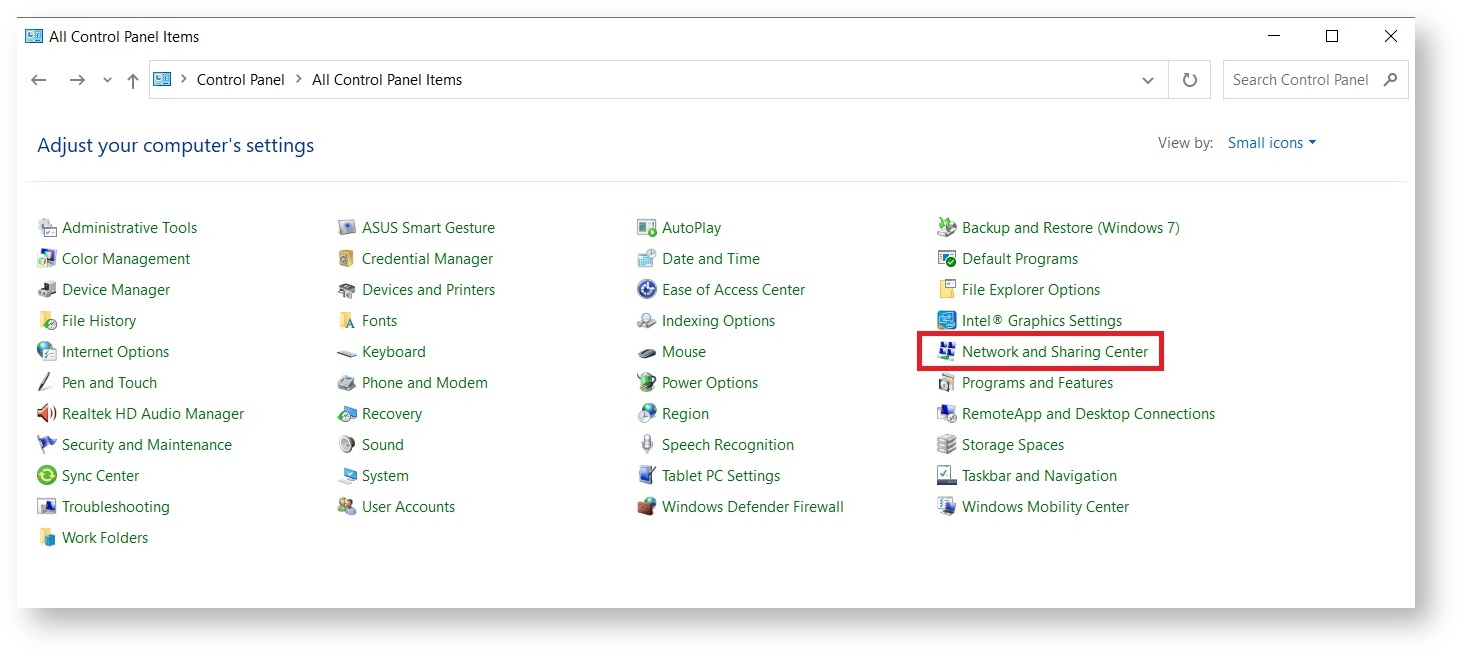
- Launch the Control Panel and open Network and Sharing Center.
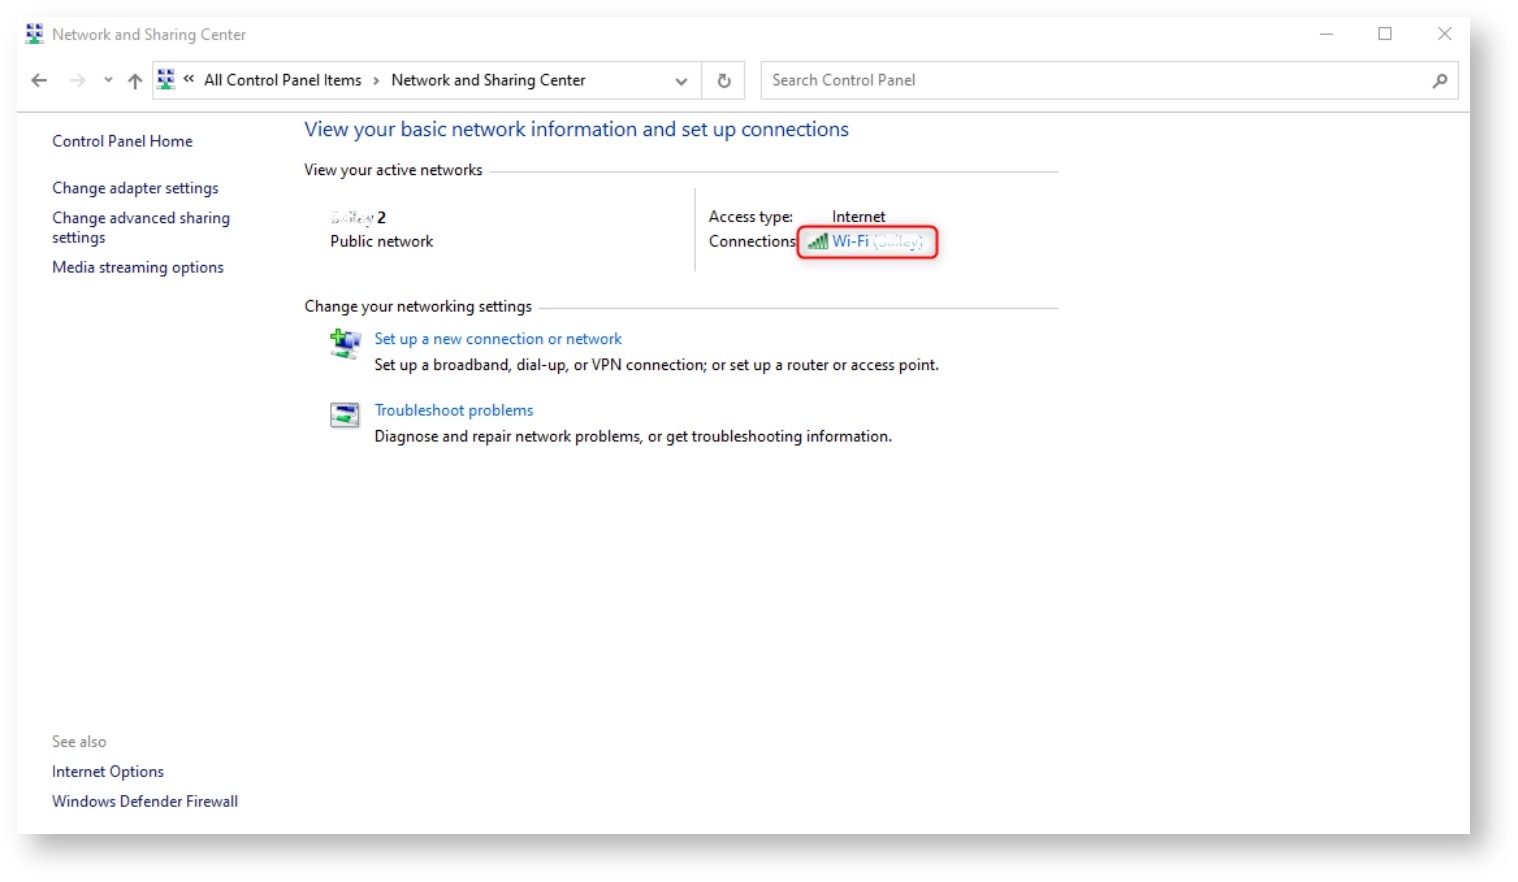
Go back to Integrations and click the Add Connector - On the Network and Sharing Center, click your Connection.
- When the Wi-Fi Status window appears, click the Properties button.
- Take note of your IPv4 Address.
- Launch the Control Panel and open Network and Sharing Center.
...
- Go back to Integrations and click the Add Connector button. (
: This refers toInfo Last success auth
lastshows the last time when the MSPbots Agent
whichsuccessfully pulled the database configuration information. By default,
by defaultthis process is set
)to occur every 5 minutes.
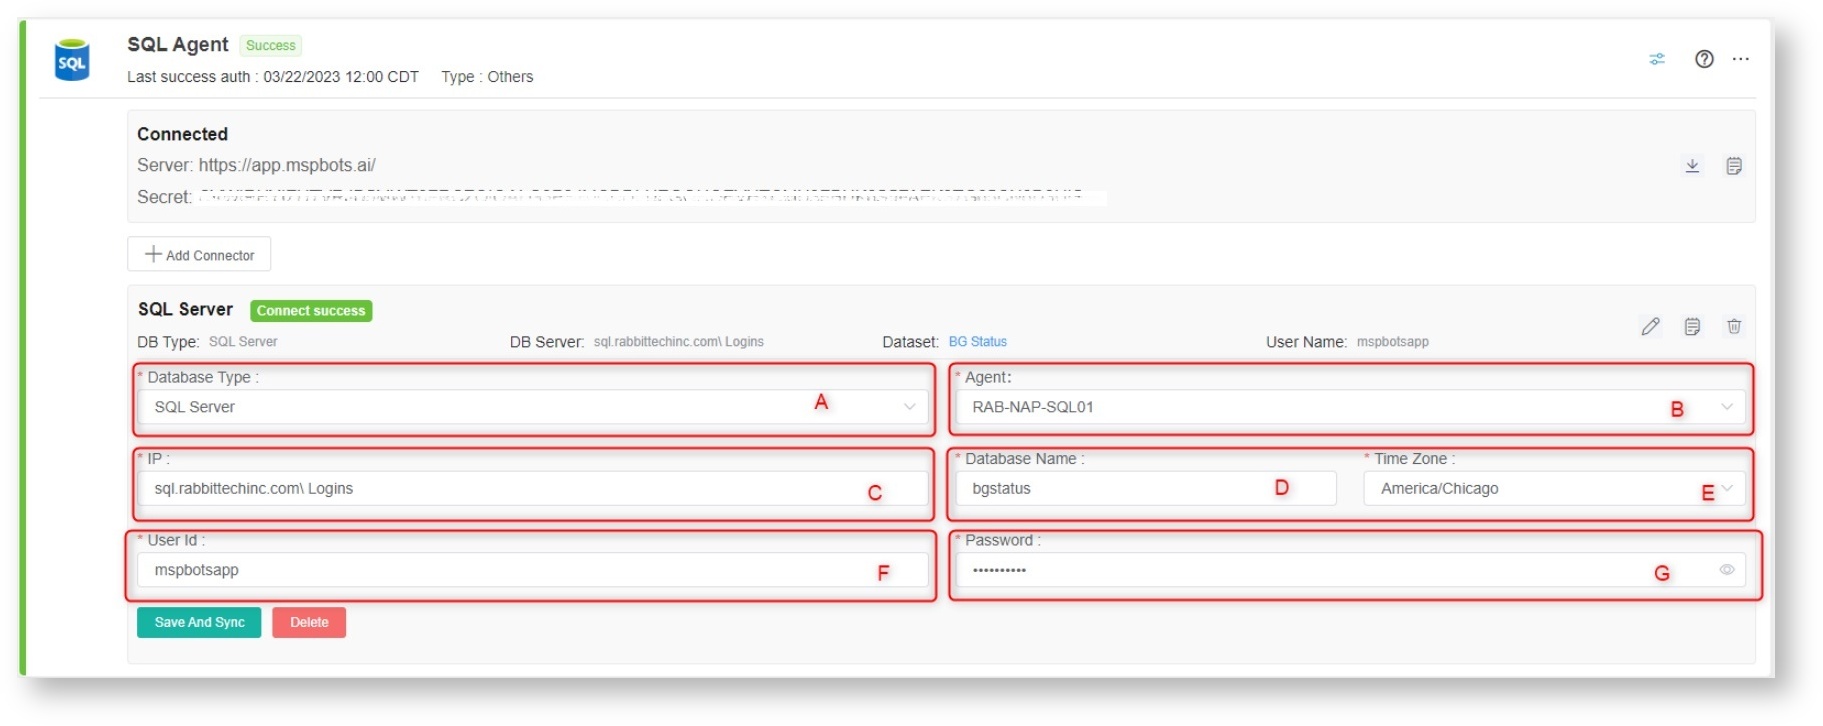
- Fill in all of the following required fields. . It may take a few moments for the agent to check in after installation.
A. Database Type - Select either SQL Server or MySQL.
B. Agent - The agent will auto-populate with the machine name you installed.
C. IP - Provide the internal IP address or FQDN of the SQL or MySQL server.
D. Database Name
E. Time Zone - Select your the time zone ( The time zone of used by the connected database).
F. User ID - This is the username of the user with read-only access to the database.
G. Password - This is the password of the user with read-only access to the database.
Multiple MSPbots AgentNote
(If you have installed multiple MSPbots agents
multiplewith databases in
)different network segments
, you need to select the device name where the MSPbots Agent is installed. The agent is found under the corresponding gateway of the database in the Agent selection box.
- Click Save And Sync.
- Go back to Integrations and click the Add Connector button. (
Create a dataset and validate the data.
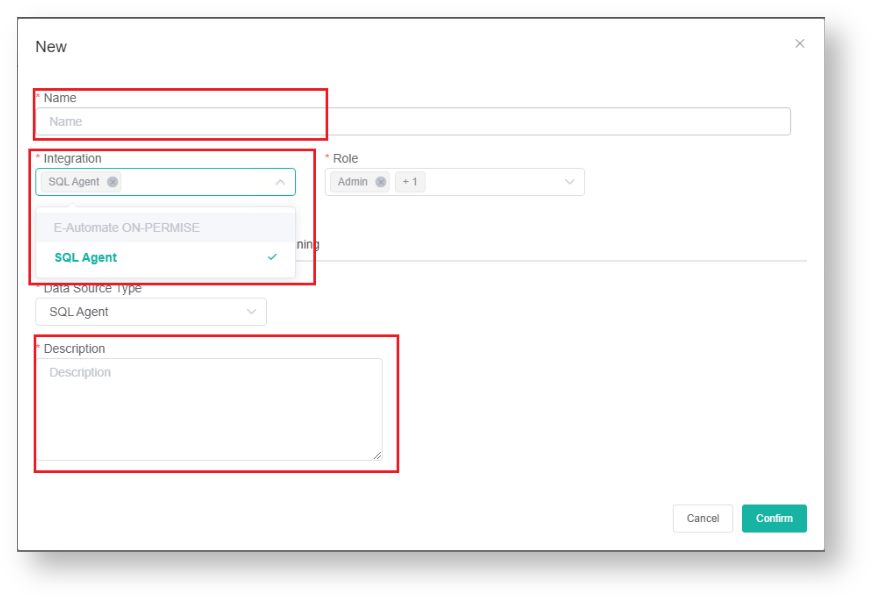
- Go to Datasets on the MSPbots app menu and click the New Agent Dataset button.
When the New window appears, Click integration to click Integration and select SQL Agent , fill in the . Don't forget to fill in dataset Name and Description fields.
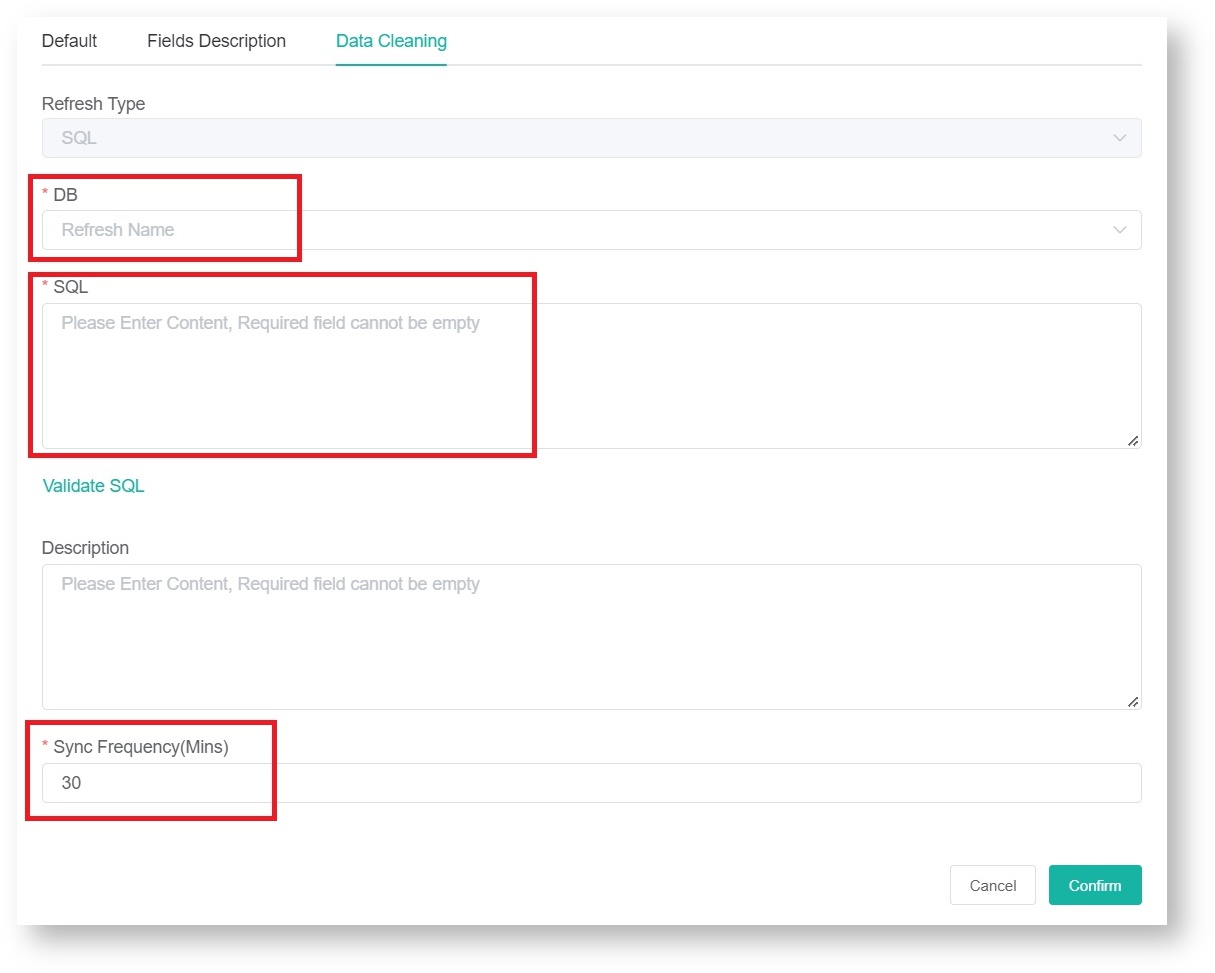
- Next, go to the Data Cleaning tab to show the Validate SQL section below. Select a database from the DB dropdown list.
The most common SQL statement to use here is “select * from TABLENAME”.
- Scroll down to the Validate SQL section, fill in the SQL field, and input your desired Sync Frequency in minutes.
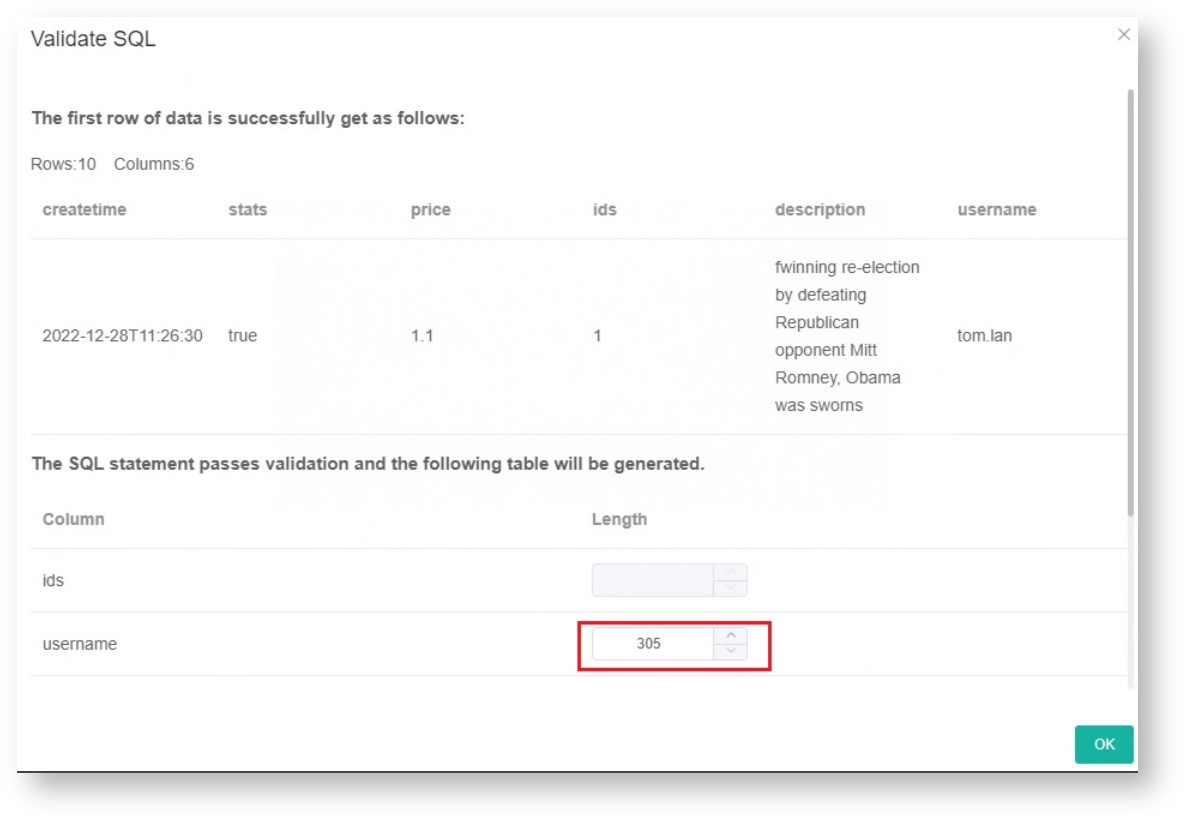
Sync Frequency is currently limited to 30 minutes and can only be decreased for smaller datasets. For larger datasets, the frequency may be limited due to a large amount of data ingestion and the constraint it would place on both your server and ours. - Click Confirm when done. This will show a preview of the data for your validation. You can customize or use the default character length for string-type fields.
- Once you confirm the data is correct, click OK to create and save the dataset. The data will be synchronized in 10 minutes.
- Go to Datasets on the MSPbots app menu and click the New Agent Dataset button.
...
Overview
Content Tools
