 N O T I C E
MSPbots WIKI is moving to a new home at support.mspbots.ai![]() to give you the best experience in browsing our Knowledge Base resources and addressing your concerns. Click here
to give you the best experience in browsing our Knowledge Base resources and addressing your concerns. Click here![]() for more info!
for more info!
Page History
...
This article shows how you can create a target card widget. Before you proceed, make sure that you are logged in to the MSPbots app as an administrator.
...
| Widget Connector | ||
|---|---|---|
|
...
To create a target card widget
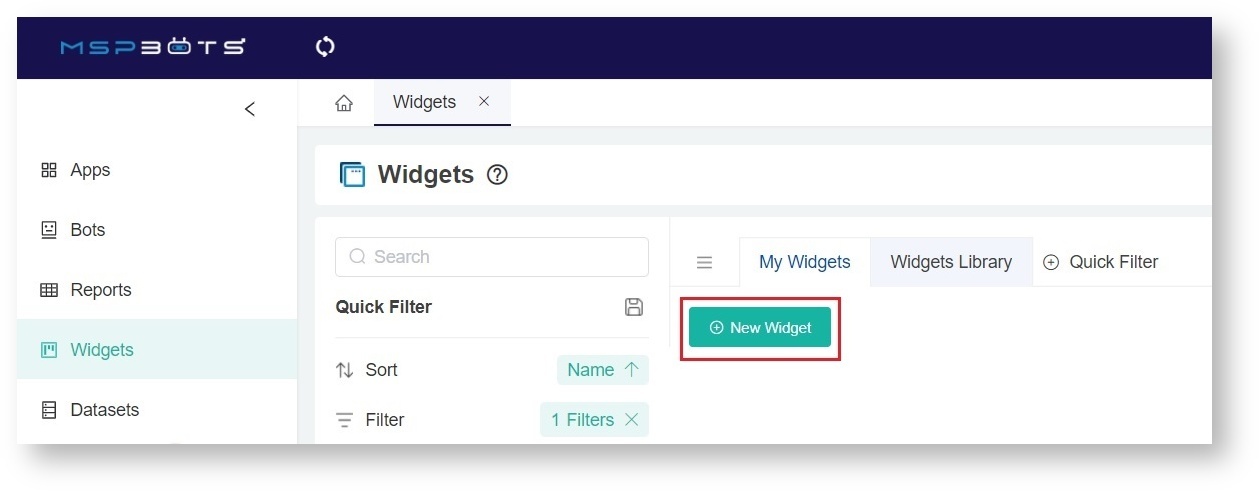
- Navigate to Widgets and click the New Widget button.
- On the New Widgets window, select Target Card. This step opens the Widget Builder window.

- When the Widget Builder window appears, go to Basic Setting and provide the following:
- Name - Give the widget a Name.
- Description - Provide a short Description.
- Role - Select Userthe user that needs access to the widget.and/or Admin.
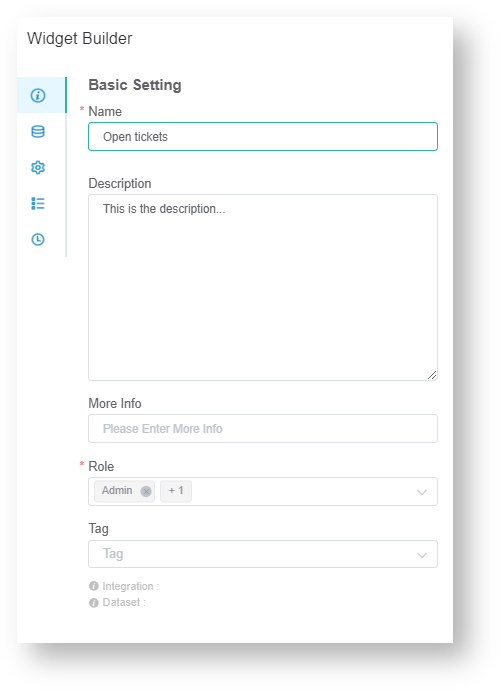
- Click Apply.
- Next, go to Dataset and click the + button.

- Select New Layer on the window that appears. This step opens the Dataset window.

- Do the following on the Dataset window:
- Select a dataset to use.
- Give the datasource a name.
- Add columns by selecting an option from the Column Name dropdown list and assigning an Alias and Business Type for each. Click the + icon to add more rows.
- Add filters, measures, and dimensions.

Refer to What Conditions are Available for Creating Widgets? as a guide for this step.
- Click Save.
- Click Apply. This will show a preview of the target card that you created.
- Next, go to Config and provide data for the following fields:
- Fields - Select the measure that you would like the target card to show.
- User - Select the KPI or metric owner name from the dropdown list. Selecting a user will activate the widget and will start taking a snapshot snapshots of the target card. If left blank, it will not record any snapshot.
- Refresh Cron - Select the frequency for the widget to take a snapshot of the target card.
- Benchmark - Set the target score of the widget.
- Last Days - Set the number of days to limit the graph dimension.
- Header Text - Set the measure label.
- Trendline - Select a preferred trendline on the dropdown list, if necessary.

- Click Apply. This will show a preview of the target card that you created.
- If you want to change the text or background color when the fields and measures meet specific conditions, set a conditional formatting rule for your target card. Go to Conditional Formatting and add rules to define the conditions. Once a rule is set, click Apply on the widget rule window.

- Lastly, click Apply then click Apply again on the widget to show a preview of the target card.
The preview will appear empty on the first day of widget creation because the widget does not have a record of snapshots yet. Once records are available, a line graph preview will appear.
Content by Label showLabels false max 5 showSpace false title Related Topics excludeCurrent true cql label in ("target","scorecard")
...
Overview
Content Tools