 N O T I C E
MSPbots WIKI is moving to a new home at support.mspbots.ai![]() to give you the best experience in browsing our Knowledge Base resources and addressing your concerns. Click here
to give you the best experience in browsing our Knowledge Base resources and addressing your concerns. Click here![]() for more info!
for more info!
Page History
You can change the time zone setting in the Users Work Schedule under Settings of the Attendance Manager if you have employees working in different regions of the world.
What's in this article:
User issue and background information
...
Attendance Manager users whose shifts extend beyond midnight are logged out before the end of their assigned work schedule and receive the following message:

An employee whose work schedule is set to 6:00 PM to 2:00 AM Europe/Amsterdam (UTC+02:00), for example, is logged out automatically at midnight occurs because the Attendance Manager follows Central Standard Time (CST) UTC−05:00 and changes the status of all logged users to OUT
| Table of Contents |
|---|
Background Information
The main purpose of this wiki is to help you adjust the time zone if your working hours extend beyond midnight. By default, the MSPbots app automatically ends work at midnight (12:00 AM CST). To avoid any inconvenience caused by this, all you need to do is This setting can cause work schedule issues for people working in different time zones. To avoid these issues, change the time zone setting of your work schedule. Only the Admin can modify the time zone. Here's an example using your original work schedule, with the time zone set to Europe/Amsterdam, starting at 6:00 PM and ending at 2:00 AM the next day.

Main Section
in the Users Work Schedule to another setting like America/Chicago (UTC-05:00).
How to adjust the time zone in a user's work schedule
...
Only users with the admin role can modify the time zone settings.
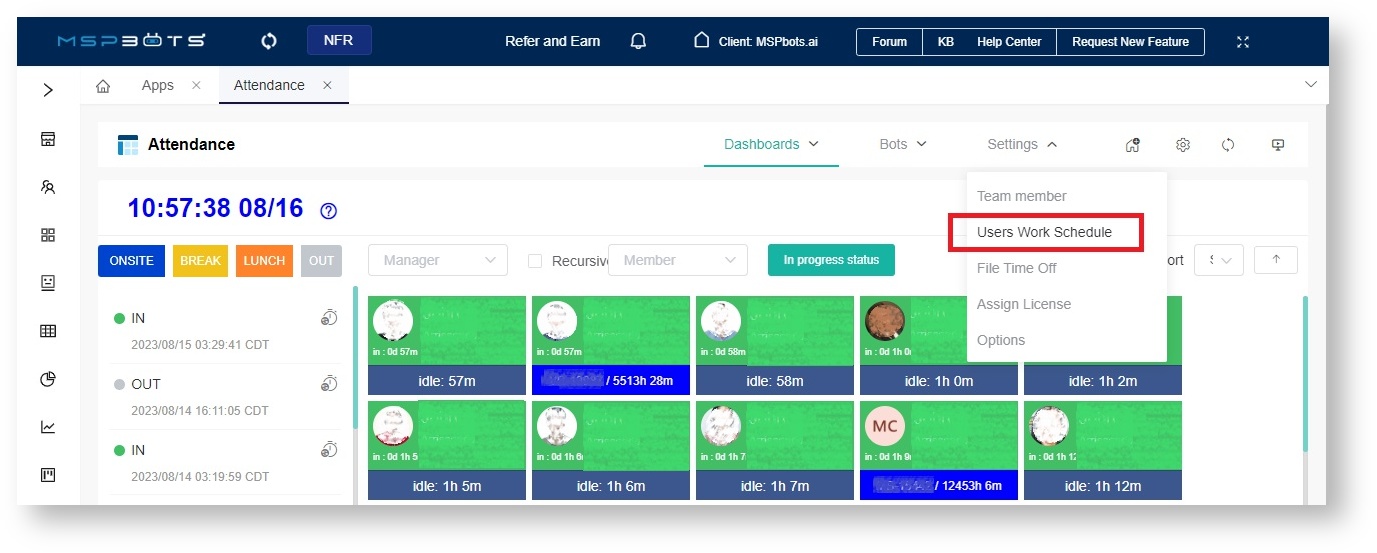
- On the Attendance Manager app, hover over Settings and select Users Work Schedule.
Alternatively, you can go to Settings > Work Schedule Go to Settings > Work Schedule in the MSPbots app.
- You can also enter the work schedule page by clicking on Users Work Schedule in the dropdown menu under the Settings section of the Attendance app.

- You can also enter the work schedule page by clicking on Users Work Schedule in the dropdown menu under the Settings section of the Attendance app.
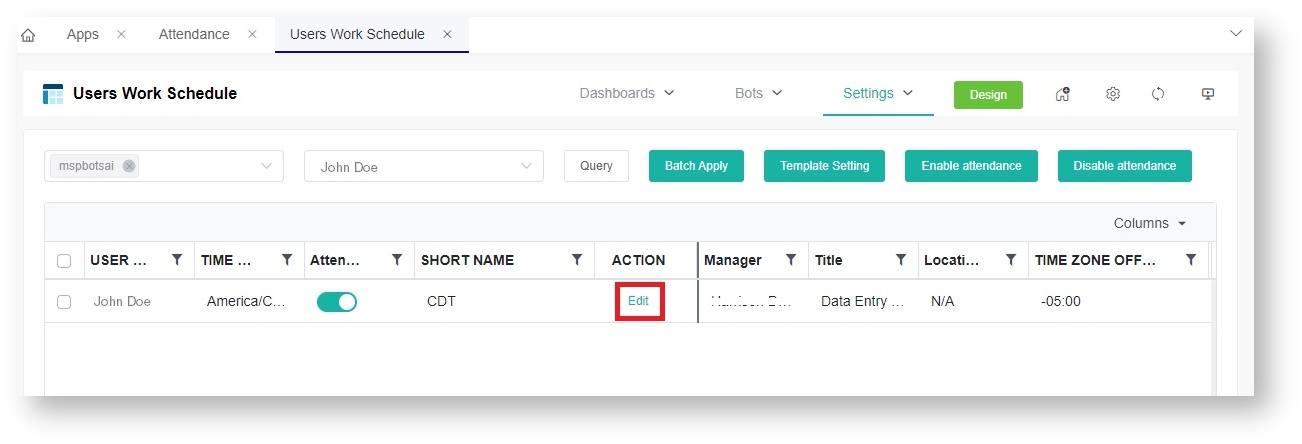
- In the search bar, query the user you want to set based on the Organization and Username.

- Click on the Edit button in the Action column.

- Select an organization from the Organization dropdown list then go to the Select Users dropdown list and select the user whose work schedule settings need to be modified.

- Next, go to the Action column and click the Edit button for the selected user.
- Select America/Chicago (UTC-05:00) from the Working Time Zone dropdown list.
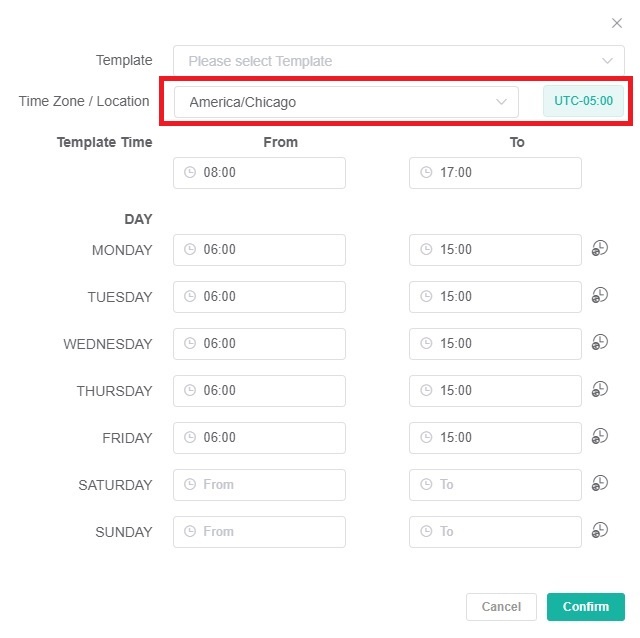
Example A. If your work schedule is You can select a time zone in the Working Time Zone dropdown that does not span two days.
For example, if your current working time zone is Europe/Amsterdam from 6:00 PM to 2:00 AM the next day, you can choose America/Chicago as your working time zone. Due to the 7-hour time difference between Amsterdam and Chicago, this will be equivalent to your working hours being from(Europe/Amsterdam (UTC+02:00), it will be adjusted to 11:00 AM to 7:00 PM in Chicago time.Note
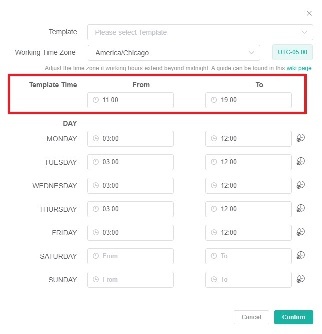
Once the time zone is changed, the time in the MSPbots app will be adjust automatically adjusted to match the new time zone.
- Update the Template Time manually based on the your chosen time zone, converting it into the corresponding working start and end time. For instance, it would be transformed to 'From 11:00' to 'To 19:00'.
- You can click
 the Schedule Unify button next to Day to directly apply the Template Time to the working hours of this day, eliminating the need to set the working hours for each DAY.
 - . Based on Example A above, enter 11:00 in the From field and 19:00 in the To field.
- To eliminate the task of setting the working hours separately for each day, click the Schedule Unify button for each day of the week to directly apply the Template Time.
- Click Confirm. Click Confirm.
Overview
Content Tools