 N O T I C E
MSPbots WIKI is moving to a new home at support.mspbots.ai![]() to give you the best experience in browsing our Knowledge Base resources and addressing your concerns. Click here
to give you the best experience in browsing our Knowledge Base resources and addressing your concerns. Click here![]() for more info!
for more info!
Page History
Filters are use used to help narrow down the tickets that you wanted want your technician/users technicians to work on. You can define the filter conditions using the dropdown menu and exclude the tickets that you don't want the technicians to seeThese are configured by defining conditions using the available fields in your PSA.
What's in this article:
Table of Contents
| Note |
|---|
Only admin users can create and modify filters. |
How to Create
...
a Filter
...
You may can create or add a new filter by doing with the following steps:
- Open NextTicket on the MSPbots app. Navigate to Apps and select NextTicket from the apps list.
- On the NextTicket dashboard, click the Filter dropdownand select Add New Filter.

- Set up conditions on the Filter Settings window that appears.

- Input a Filter Name.
- Click the
 icon to add a condition and select the needed PSA field(s) and operator(s) to define the ticket pool. Service Boards/Queue, Ticket Status, and Closed Flag are commonly used filters. You can also use the icon to add a group.
 Note You must have a service board (Or Queue) field for the NextTicket app to work.
- When done adding conditions, click the Preview button to test if the tickets are the ones that you want to show.
Note Select a user on the main dashboard before using the Preview button to ensure that the function will work successfully.
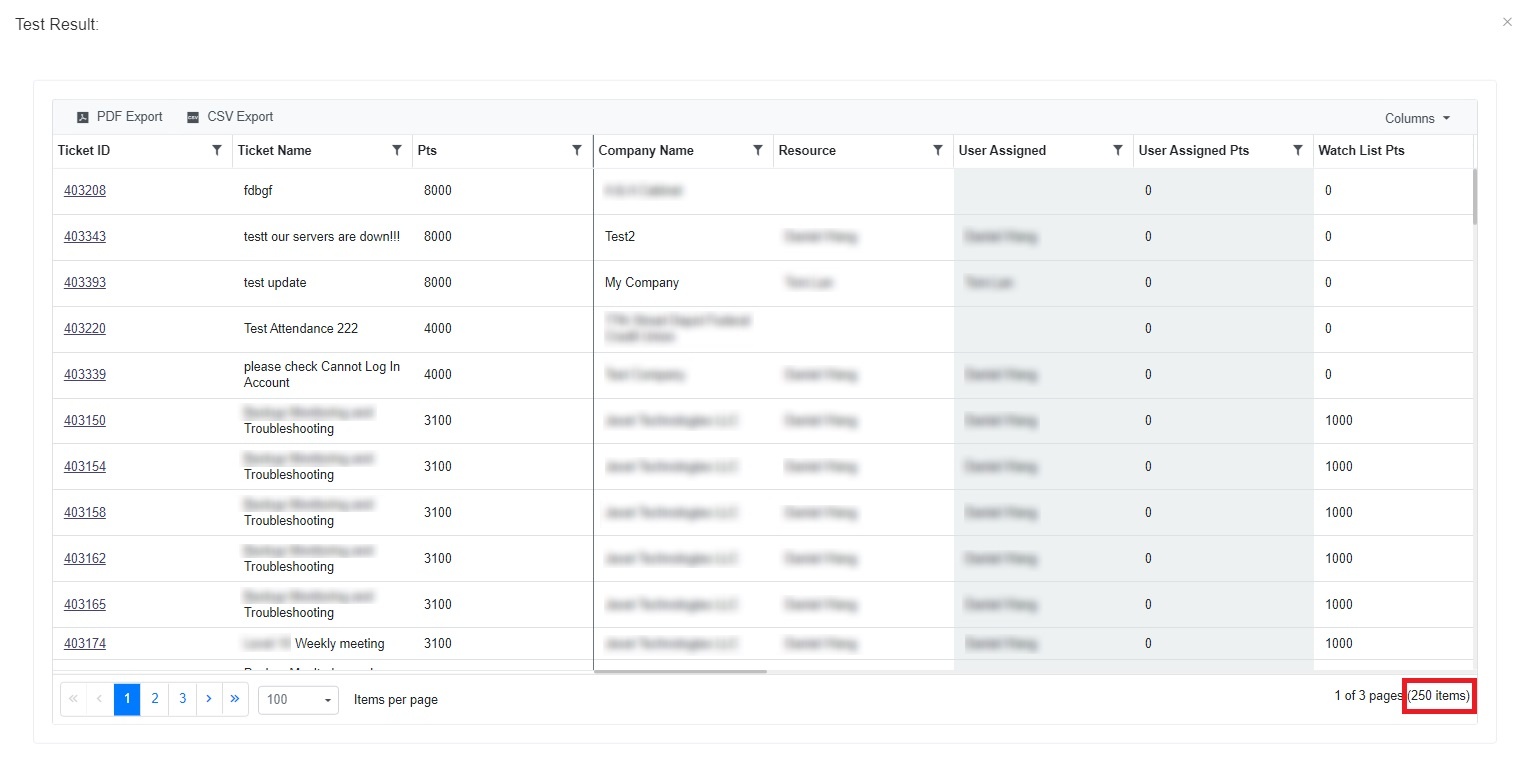
Tip In the "Test Result" pop-up window, it can capture up to 250 items. We have set a limit to capture a maximum of 250 data items. The reason for this limit is that sometimes the data returned by the API interface is too large, which can cause errors in the interface.
- When capturing 250 ticket items, the number of filtered tickets can be exactly 250 items or more than 250 items.
- When there are fewer than 250 items, the number of filtered tickets will be displayed accordingly.
If you want to avoid having 250 items, please go back to the "Filter Settings" page to adjust the filter and preview again until the ticker items are less than 250 items.
- Once satisfied with the filter settings, click Save.
Info If a PSA field is not available from the dropdown list, please reach out to our Support Team at support@mspbots.ai.
How to Edit a Filter
...
You can edit an existing filter with the following steps:
- Navigate to Apps on the MSPbots menu and select NextTicket.
- On the main dashboard, click the Filter dropdown, then click the
 icon corresponding to the filter you want to edit.
- Click Save when done editing.
How to Copy a Filter
...
You can copy or clone an existing filter with the following steps:
- Navigate to Apps on the MSPbots menu and select NextTicket.
- On the main dashboard, click on the Filter dropdown, then click the
 icon corresponding to the filter you want to copy.
A copy of the selected filter will be added to the dropdown list.
How to Delete a Filter
...
You can delete a filter with the following steps:
- Navigate to Apps on the MSPbots menu and select NextTicket.
- On the main dashboard, click on the Tickets filter dropdown, then click the
 icon corresponding to the filter you want to delete.
- Click OK when asked if you want to delete. The screen will refresh, and the filter will be removed from the dropdown list.
- In NextTicket Manager, click on the filter dropdown then click the "Add New Filter".

- In Filter Settings:
- Input Filter Name
- Select Service Board or Queue you wanted to pull your tickets. You may select multiple item depends on the operator you selected.
- You may add condition or group by clicking the "+" button. You may click the pre
Overview
Content Tools