 N O T I C E
MSPbots WIKI is moving to a new home at support.mspbots.ai![]() to give you the best experience in browsing our Knowledge Base resources and addressing your concerns. Click here
to give you the best experience in browsing our Knowledge Base resources and addressing your concerns. Click here![]() for more info!
for more info!
Page History
You need to give MSPbots read-only access to your company's SQL server so that we can pull data from your server without modifying or deleting entries. Read-only access to your database also helps us create datasets for your use.
This guide has the steps for granting read-only access to your SQL server.
...
What's in this articleTable of Contents
Creating a read-only account for MySQL
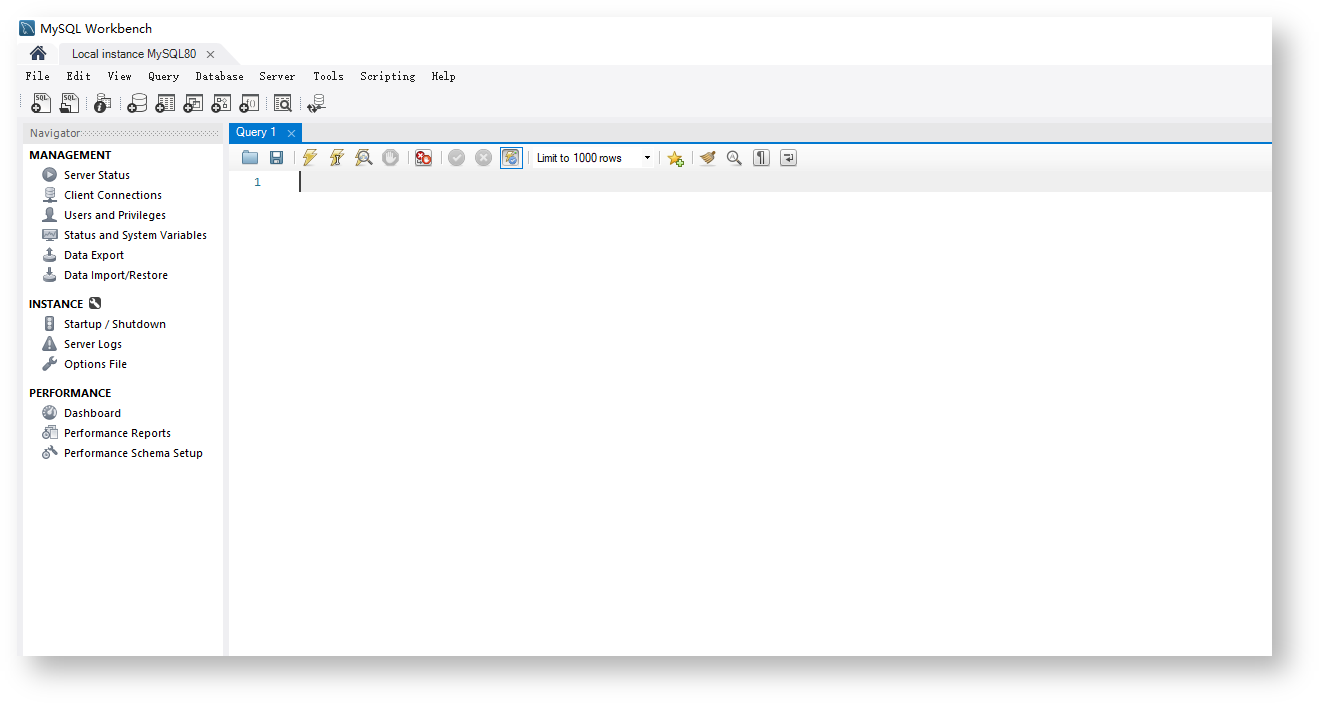
- Log in to the MySQL Console using the root or admin account.
- Create a new account that allows remote access and set a password. Type the following command:
Code Block CREATE USER 'mspbots'@'%' IDENTIFIED BY '123456';
where
‘%’ allows remote access,
‘mspbots‘ is the Login name, and
‘123456’ is the Password.
To delete an existing account, use the following command:Code Block DROP USER 'mspbots'@'%'; - Next, grant read-only permissions to the MySQL account. Type the following command:
Code Block GRANT SELECT ON autotest.* TO 'mspbots'@'%';
where
'SELECT' allows read-data access only,
'autotest' is the name of the database to which you want to synchronize data with MSPbots, and
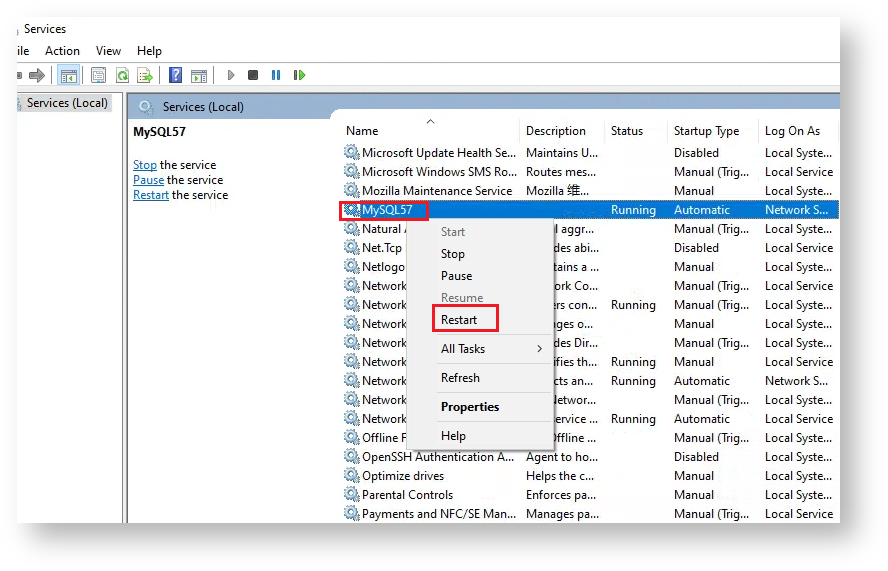
'.*' is ALL the tables or the specific tables that can be selected for synchronization. - Restart the MySQL server.
Creating a read-only account for
...
the SQL server
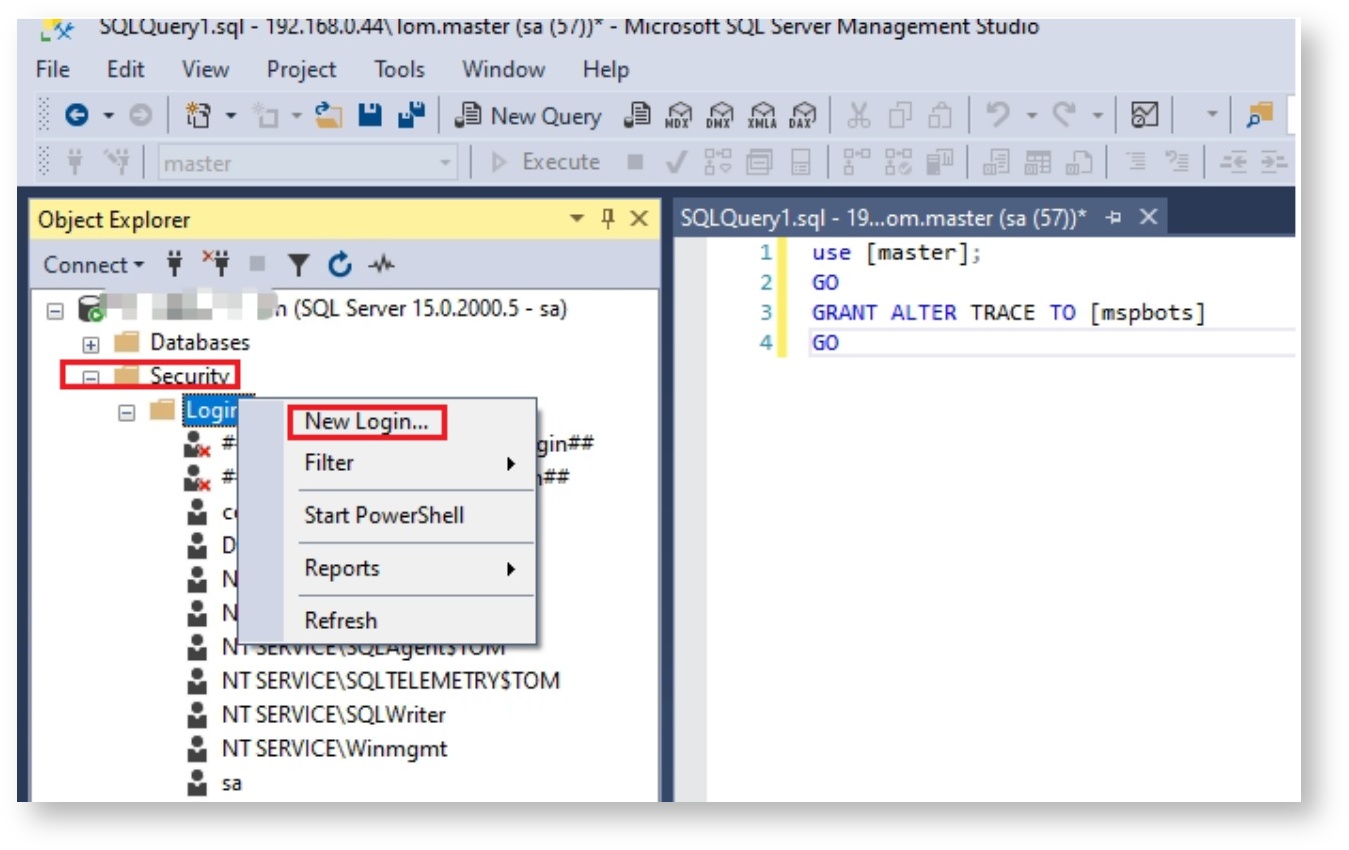
- Log in to SQL Server Management Studio and right-click on Logins New Login.
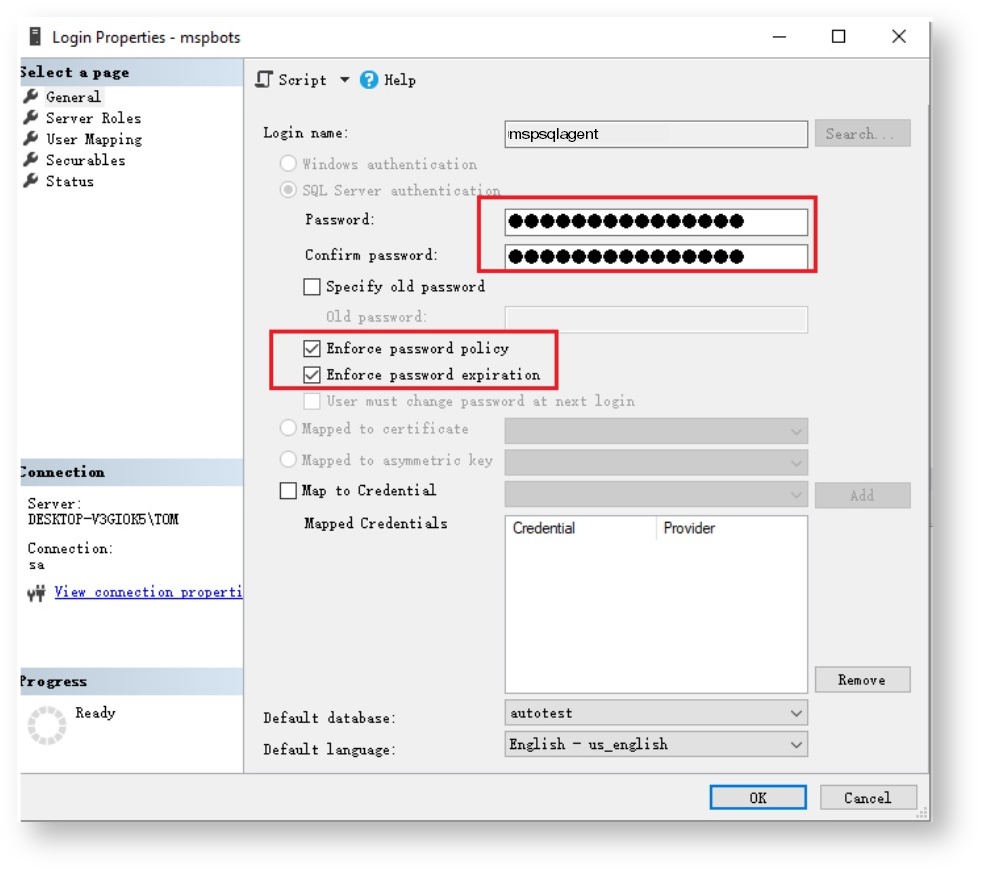
- On the Login Properties - Newmspbots window, type mspbots mspsqlagent on the field for Login name and select the SQL Server authentication radio button.
- Enter and confirm the Password,and tick the checkboxes for Enforce password policy and Enforce password expiration.
- Next, go to Server Roles and tick the checkboxes for public and sysadmin.
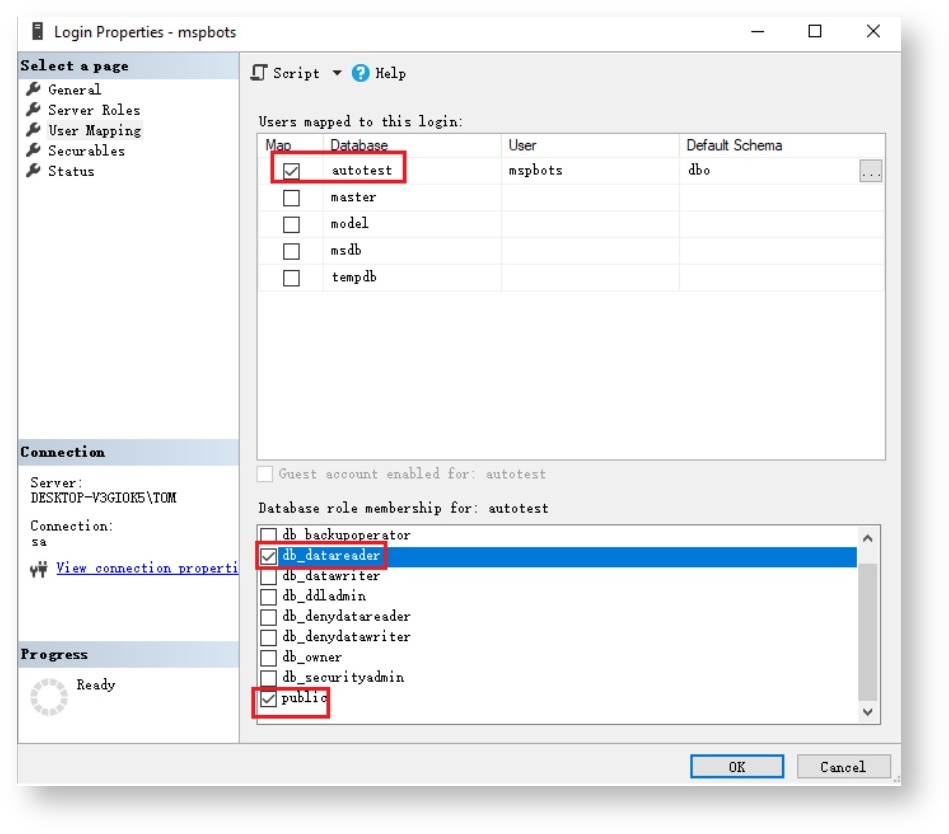
Move on to User Mapping. Put a checkmark on the autotest checkbox under the Database column. Then in the table below, Select the database that you want to synchronize and put checkmarks on the checkboxes for db_datareader and public checkboxes.
- Next, go to Securables > Permissions for <user>. Tick the Grant checkbox for View any definition.
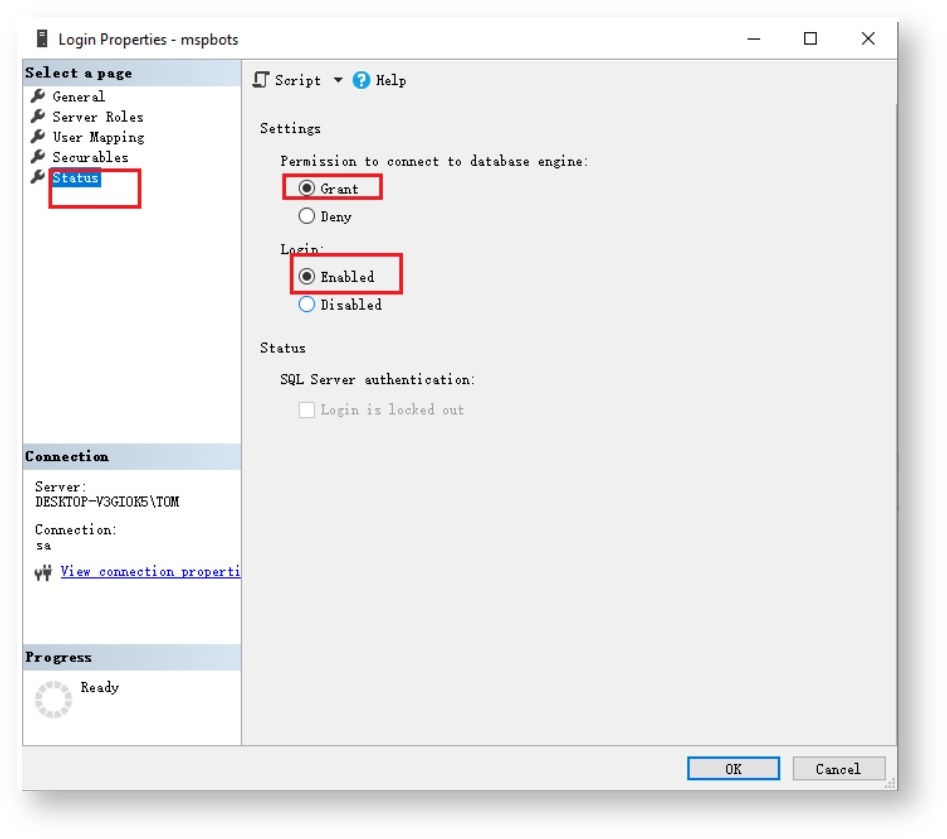
- LastlyThen, go to Status > Settings. Select Open the account by selecting the radio buttons for Grant under Permission to connect to database engine, and Enabled under Login.
- Click OK to save the settings.
...
Overview
Content Tools
