 N O T I C E
MSPbots WIKI is moving to a new home at support.mspbots.ai![]() to give you the best experience in browsing our Knowledge Base resources and addressing your concerns. Click here
to give you the best experience in browsing our Knowledge Base resources and addressing your concerns. Click here![]() for more info!
for more info!
Page History
Priority Rules are the set of rules that will determine the priority ticket from the list of tickets that we set in our Filter. The process is that we assign positive points to prioritize a ticket and lower or negative points to deprioritize a ticket.
Format of a Rule:
If <condition/certain scenario>, add points.
Below are the list of priority rules currently available with a description of how each rule functions.
...
Priority Rule
...
Function
...
Sample Setup
...
Available In
...
Autotask
...
ConnectWise
...
Syncro
...
Indicate the points to be added to a ticket if it is assigned to the selected user, to a different user, or is unassigned.
...
Select a company type of a company from where the ticket was logged, and then indicate the corresponding points to be added to a ticket if the criterion is met.
...
Select a company from where the ticket was logged, and then select the technician requested to handle the ticket.
Lastly, indicate the corresponding points to be added to a ticket if the criteria are met.
Some of your users may prefer handling tickets from specific clients due to several reasons like the familiarity with work items. On the other hand, some users may want to avoid specific companies due to possible conflict or severed relationship state.
...
Select the job title of the person who logged the ticket, then indicate the corresponding points for the criteria.
...
Customer Responded
...
Indicate the points to be added to a ticket for every $1 of agreement MRR.
This will help you prioritize the companies who are more profitable in your organization.
...
Select a scheduled status, and then indicate the corresponding points when it is within the minimum and maximum time set before or after its start or end time.
This priority rule will help you manage scheduled tickets to avoid scenarios where users pick up tickets that are scheduled for others before the schedule starts or the user forgetting to work on tickets that are scheduled for them right after the schedule begins.
tickets out of all the tickets pooled by the NextTicket Filters. To apply these rules, use your admin access to prioritize tickets by assigning positive points to high-priority scenarios and deprioritize tickets by assigning less or negative points to low-priority cases.
What's in this article?
| Table of Contents |
|---|
What is the format of a Priority Rule?
...
The format of priority rules is
if <condition/scenario>, then add or deduct points.
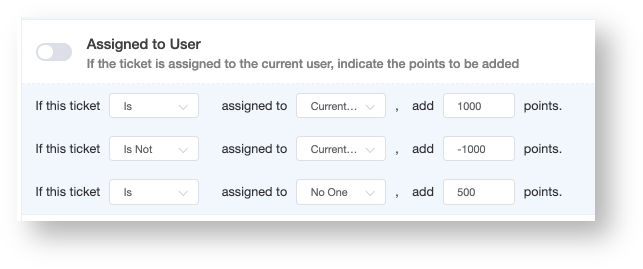
In the example below, the tickets assigned to the current user will be prioritized over unassigned tickets and those assigned to other technicians.
Activating a Priority Rule
...
You can activate a priority rule by enabling the corresponding toggle switch. Do this after creating rule conditions and adding points to it.
To enable a priority rule:
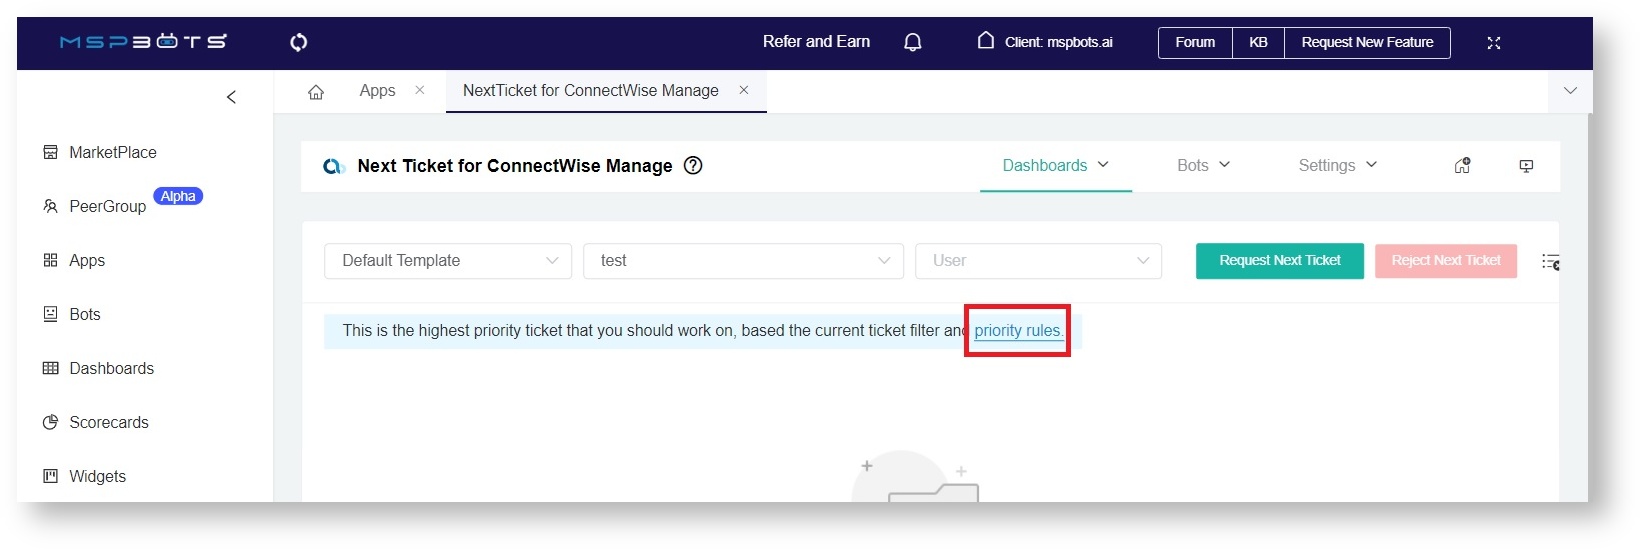
Launch the MSPbots app. Navigate to Apps and open NextTicket.Anchor step1 step1 - Click the priority rules link on the NextTicket tab.
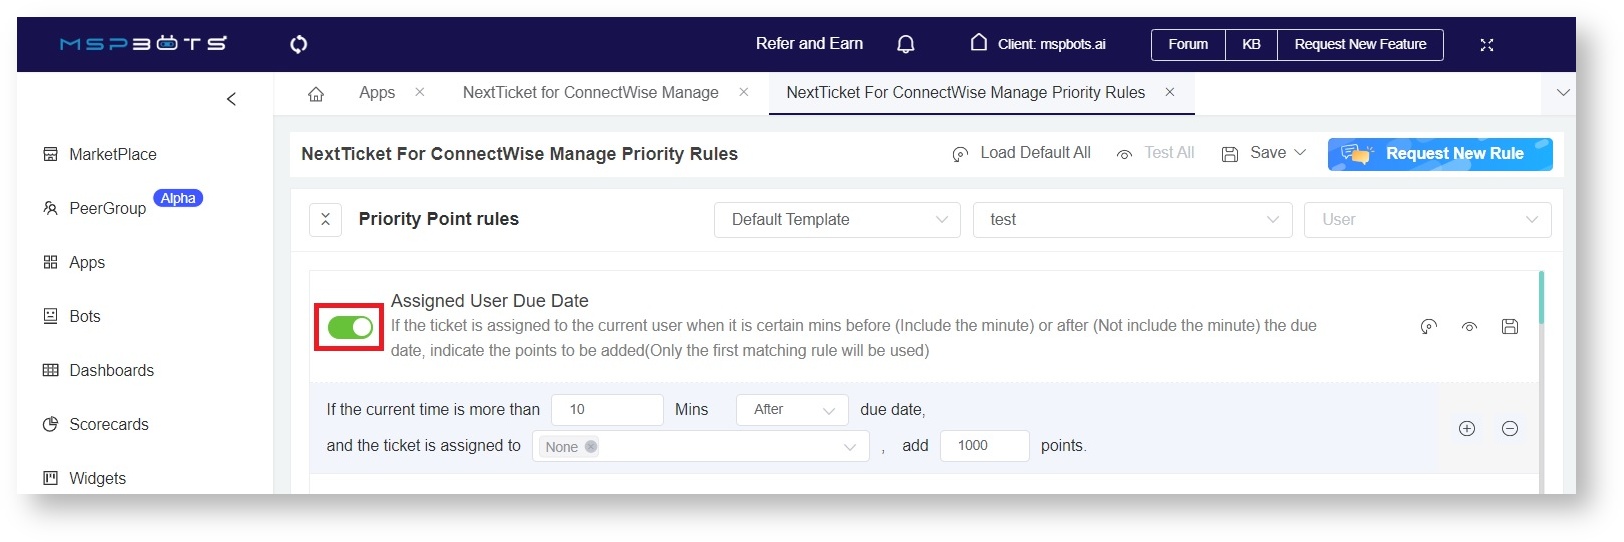
- When the NextTicket Priority Rules tab opens, find the rule that needs to be activated and enable the corresponding switch.
The switch is enabled when it is green and disabled when it is grey.
Testing the Priority Rules
...
You can test the priority rules and verify if the resulting prioritization shows your expected outcome. You can test individually or all the rules together.
A. To test a priority rule
- Do Steps 1 and 2 above.
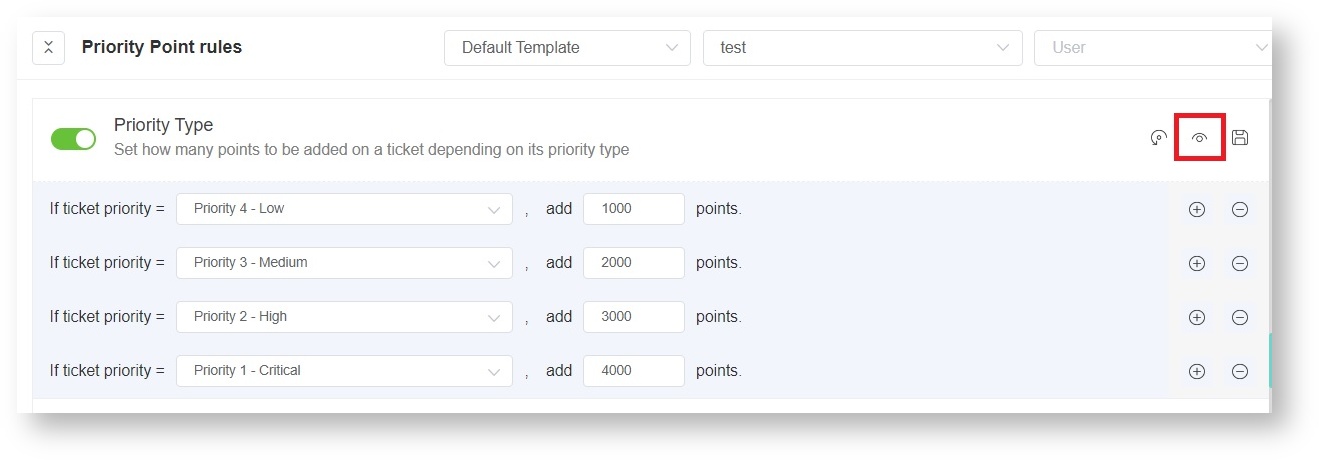
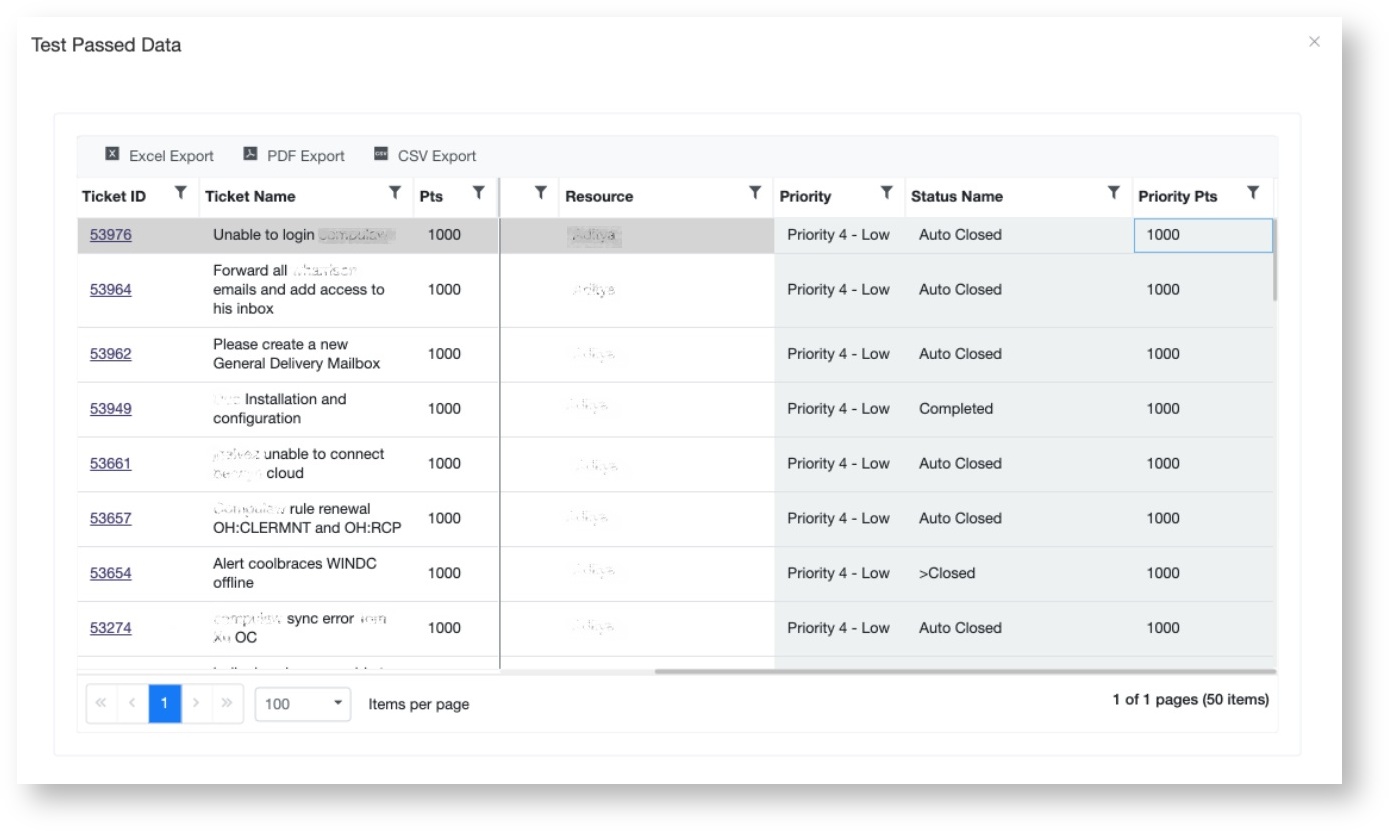
- Click the eye icon corresponding to the priority rule for testing. This will preview the tickets list when the rule is applied.
- In the Test Passed Data window, review if the previewed ticket list shows your expected outcome.
Below is an example of a ticket list that applies a priority rule.
B. To test all enabled priority rules
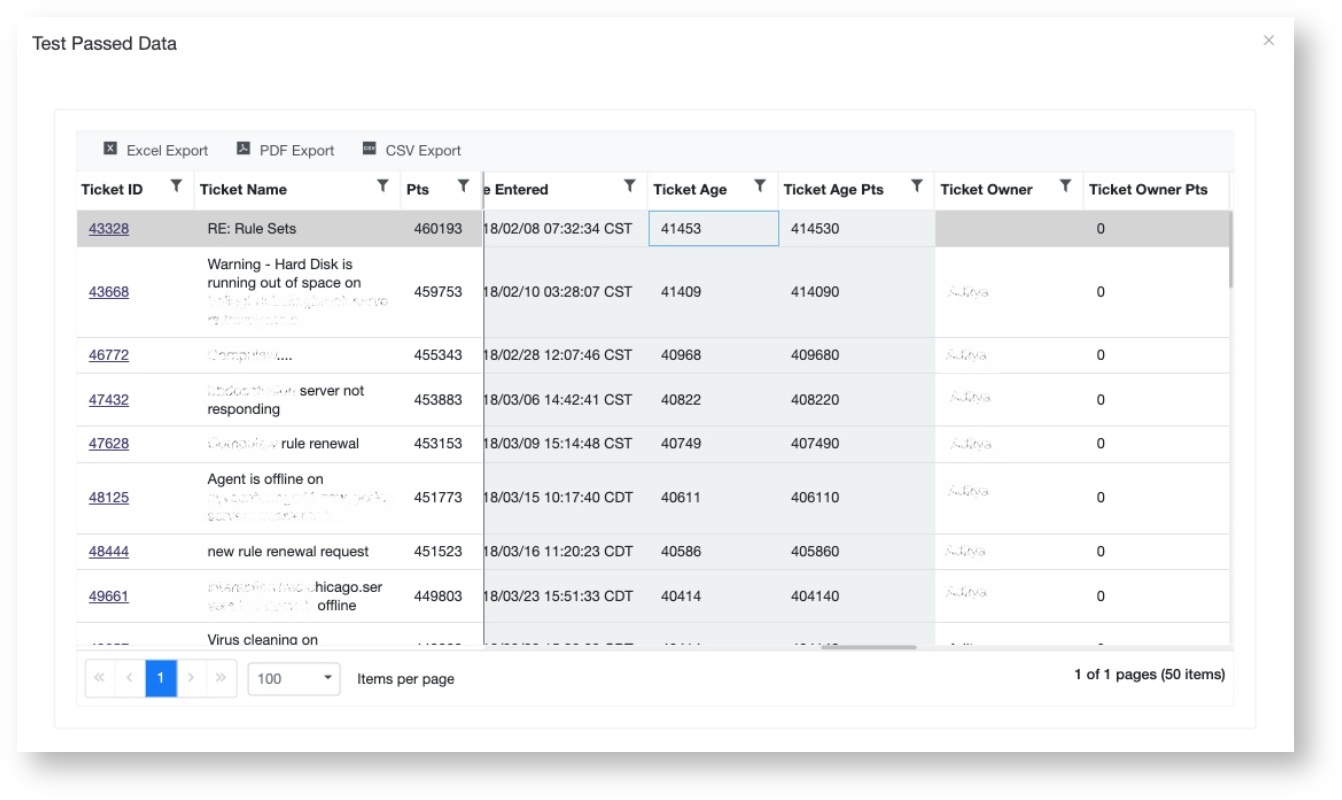
The Test All button previews the prioritization of tickets based on the points assigned to all enabled priority rules. Click this button to verify if all the rules work together to show your expected prioritization. If the rules are not working as expected, review the points and continue adjusting until you achieve your desired outcome.
To test all priority rules:
- Do Steps 1 and 2.
- In the NextTicket Rules window, click the Test All button.
Below is an example of a ticket list that applies all enabled priority rules.
Saving a Priority Rule
...
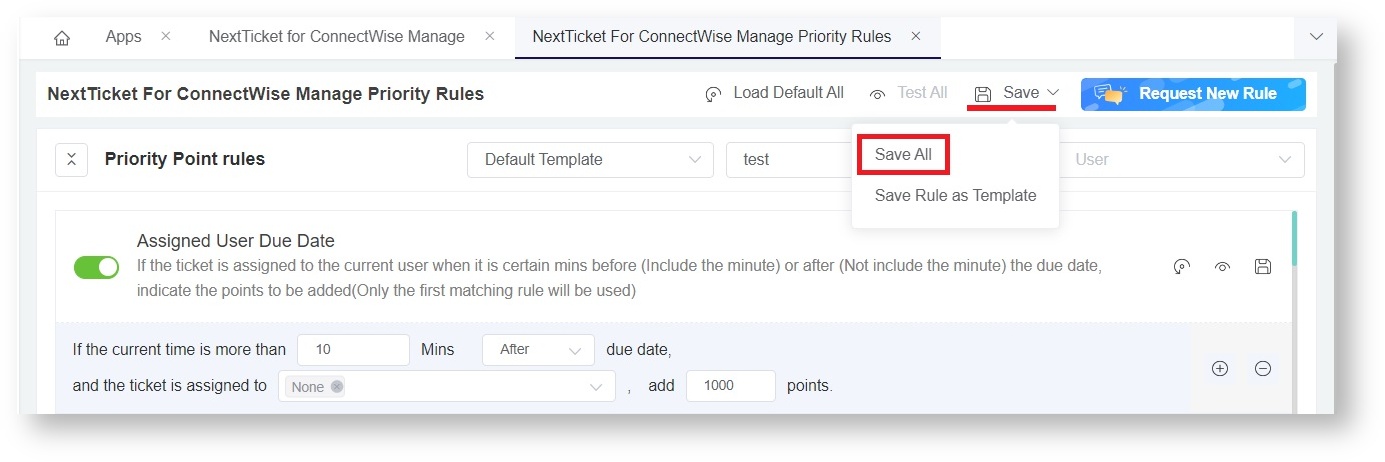
To save a Priority Rule from the NextTicket Priority Rule window, click the Save icon corresponding to the rule.
Alternatively, you can navigate to Save on the upper right section of the page and select Save All.
Saving a Priority Rule as a Template
...
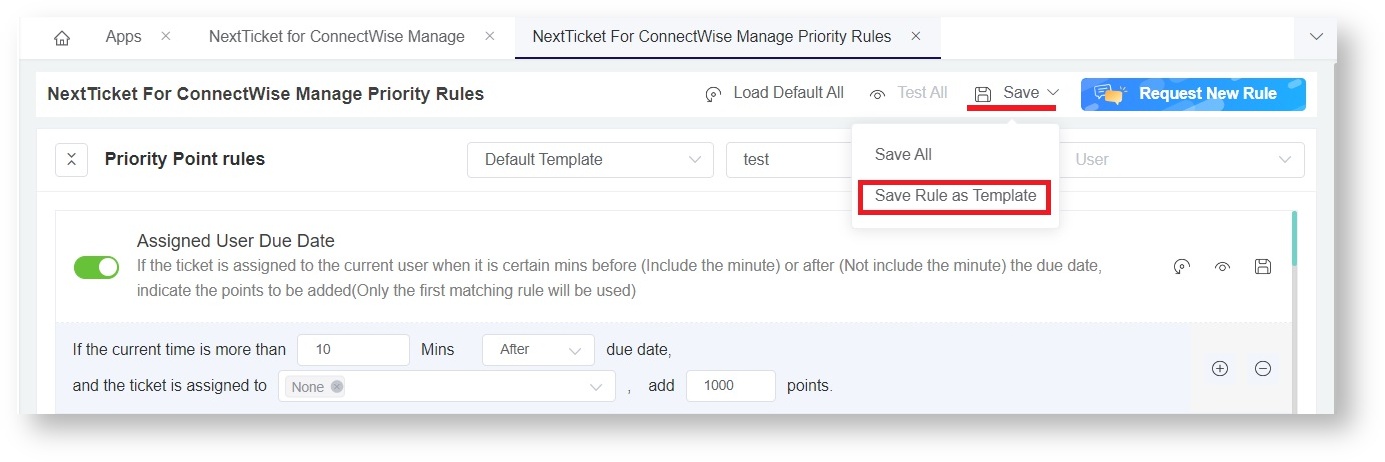
You can save priority rules as templates in the NextTicket Priority Rule window.
To save a priority rule as a template:
- Do Steps 1 and 2 at the start of this article.
- In the NextTicket Rules window, navigate to Save and select Save Rule as Template.
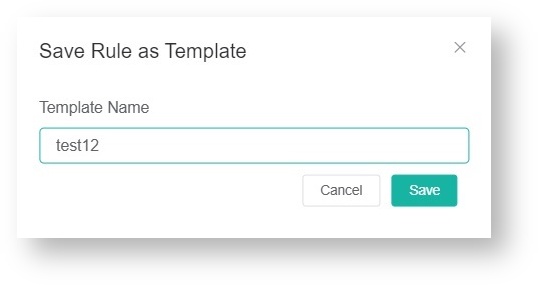
- In the Save Rule as Template pop-up window, type a Template Name and click Save.
- Verify the creation of the new template by clicking the Template List dropdown. The name of your new template should now be on the list.
Deleting a Priority Rule Template
...
This is how to delete a priority rule template:
- Do Steps 1 and 2 at the start of this article.
- Go to the Default Template List and click the delete icon corresponding to the rule for deletion.
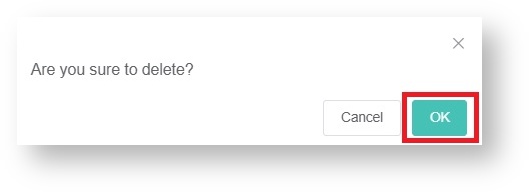
- Click OK when asked to confirm your deletion.
Requesting a new Priority Rule
...
- Do Steps 1 and 2 at the start of this article.
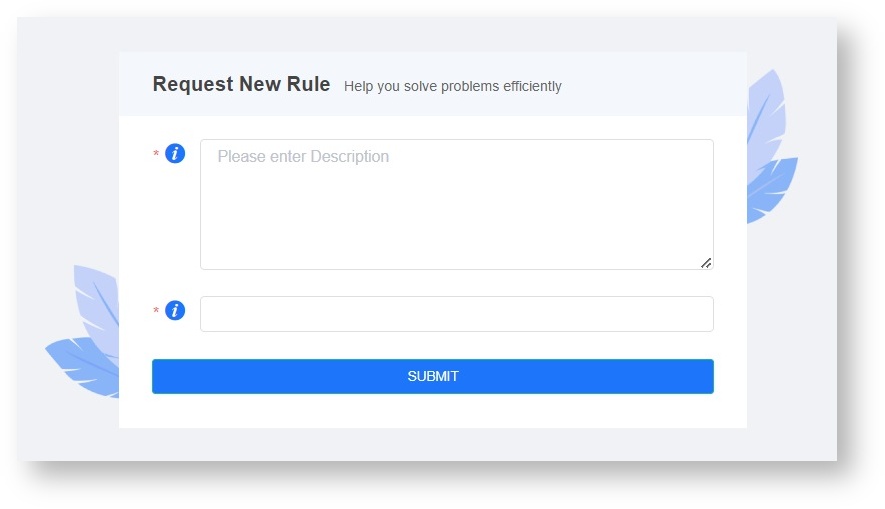
- Click the Request New Rule button.
- Fill out the Request New Rule form then click Submit. Your request will be forwarded to the MSPbots Support Team.
Related Topics
...
| Content by Label | ||||||||||
|---|---|---|---|---|---|---|---|---|---|---|
|
...
Indicate the points to be added to a ticket if the ticket summary contains the specified keywords.
You can capture blockers that prevent your clients to continue their operations easily or sort tickets based on specific topics which may be assigned to technicians with great expertise on those areas.
...
Indicate the points to be added to a ticket if it has been in the specified status for more than or less than the specified duration.
...
