 N O T I C E
MSPbots WIKI is moving to a new home at support.mspbots.ai![]() to give you the best experience in browsing our Knowledge Base resources and addressing your concerns. Click here
to give you the best experience in browsing our Knowledge Base resources and addressing your concerns. Click here![]() for more info!
for more info!
Page History
...
The procedure applies to other scenarios where users would like to configure widgets to show the breakdown of data in a column. To create
In this article:
Table of Contents
Create the stacking column
...
- Go to Widgets and find the widget to be modified.
...
- Click on the ellipsis
...
- ... button and select
...
- Clone.

...
- On the Clone Widget window, give the widget a new name, review the roles, and add a description for the widget. When done, click Confirm.

...
- Next, go back to Widgets, find the cloned widget, and open it.
...
- When the Widget Builder window appears, click the data source icon, then click the ellipsis ... button and select Edit.
...

- Add another dimension for status.
...
- Click the plus sign.
...
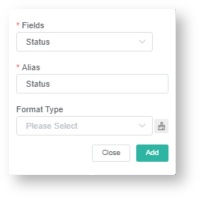
- Select Status for Fields and rename the Alias to Status
...
- . Click Add.
...
- Scroll down to the Order By section
...
- , click the plus sign, and select Technician and Status to arrange by Technician and Status.
...
- Clicking the arrows will arrange the data in a descending or ascending order.

...
- Click Save. You will see a prompt that warns about the widget already in use. Click the Save and Continue button on the prompt.
...
- Lastly, go to Config
...
- . Select Status for Dimension Group and StackingColumn for Type.

...
- Click Apply. Your widget now has stacking columns.

Watch the video tutorial
...
| Widget Connector | ||
|---|---|---|
|
Overview
Content Tools